If you are looking for a sale-driven tool for your Shopify store when sales season is coming, you should know about Shopify Countdown Timer. Shopify Countdown Timer is a powerful feature which helps customers to decide to buy more easily. You can set up Shopify Countdown Timer in many positions, including on the product page. Follow this blog post and see how.
What is Shopify Countdown Timer?
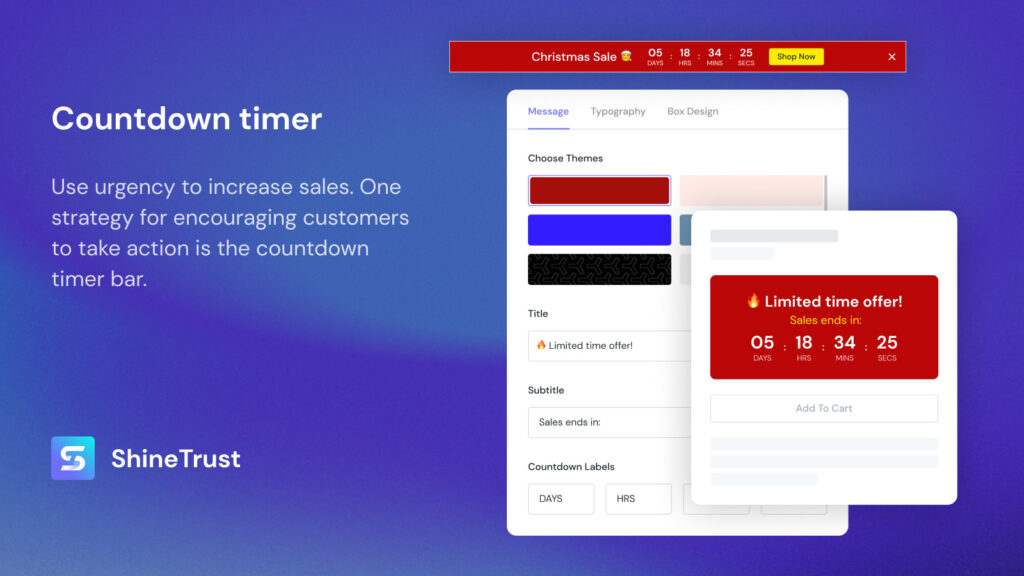
Shopify Countdown Timer visualizes the number of days, hours, minutes, seconds remaining until a special offer or campaign begins or ends. Showing Shopify Countdown Timer means that you make your online store more lively. Customers also view the discount campaign literally so they will have higher demand to purchase.
Shopify Countdown Timer is also a tactic in scarcity marketing because it shows the limited time people can buy something at discount. Because of creating a sense of urgency, it not only boosts sales but also reduces cart abandonment. In your online store, product page is one of the most attractive positions because visitors often come and see product details. This is also a page that you should utilize when running a campaign.
How to show a countdown timer on the product page?
These are two ways to add a Shopify Countdown Timer on the product page: Hiding a developer or using ShineTrust app. With ShineTrust app, you save much more time and cost as you can easily configure by yourself even when you have no idea about coding.
Hiding a developer
You can use code to show Shopify Countdown Timer on the product page but currently, there hasn’t been any available free and optimized code for you to add Shopify Countdown Timer on the product page. As a result, you need to hide a developer to customize code for you. Try to look for an experienced one if you don’t want to see your site slow down.
Using ShineTrust app
ShineTrust app allows you to flexibly and quickly design Shopify Countdown Timer with no coding required and having no effect on your site speed. This blog post will guide you how to show Shopify Countdown Timer on the product page. If you want to set up it in other positions, you can refer to this documentation
Now, let’s follow step by step!
Step 1 - Find and install the app Product Labels & Badges Shine in your online store
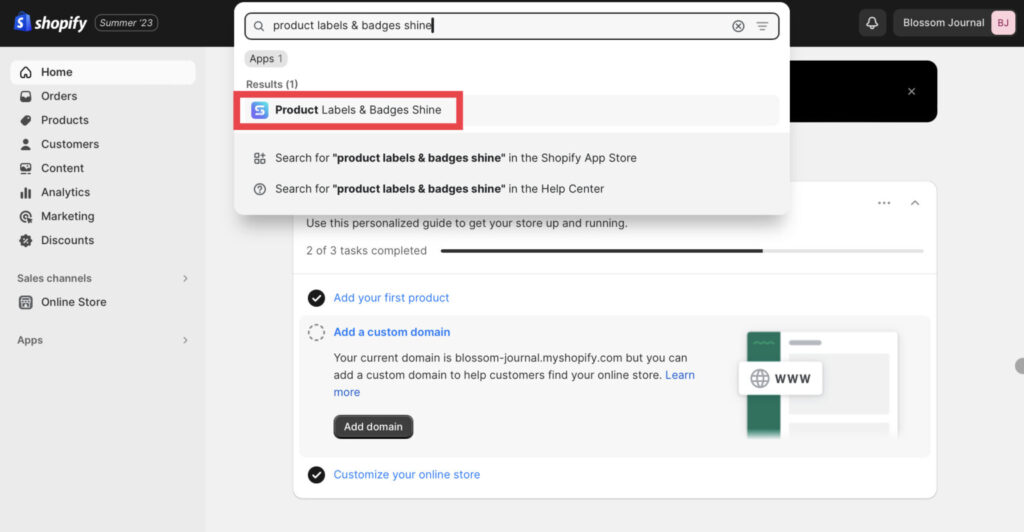
In the Dashboard menu, go to Apps, then click on Product Labels & Badges Shine.
Step 2 - Enter your store name or URL link for your store

Step 3 - After logging in, turn on the Countdown Timer feature
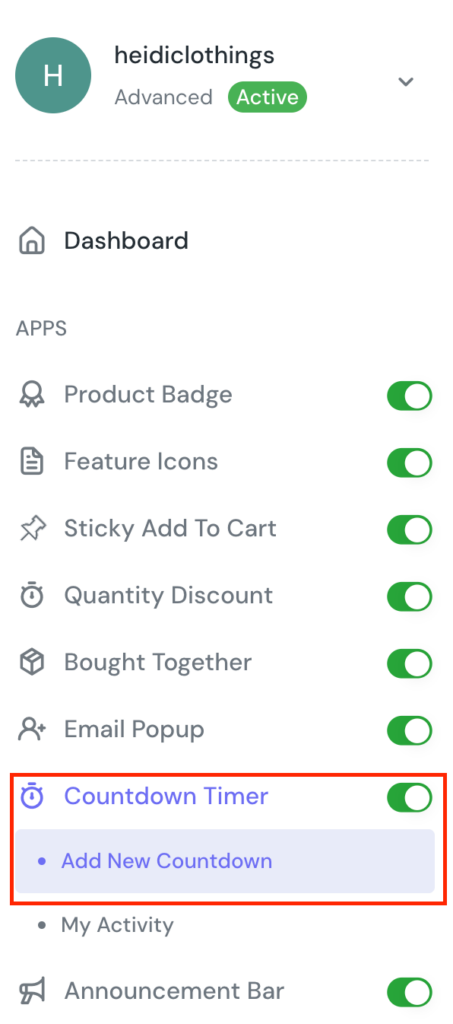
Click on Add New Countdown to set up a countdown timer for your promotion. ShineTrust allows you to customize your countdown template and running time so that it will fit your theme and campaign plan.
Step 4 - Choose Display Position to show countdown timer on Product Page
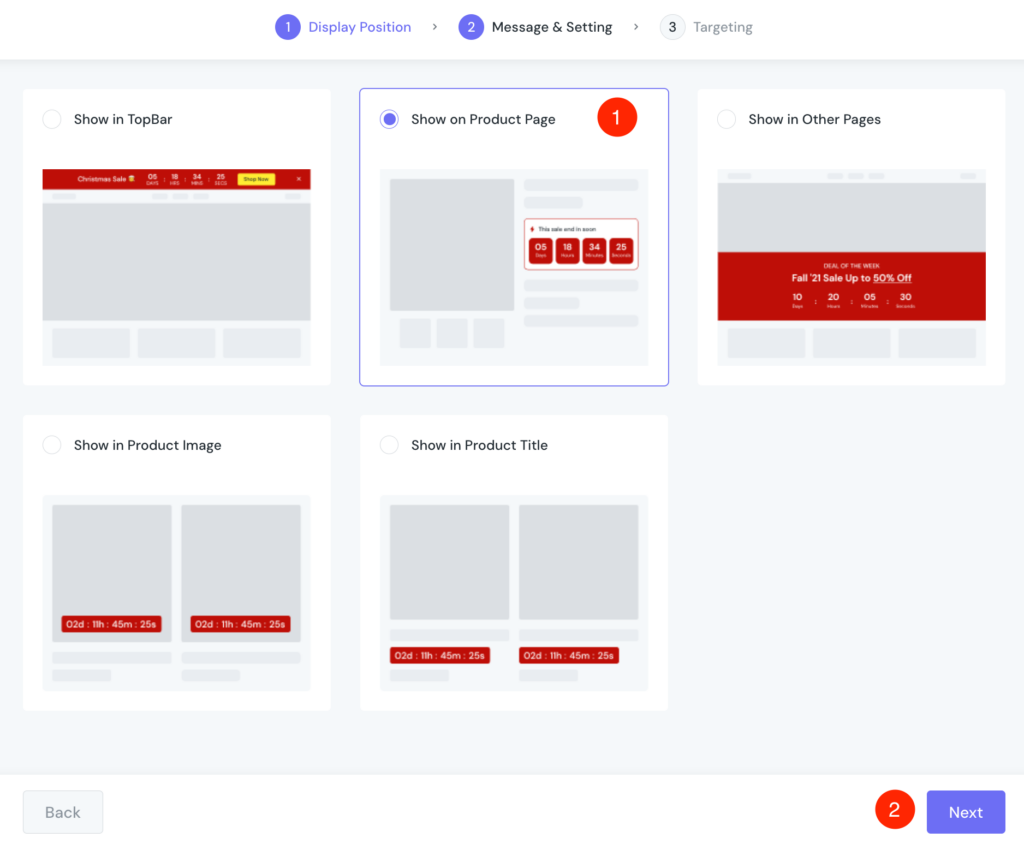
Tick Show in Product Image as you want and click on Next button at the bottom of the page.
Step 5 - Configure Message & Settings
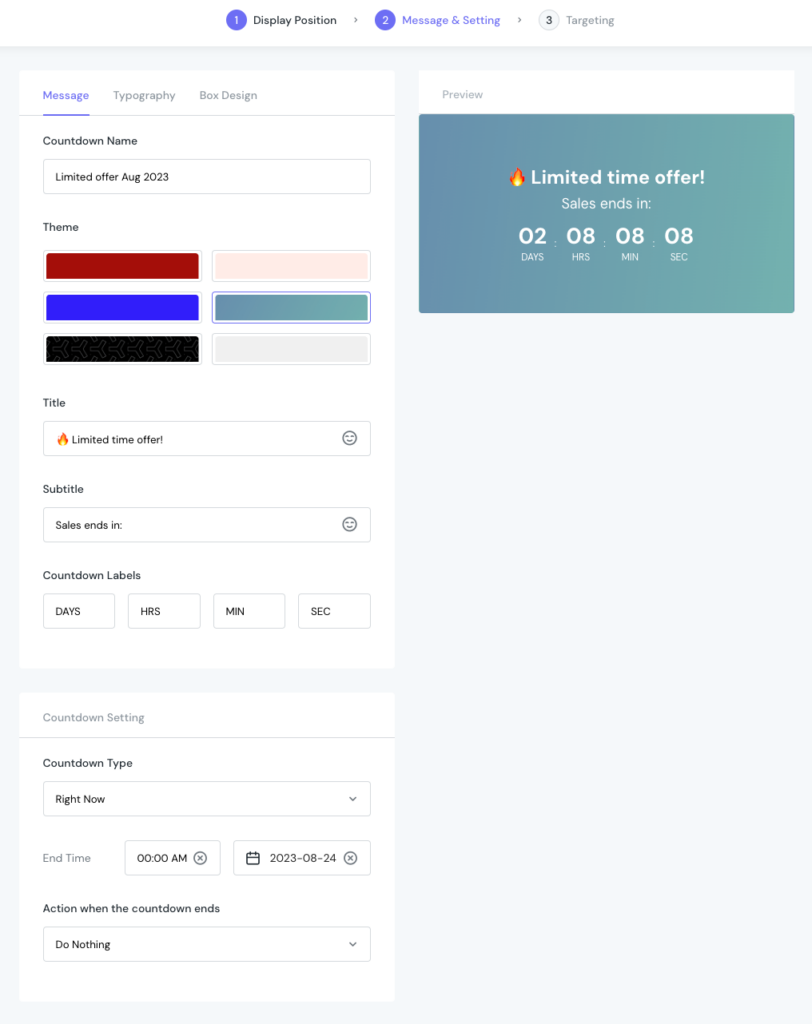
In this step, you can edit these 7 fields in the Settings tab, including Countdown Name, Theme, Title, Subtitle, Countdown Labels, Countdown Type, End Time and Action when the countdown ends. As the default setting has been the most suitable with Shopify website (see the picture above), these are fields you may focus on:
- Countdown Name: Choose a countdown name that reminds you about your campaign. For example, Limited Offer Aug 2023.
- Theme: Select one of 6 themes and you will see your countdown timer set as default. Here the light blue one is chosen.
- End Time: Choose the running time according to your promotion plan. For example, the countdown timer will end at 00:00 AM 2023-08-24.
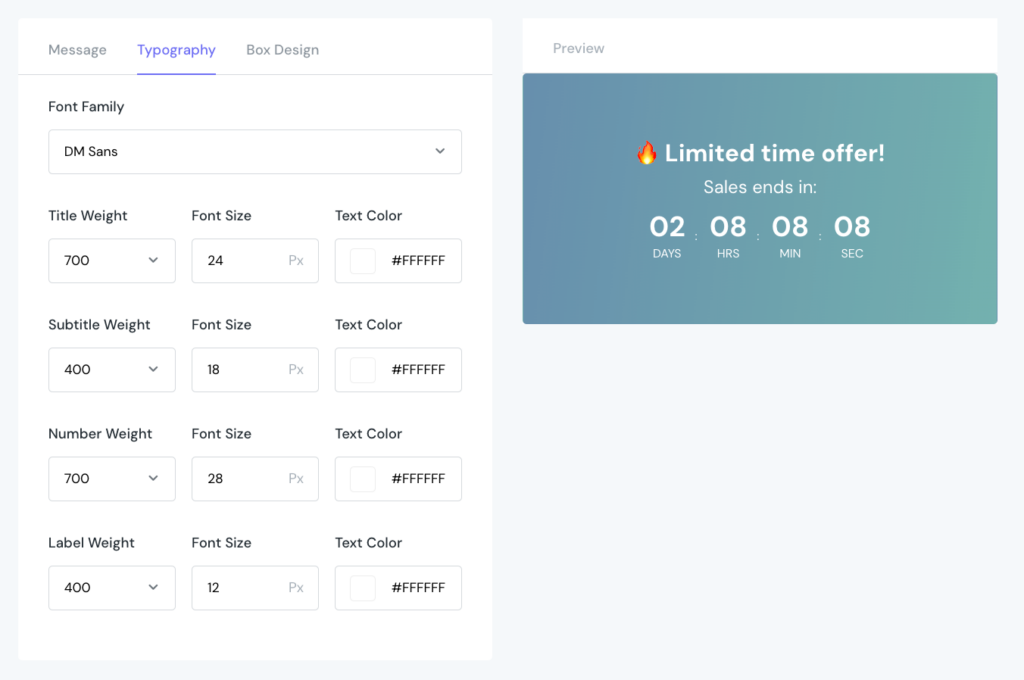
After that, click on the Typography tab. You can edit Font Family, Title/Subtitle/Number/Label Weight, Font size, Text Color of every element on your countdown timer to make it match your theme. As the light blue theme is chosen, you can see the default configuration in the picture below. For Font Family, DM Sans is recommended because it is a low-contrast geometric sans serif design, intended for use at smaller text sizes.
Then, move to Box Design tab to customize your countdown timer background. If you select Gradient as your Background Type, you will see the setting as following.
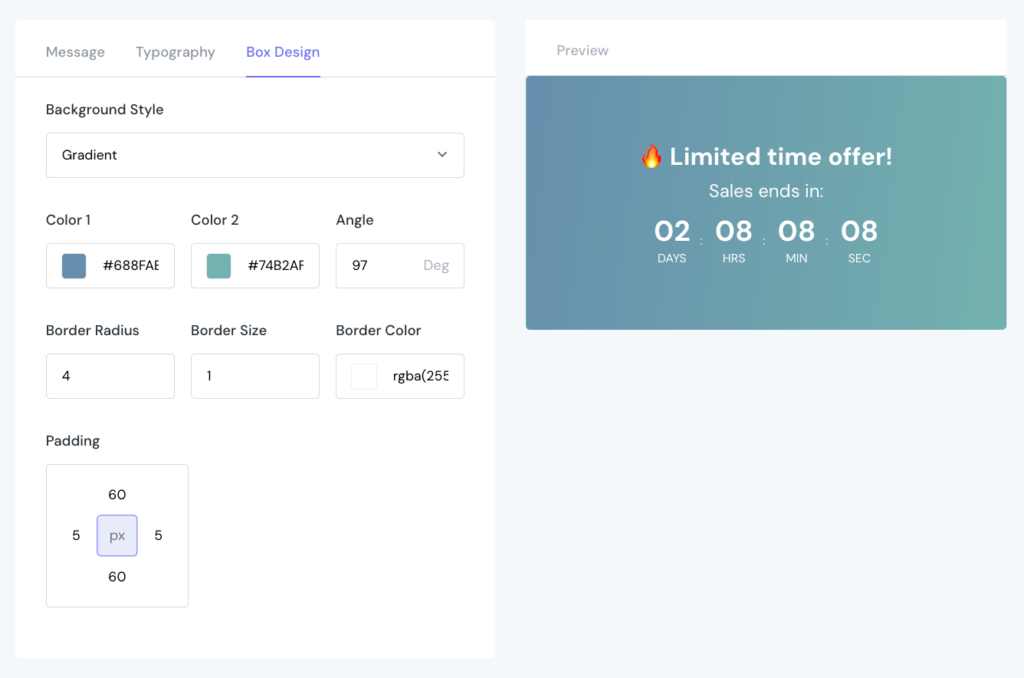
If you choose Solid for Background Type, you need to configure Background Color and Background Image. Please view the example configuration in the picture below.
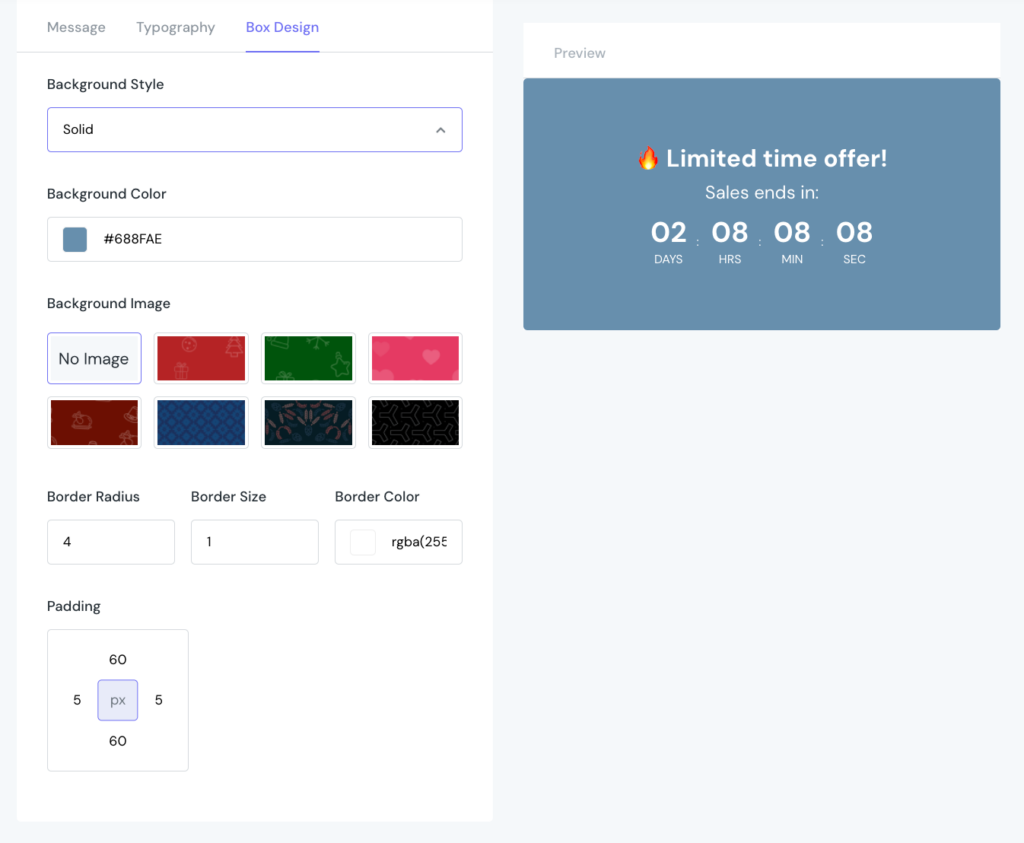
During customizing, you can also see how it looks in the Preview section on the right and make any changes if needed.
Step 6 - Choose Targeting
You are nearly finished now! In the Targeting section, please choose Display Position and products that you want to show your countdown timer.
The Display Position is set Above the “Add To Cart” Button as default because this is the most eye-catching position in the product page. In this campaign, we set the countdown timer for all products.
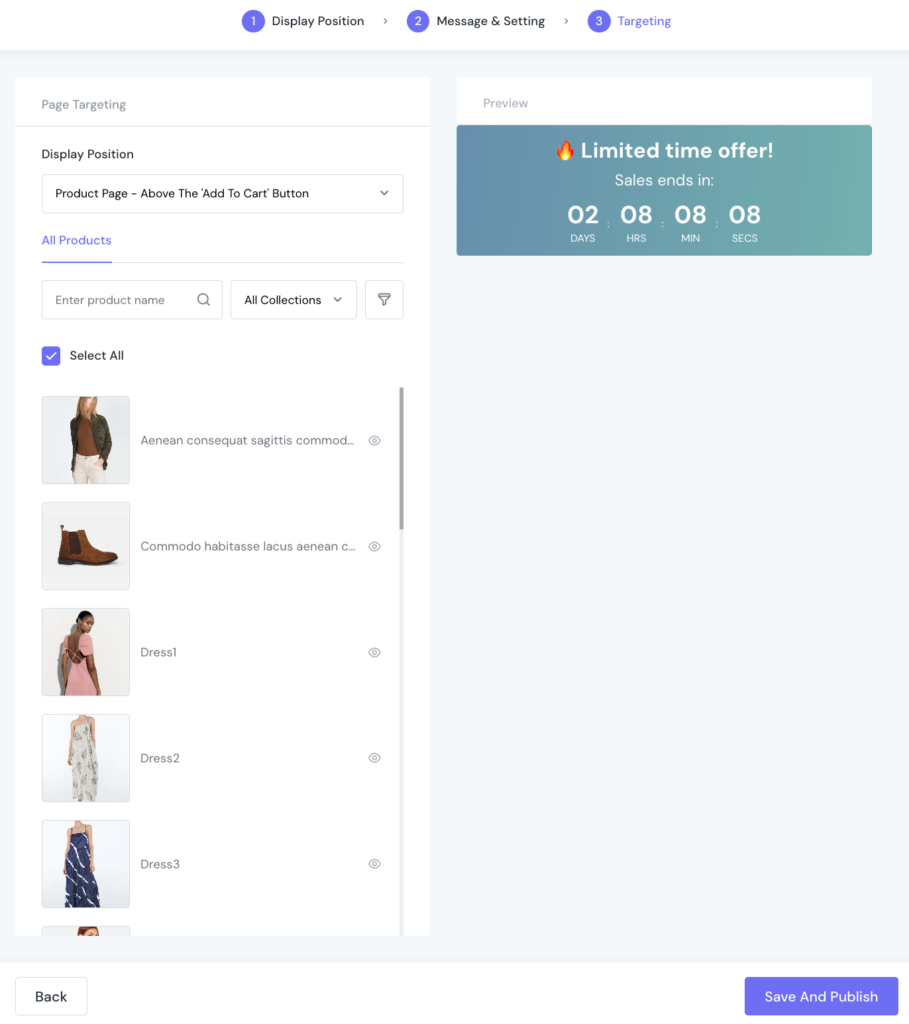
Please note that if you want to show the countdown timer in another position of your product page, you can choose Custom for Display Position field. At this time, you need to customize your css. Just click on How to get css selector link to see the guide.

After that, click on Save & Publish or Save button at the end of the page to finish.
Step 7 - Check countdown timer in the store
It’s time to check it again. Now go to your store and see how Shopify Countdown Timer is shown. Is it ok? If not, please go to the Dashboard and edit again.
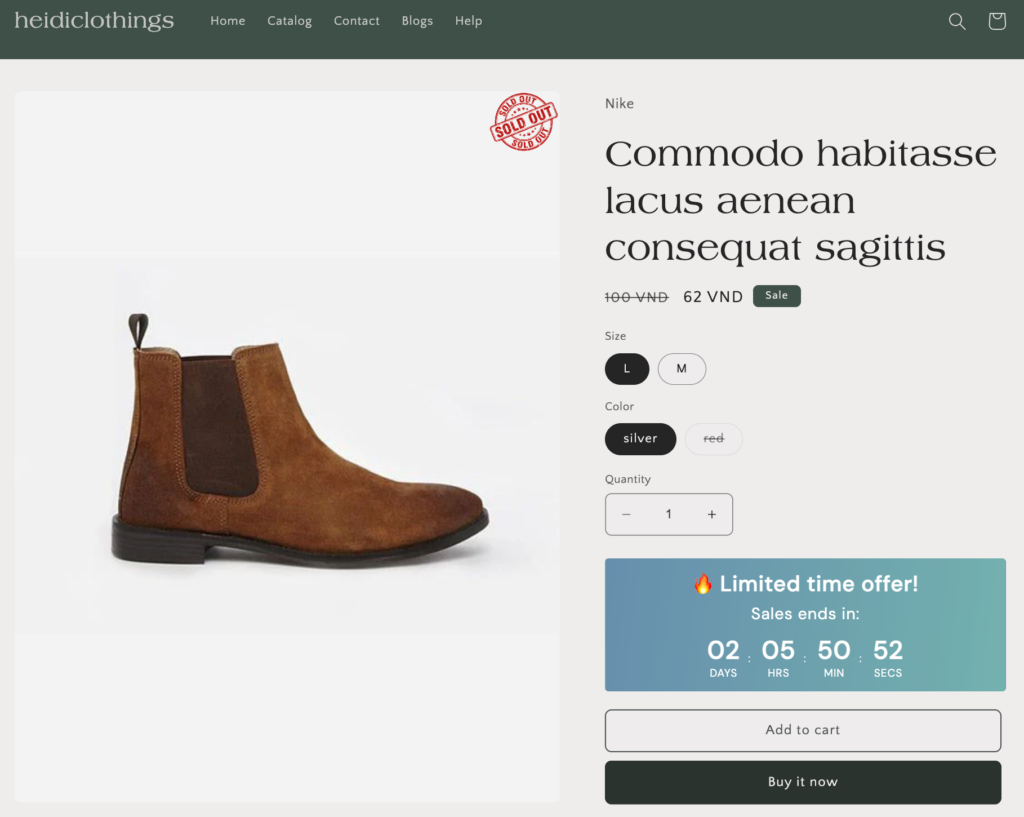
Shopify Countdown Timer shown on the product page
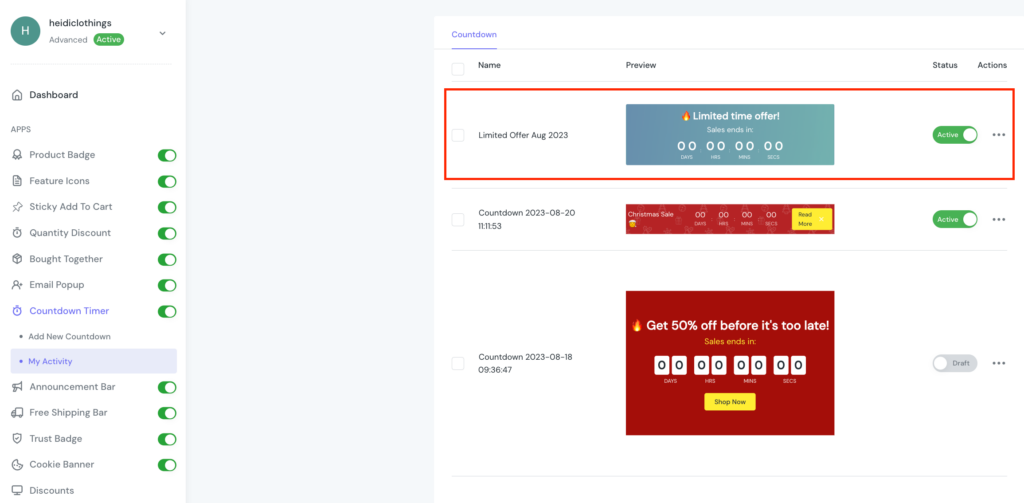
Note: Check My Activity to see all the countdown timers you have added and activate/deactivate or edit/delete the one you want.
In Conclusion
You have already known how to show Shopify Countdown Timer on the product page. Shopify Countdown Timer is a really useful feature for your online store because it motivates customers to buy products quickly. Especially, by using ShineTrust app, the configuration becomes easier and time-saving.
Read the blog post carefully and utilize it to get higher sales for your store!


