While shipping cost is one of the biggest obstacles, free shipping is an important incentive for customers to shop online more and more. However, you should show the condition for free shipping clearly in your store to make sure that your customers don’t ever miss it. This blog will help you know how to add Shopify Free Shipping Bar to your site.
What is Shopify Free Shipping Bar?
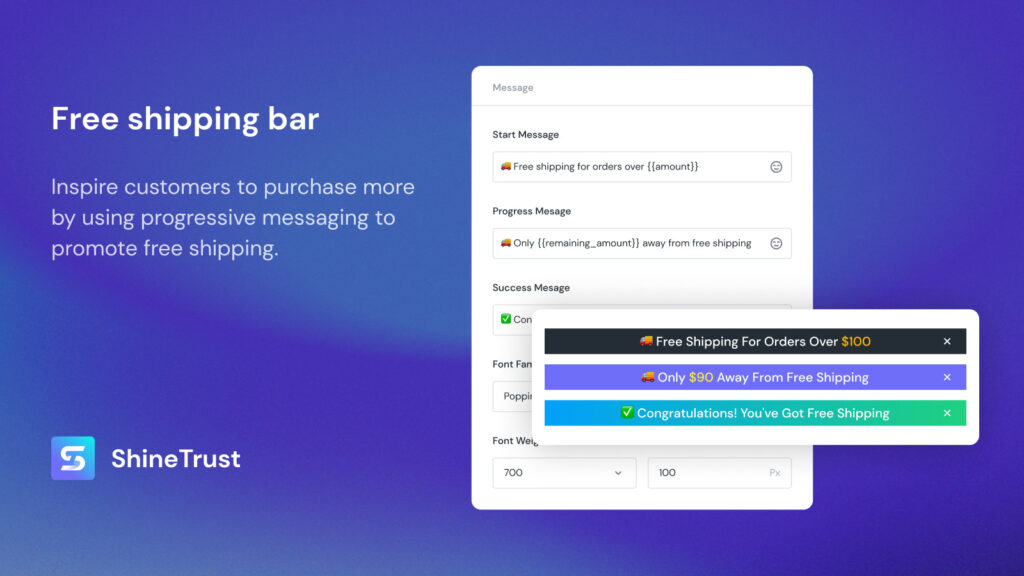
Shopify Free Shipping Bar displays messages to customers based on their purchasing progress toward free shipping. When the cart value reaches the target amount for free shipping, a congratulation message will be shown.
Shopify Free Shipping Bar is a great feature, which supports boosting sales and increases average order value. It allows customers to know how much more they need to buy to get free shipping during their online shopping. Then, they want to put more products in their shopping cart. Hitting the target order value for free shipping is like completing a task and customers will feel good about that.
How to add Shopify Free Shipping Bar?
There are two ways to add Shopify Free Shipping Bar to your online store, which are using code and using ShineTrust app. With the first one, you need to know coding or have an experienced developer support you. Otherwise, using ShineTrust app is easier and you can add Shopify Shipping Bar by yourself without code requirement.
Using Code
You can consider this code recommended below as reference. Please try and customize (for example, sizing or alignment) to fit with your online store.
Step 1 - Add the code under the header tag
Copy and paste this code below the </header> closing tag:
$0 $100
In this code above, the free shipping threshold is set at $100. You can edit the “10000” and “$100” value as your campaign.
Step 2 - Add dynamic message
Using liquid control flow tags for the dynamic message below the progress bar. Remember to edit the “10000” value as your preference.
<br>{% if cart.items.size == 0 %}Purchase more to get free shipping.{% endif %}{% if cart.items.size != 0 %}{% if cart.total_price >= 10000 %} Congratulations! You've got free shipping{% elsif cart.total_price < 10000 %}Only {{ 10000 | minus: cart.total_price | money }} away from free shipping.{% endif %}{% endif %}
Using ShineTrust app
By using ShineTrust app, you can flexibly and quickly set up Shopify Countdown Timer as you want with no coding required. In this blog post, you can find the way to add Shopify Countdown Timer on product image. To show it in other positions in your store, please refer to this documentation.
Now, just follow step by step as below.
Step 1 - Find and install the app Product Labels & Badges Shine in your online store
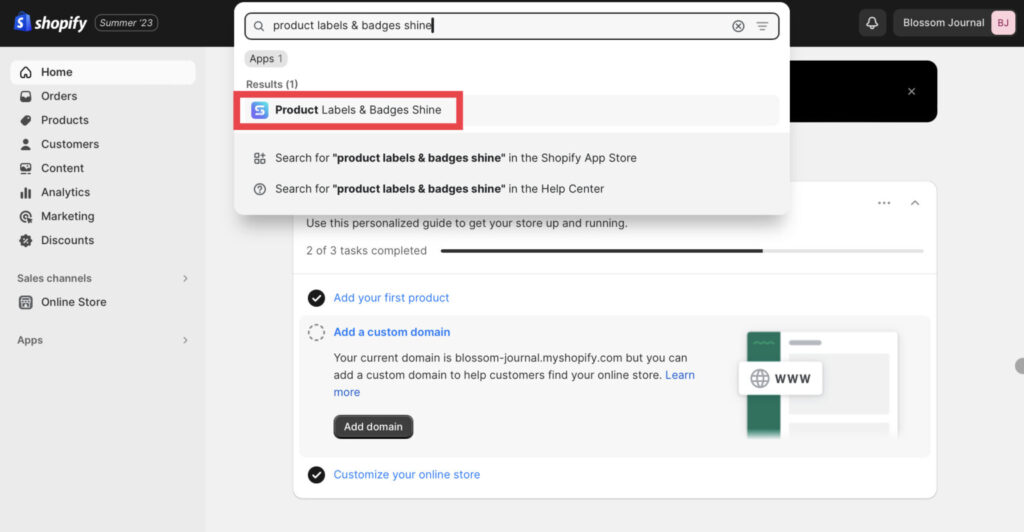
In the Dashboard menu, go to Apps, then click on Product Labels & Badges Shine.
Step 2 - Enter your store name or URL link for your store
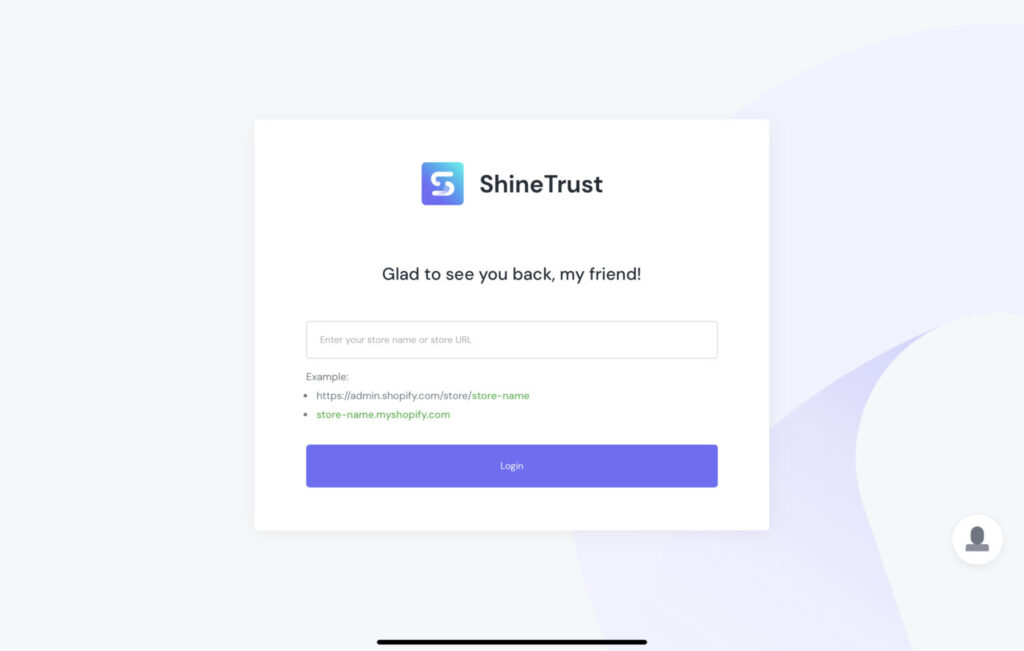
Step 3 - After logging in, turn on the Free Shipping Bar feature
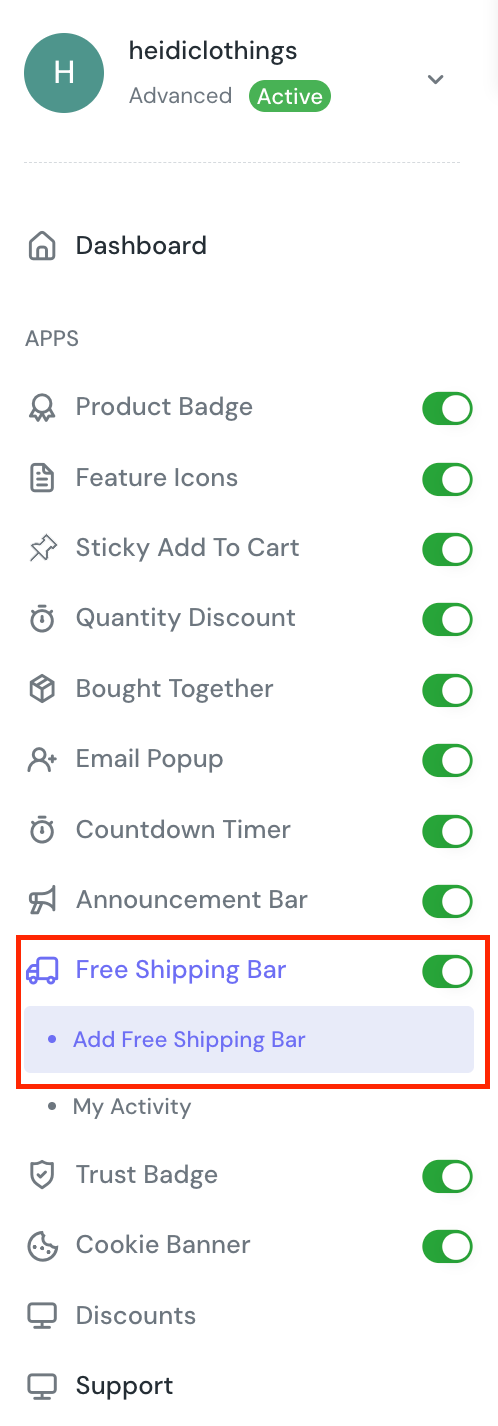
Click on Add Free Shipping Bar to set up a free shipping bar for your store. ShineTrust allows you to customize your free shipping bar at ease with various available themes and editable elements. You can also choose to show it on pages, for visitors based on locations and sources or in the devices you want.
Step 4 - Choose Templates for your Shopify Free Shipping Bar
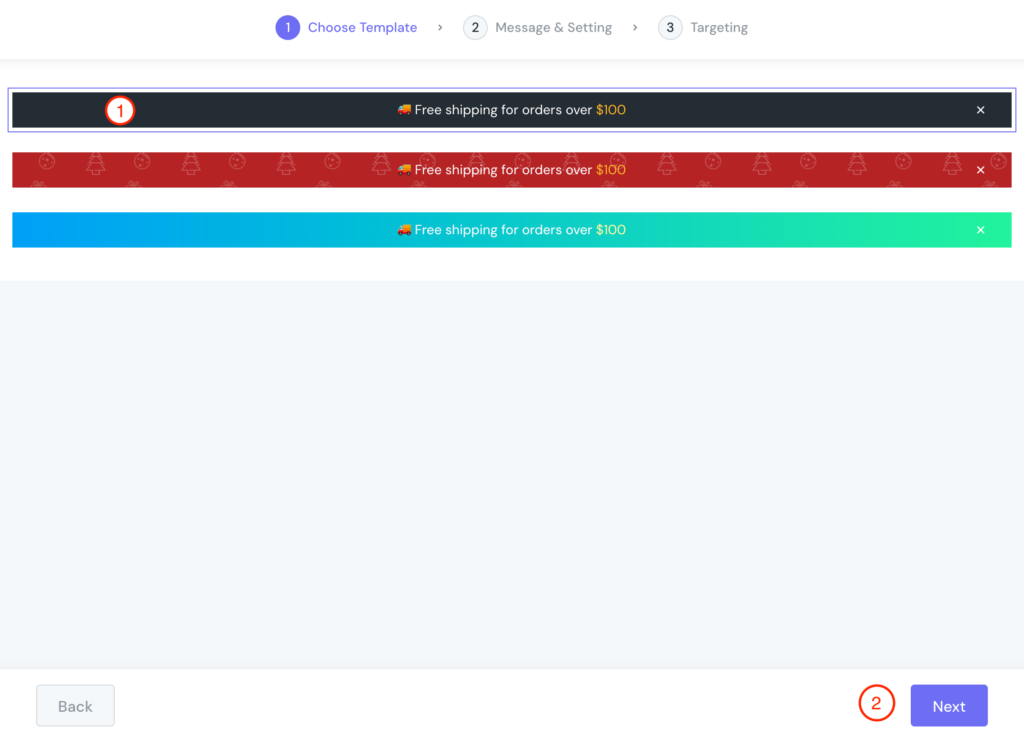
There are 3 available templates for you to choose. Select one and click on the Next button at the end of the page. In this post, the first black theme option is chosen.
Step 5 - Configure Message & Settings
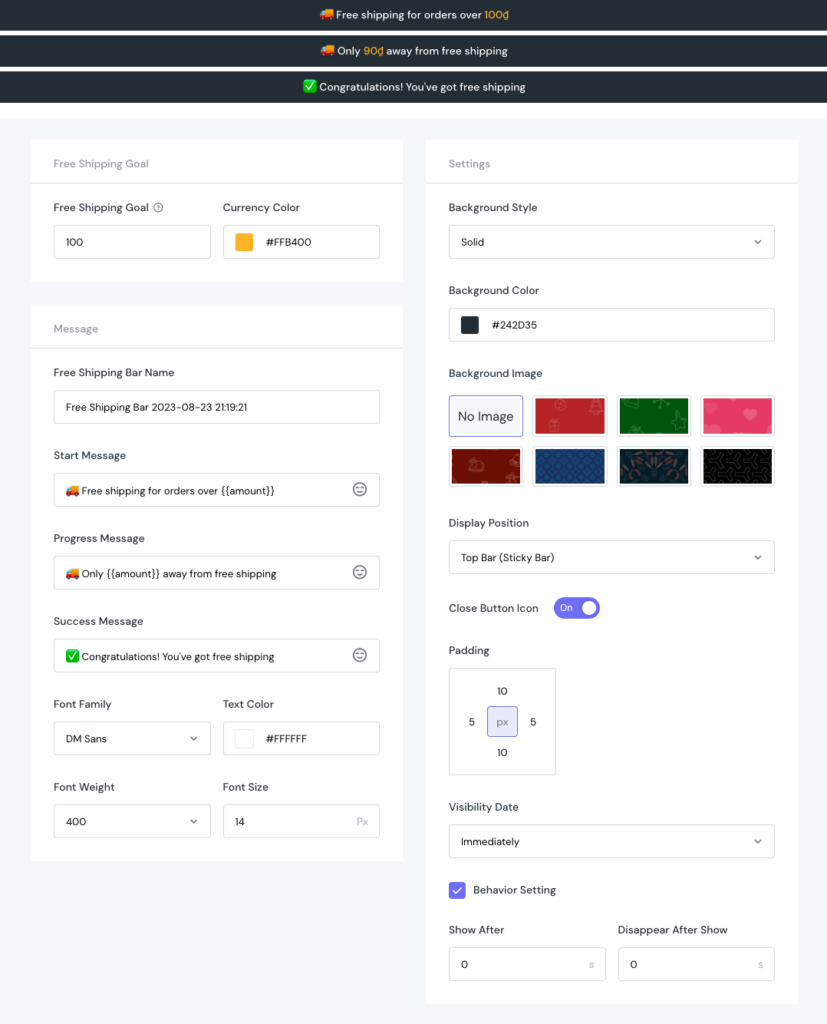
In this tab, you will see 3 big sections to customize, which are Free Shipping Goal, Message and Settings. As the default settings are most suitable with your store with eye-catching theme (view the example in the picture above), you should pay attention to these elements:
- Depending on your free shipping campaign, enter a number in Free Shipping Goal. Ex: 100.
- Edit your Start Message, Progress Message and Success Message as prefered.
- Choose a Font Family. DM Sans is recommended because it looks good in these small positions like the free shipping bar.
- Turn on Close Button Icon so that customers can hide it if they don’t want to see. By this way, you can create a friendly customer experience.
- Tick on Behavior Setting when you want to set the time (in units of seconds) that the free shipping bar will be shown or disappear.
While customizing, you can also see how your Shopify Free Shipping Bar appears in the Preview section at the top of the page.
Step 6 - Choose Targeting
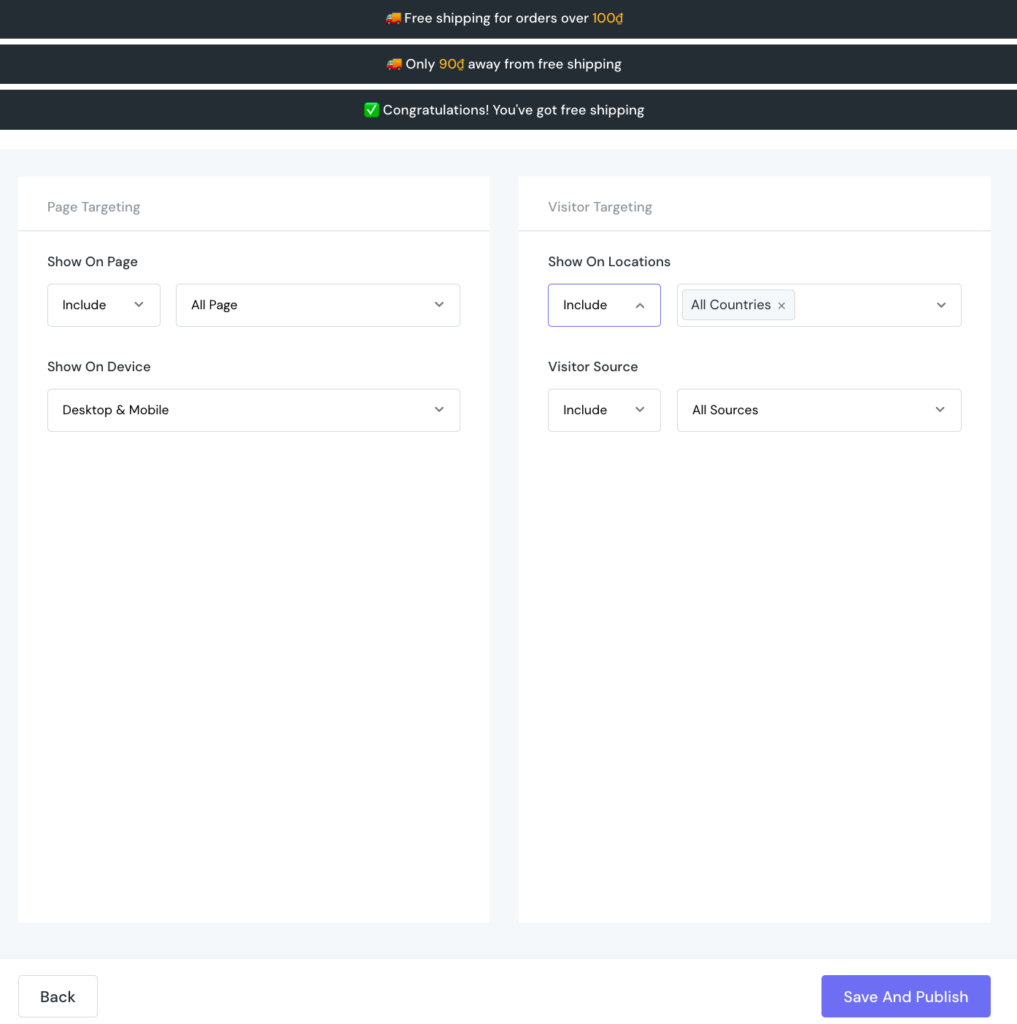
The Targeting tab allows you to display Shopify Countdown Timer on the preferred page (Page Targeting) and to the target customers (Visitor Targeting).
In the Show On Page field, select Include to choose the pages you want to show Shopify Free Shipping Bar. Select Exclude to hide Shopify Free Shipping Bar on the selected pages. In this example, Shopify Free Shipping Bar is shown in All pages.
In the Show on Device section, choose the device that Free Shipping Bar will be shown: Desktop, Mobile or both.
After that, configure the Visitor Targeting based on locations by choosing Include or Exclude whatever country you want in the Show on Locations field. For Visitor Source, please set up similarly.
When finishing, click on Save & Publish or Save button at the end of the page.
Step 7 - Check free shipping bar in the store
Does your Shopify Free Shipping Bar look attractive enough? Check it again in the live store, see whether it runs smoothly or not and edit any element if needed.
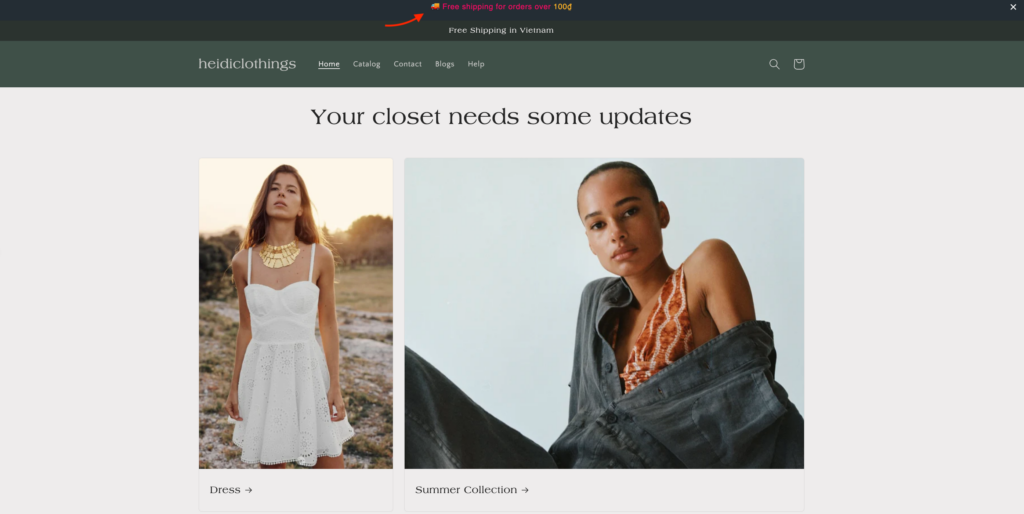
Shopify Free Shipping Bar is shown at the top of the page
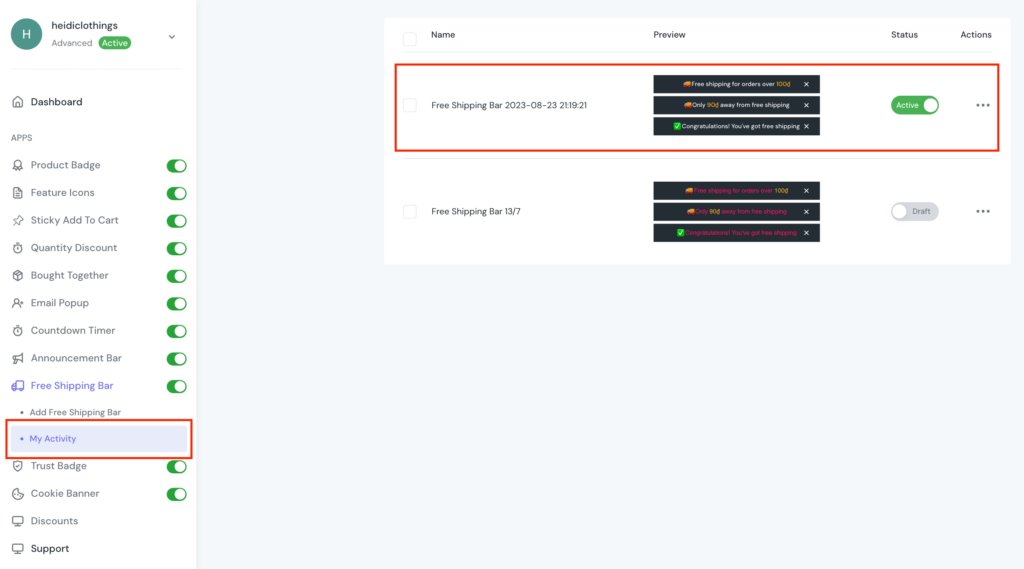
Note: Check My Activity to see all the free shipping bars you have added and activate/deactivate or edit/delete the one you want.
In Conclusion
To boost sales and get bigger average order values, you should make use of Shopify Free Shipping Bar, which is a powerful feature for your online store. By using ShineTrust app, you can configure your Shopify Free Shipping Bar simply and quickly without any concern about coding or slowing down your site.
Now, take the guide step by step and wait for your sales to hit the target!


