

The testing step is very important when setting up your Shopify online store. One of the most important processes you need to ensure runs well is the checkout process. If the checkout process doesn’t run smoothly, customers may consider your store a scam.
What is the Testing Checkout Process?
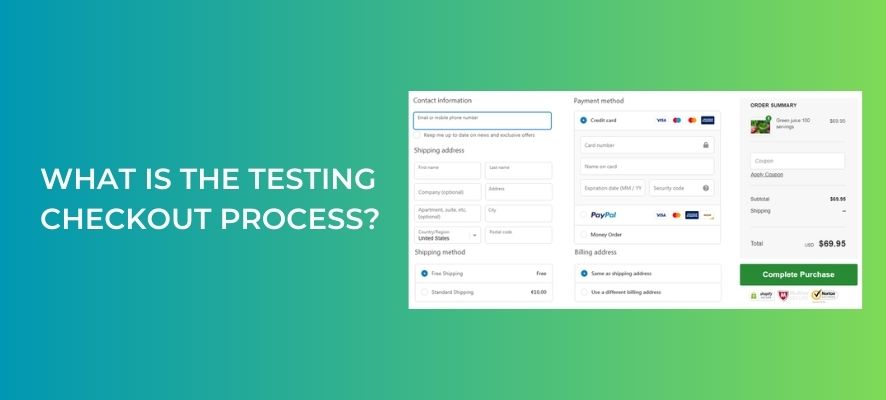
Testing the checkout process is an important step in that you can test how your customers pay for their orders and how you process the orders fulfilment. The checkout process starts with placing the order and only finishes when the order is completed.
How To Place A Test Order
Place a test order. This is the way you can experience customers when they are shopping and purchasing in your store. From order processing, inventory, shipping, and email notifications to text settings, everything needs to be correct. That’s why you need to ensure this step is completely perfect before your online store is launched.
Before placing a test order, you must select a Shopify Plan. Check out this blog post, – Which Shopify Plan Should I Choose? to find out which one is best for you!
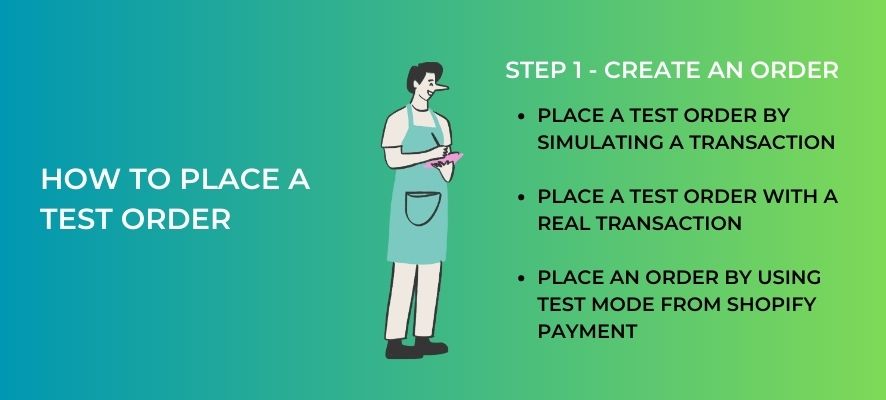
There are three ways to place a test order:
- Use Shopify’s Bogus Gateway to simulate a transaction
- Use a real payment provider and then immediately cancel and refund the order
- Use the test mode of Shopify Payments
Caution: Do not fulfil any test orders because you will be charged for any shipping labels that you purchase. If you use an app that automatically fulfils orders, then deactivate it before you create test orders.
Step 1 - Create An Order
Firstly, for creating an order, you need to click on the eye symbol next to the online store to open your store in a new tab. Add to your cart a few products. On the cart page, click Check Out.
Then, on the checkout page, fill out all the required details. It’s also the time you need to review the information that customers should have, like their name, shipping address, email or phone number, etc.
If you want to check how customers will receive email notifications, enter your email address. It’s a recommendation that you act like your customers after they purchase from your online store.
Next, you enter a shipping address. You can review the shipping methods for particular areas where you want to sell. Enter the test credit card details to test a successful transaction. You can also simulate payments from different countries and currencies with the provided Visa test numbers.
For the cardholder’s name, you need to enter at least two words separated by a space. Enter any date in the future for the expiration date. With the CVV, enter any three digits.
If you place a successful test transaction, the order appears on the orders page of your admin. Then review the order details. However, always remember not to fulfil or print shipping labels on your test orders.
Now, we will explain in more detail how to place a test order in the three ways mentioned above.
Place A Test Order By Simulating A Transaction
Bogus Gateway is a payment provider that any store can use to create test orders. Every order you place while Bogus Gateway is set up is a test order. The test purchase must be more than the equivalent of $1 in any other currency.
You need to enter test payment information at the checkout to create an order. Depending on the information you fill out, you can simulate different transaction types.
On Desktop:
- From your Shopify admin, go to Settings > Payments
- If you have a credit card payment provider enabled, then deactivate it before continuing. Click Manage > Deactivate (this button also shows the name of your payment provider, for example, Deactivate Shopify Payments), then confirm your deactivation
- Do one of the following:
– If you have Shopify Payments enabled: In the Shopify payments section, click Manage. At the bottom of the page, click Switch to a third-party provider, and then click Switch to a third-party provider again to confirm
– If you don’t have Shopify Payments enabled, then in the Shopify payments section, click See all other providers
– If Shopify Payments isn’t available in your country, then in the Payment Providers section, click Choose A Provider - Select (for testing) Bogus Gateway from the list
- Click Activate (for testing) Bogus Gateway
- Click Save
- Go to your online store and place an order as a customer would. At checkout, enter the following credit card details instead of genuine numbers:
– Name of Card: Enter Bogus Gateway
– Credit Card Number: Enter each of these in turn to simulate different types of transaction: Enter 1 to simulate a successful transaction, Enter 2 to simulate a failed transaction, Enter 3 to simulate an exception (this generates a message indicating that an error has occurred with the provider)
– CVV: Enter any 3-digit number (for example, 111)
– Expiry Date: Enter any date in the future - After you’re done testing, click Manage next to (for testing) Bogus Gateway in your Shopify admin
- Click Deactivate (for testing) Bogus Gateway to remove this gateway from your checkout
On Mobile:
- From the Shopify app, go to Store > Settings
- Under Store settings, tap Payments
- If you have a credit card payment provider enabled, then deactivate it before continuing. Click Manage > Deactivate (this button also shows the name of your payment provider, for example, Deactivate Shopify Payments), then confirm your deactivation
- From this step, it is the same as step 3 on the Desktop
Place A Test Order With A Real Transaction
You can use an authorised payment provider to place a test order that you can then quickly cancel and refund. The payment processor you select may charge you fees.
When you issue a refund, some payment processor costs and credit card third-party transaction fees are not refunded to you.
Remember to review your payment provider’s terms of service before testing a payment gateway with a real transaction. Here are the steps for you:
- Make sure that you’ve set up the payment provider that you want to test
- Make a purchase from your store as a customer would, and complete checkout using genuine credit card details
- If you’re using a third-party payment provider, then log in to your payment provider and make sure that the funds were processed
- Cancel and refund the order as soon as possible to refund yourself. Any third-party transaction fees that have been charged are not refunded
Place An Order By Using Test Mode From Shopify Payment
Activate the test mode and test payments with test credit cards to test your Shopify Payments system. Only if you have selected a premium plan are you able to try Shopify Payments.
Before you can create test orders, you need to activate the test mode for Shopify Payments.
On Desktop:
- From your Shopify admin, go to Settings > Payments
- In the Shopify Payments section, click Manage
- In the Test mode section, select Enable Test mode
- Click Save
On Mobile:
- From the Shopify app, go to Store > Settings
- Under Store settings, tap Payments
- In the Shopify Payments section, click Manage
- In the Test mode section, select Enable Test mode
- Click Save
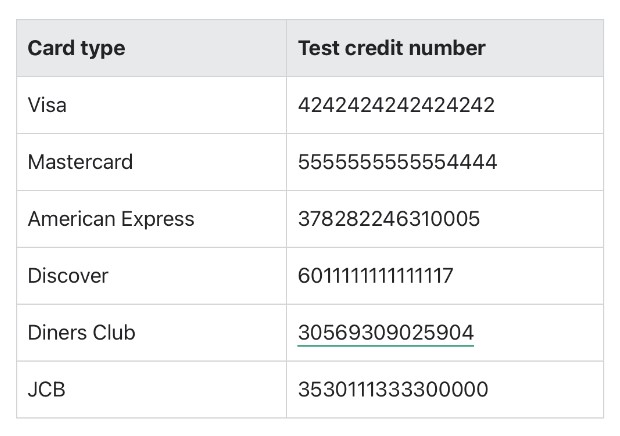
Use a test credit card number to generate orders and simulate transactions. To generate successful transactions, unsuccessful transactions, and transactions in various currencies, test numbers are available. The test purchase amount needs to be greater than the equivalent of $1 in any currency.
To simulate a successful transaction, use the following information when you are asked for credit card details at checkout:
- Name on card: Enter at least two words
- Expiry date: Enter any date in the future
- Security code: Enter any three digits
- Card number: Use any of the following numbers:
Use these test credit card numbers to recreate several unsuccessful transactions if you want to see the credit card error messages that might be sent to a customer during checkout:
- Use credit card number 4000000000000002 to generate a card declined message
- Use credit card number 4242424242424241 to generate an incorrect number message
- Use credit card number 4000000000000259 to simulate a disputed transaction
- Use an invalid expiry month, for example, 13, to generate an invalid expiry month message
- Use an expiry year in the past to generate an invalid expiry year message
- Use a two-digit security code number to generate an invalid security code message
Note:
French traders aren’t allowed to use test mode.
Review the following specifications before using Shopify payments:
Only merchants in particular countries and regions have access to Shopify Payments. Find out more about the locations and countries that are supported.
You must enable two-step authentication on your account to use Shopify Payments. Find out more about setting up two-step authentication and, generally, account security. Your account and financial information are at risk of future criminal attacks if you select to deactivate two-step authentication.
Step 2 - Testing Your Shipping Settings
By placing a test order, you can ensure that your delivery options are correct. You can test an order that would be eligible for free delivery, for example, to ensure that the shipping discount is applied if you provide free shipping for purchases above a specific amount.
Step 3 - Testing Email Notifications
Place a test order to check your email notifications. When checking out, provide your email address to receive email alerts. From the Shopify admin, you can customise your email templates.
In Conclusion
Testing is a really important step not only to make your customers’ shopping experience go smoothly, but it is also a step that helps you review your selling procedure to complete the order perfectly. With three ways for placing a test order, shipping setting, and email notification, we hope you can choose one of them to test your online store checkout process!
You can find out how the test order process works at How to Test Order Process on Your Shopify Store Successful.

