

1. What is Shopify Countdown Timer?
Online retailers use a Shopify Countdown Timer as a visual tool to create a sense of urgency and encourage buyers to act. This timer shows a ticking clock that decreases in time until a particular event, such as the conclusion of a sale, the end of a discount, or the introduction of a new product. This marketing strategy seeks to persuade consumers to decide more quickly to buy by alluring them with the idea of a short window of opportunity.
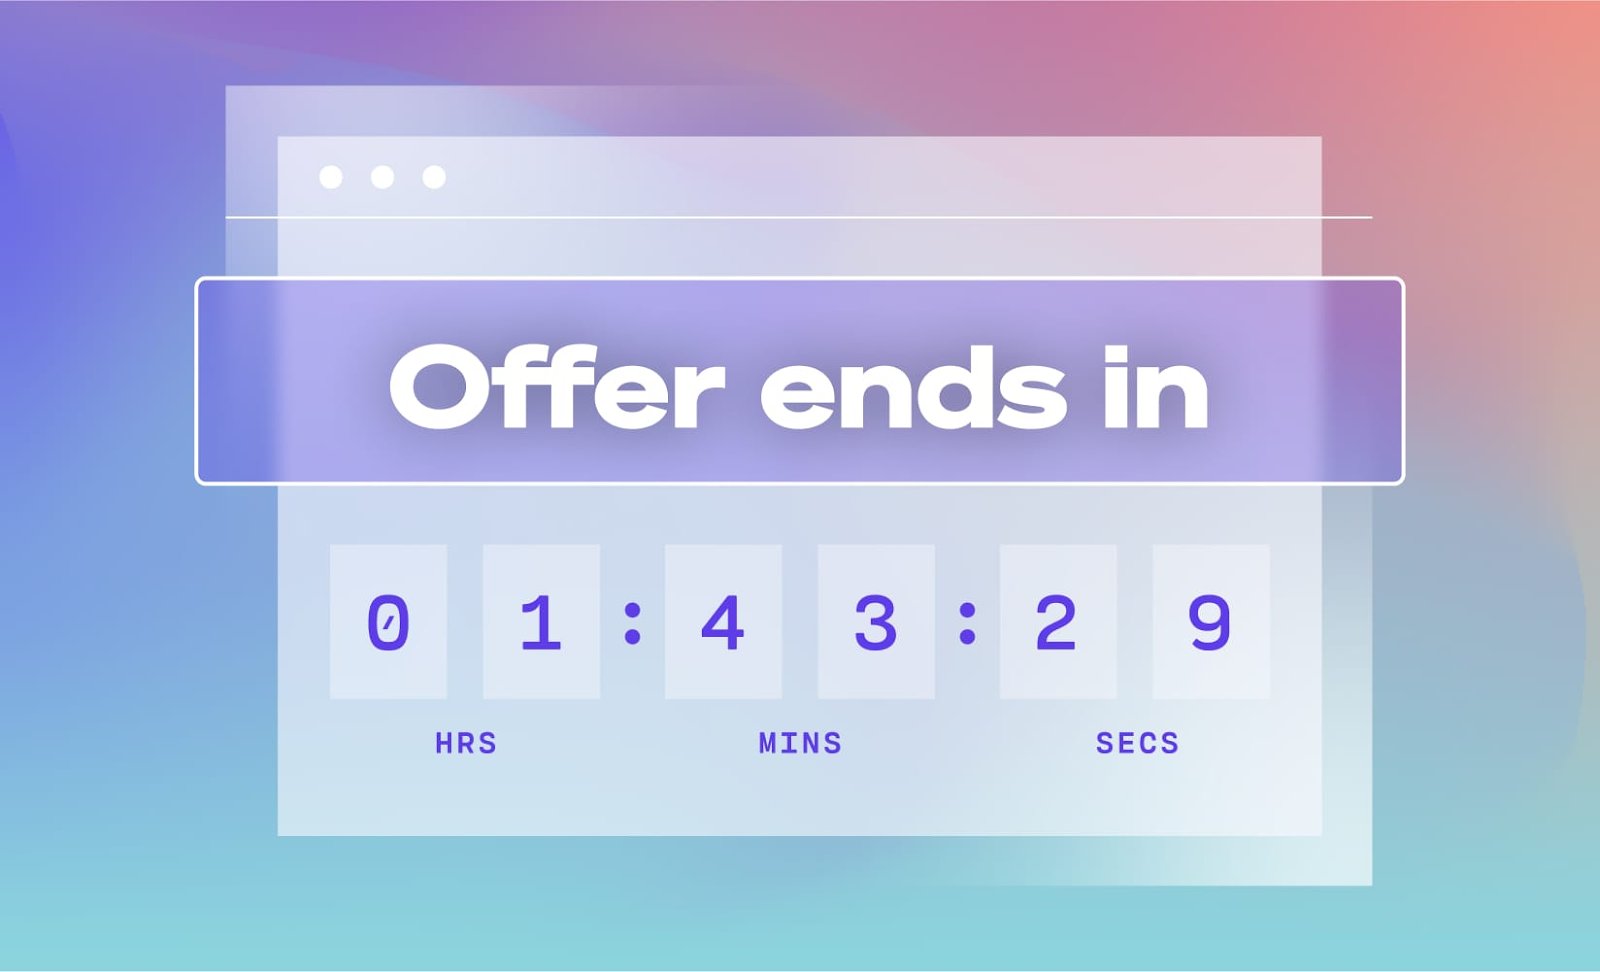
Many studies have proven that customers are more likely to buy something from your store when a countdown timer is involved.
The logic is simple – a countdown timer triggers their fear of missing out and makes them feel the need to act and act quickly. People are more likely to buy something if they see an attractive offer that is only available for a short time. That is pure psychology. So you can develop upselling and cross-selling through this tool.
2. How to create a Shopify Countdown Timer on Top Bar?
2.1 Using Code
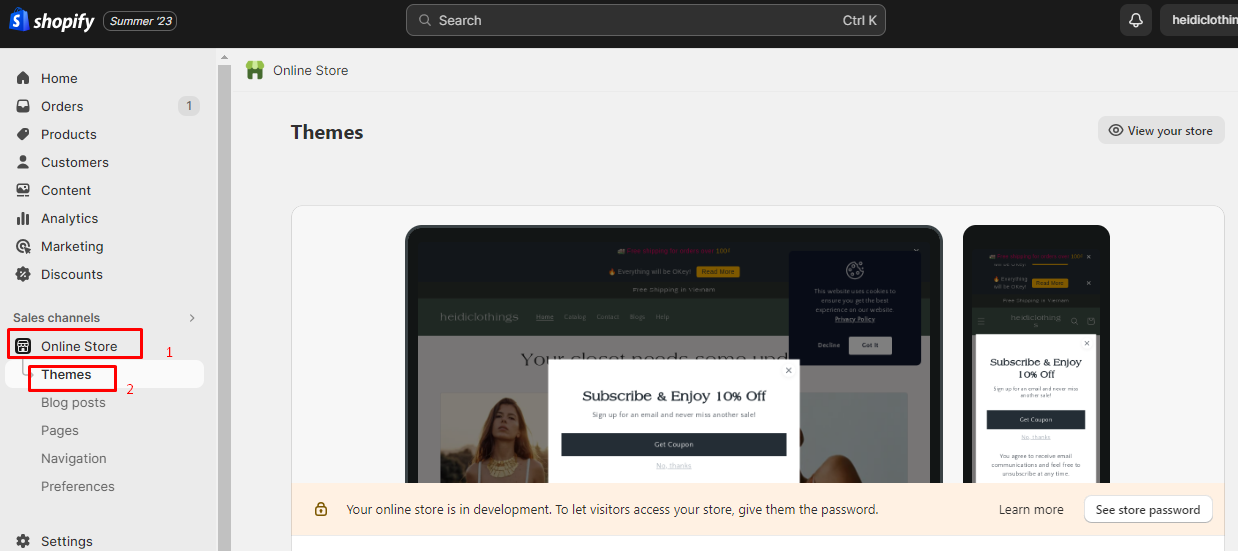
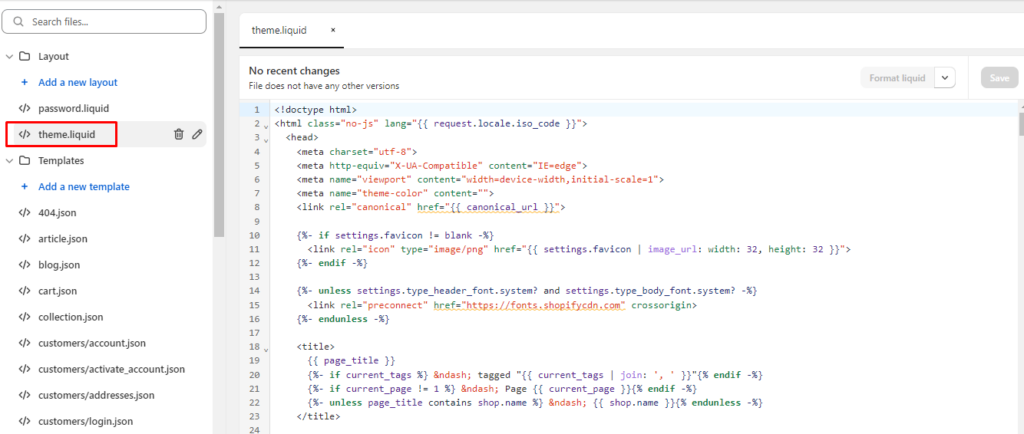
Step 1: Log in your Shopify store admin panel. Choose online store -> Themes
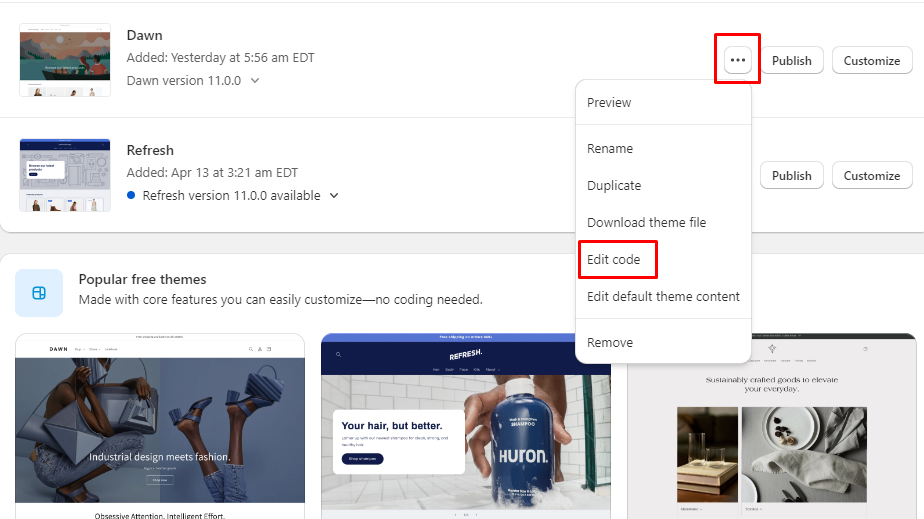
Step 2: Choose your theme -> Use 3 dots right in the theme you want to select -> Select “Edit Code”
Step 3: In the list of theme files, find and click on “theme.liquid” or “header.liquid.” This is where you’ll insert the code for the countdown timer.
Step 4: Add Countdown Timber
Find the proper spot in the “theme.liquid” file where you want the countdown timer to display and add the necessary code there. This might be in the top bar or header area. Add the following line of code:
<div id=”countdown-timer”>
<p>Offer ends in:</p>
<span id=”timer”></span>
</div>
<script>
// Set the end date and time
var countDownDate = new Date(“2023-12-31T23:59:59”).getTime();
// Update the countdown every 1 second
var x = setInterval(function() {
var now = new Date().getTime();
var distance = countDownDate – now;
// Calculations for days, hours, minutes, and seconds
// Display the result in the element with id “timer”
document.getElementById(“timer”).innerHTML = days + “d ” + hours + “h ” + minutes + “m ” + seconds + “s “;
// If the countdown is over, show a message
if (distance < 0) {
clearInterval(x);
document.getElementById(“timer”).innerHTML = “EXPIRED”;} }, 1000);
</script>
Step 5: Save changes and preview your result.
2.2 Using 3rd app
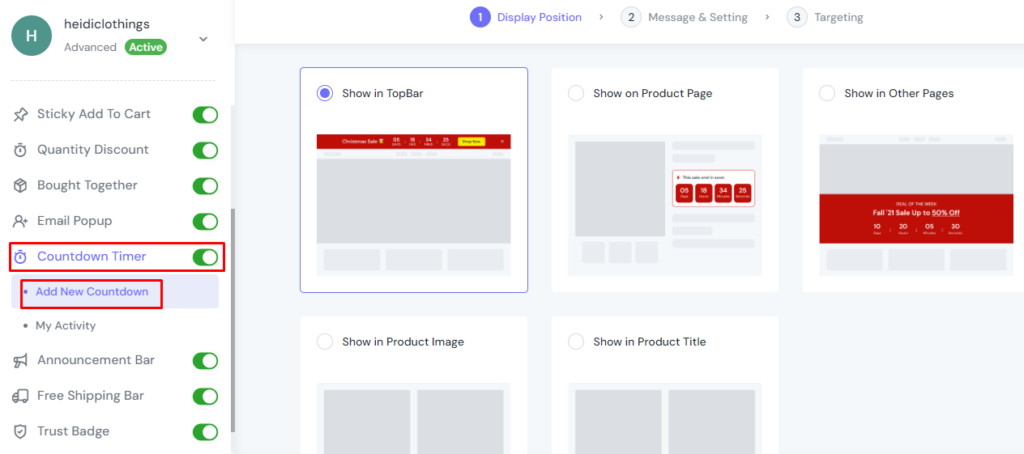
Step 1: There are many useful applications to set up countdown time on shopify. However, ShineTrust is chosen by many people as this one because of its simple configuration and many features. ẢNH
Step 2: Active Countdown Timer -> Add new Countdown and click on the part you want to change:
- Display Position
- Message & Setting
- Targeting
In Displayed Position -> Show in TopBar
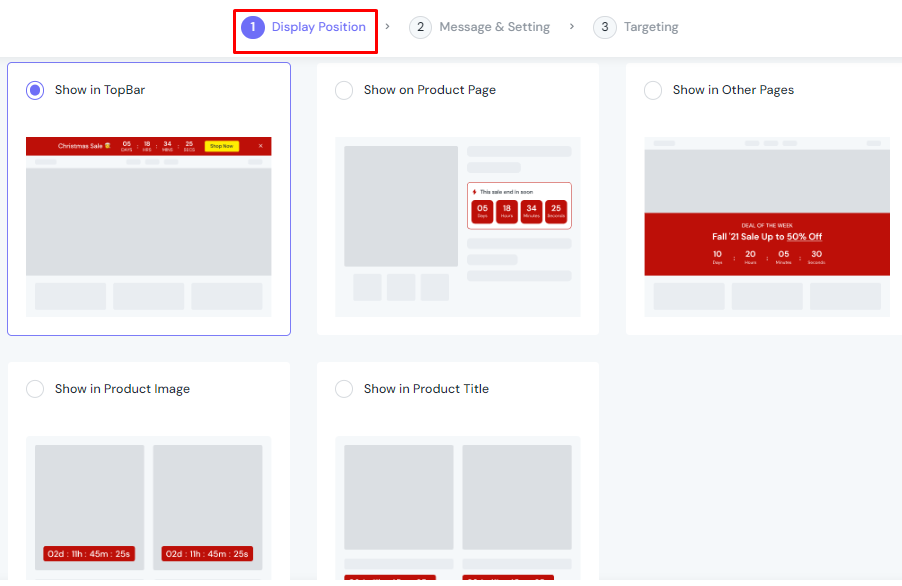
DISPLAY POSITION
You can select the Display Position for the Countdown Timer from the list. Here we choose Show In Top Bar.
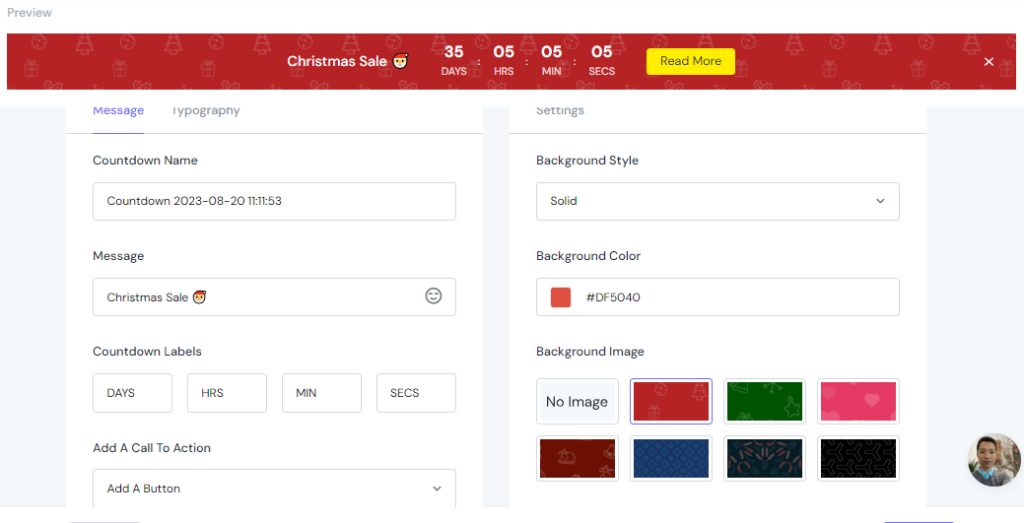
MESSAGE & SETTING
In this part, you can customize your Countdown Names and Message. For example, we’re creating a countdown timer for our Christmas sales event, so we decide to select the red theme.
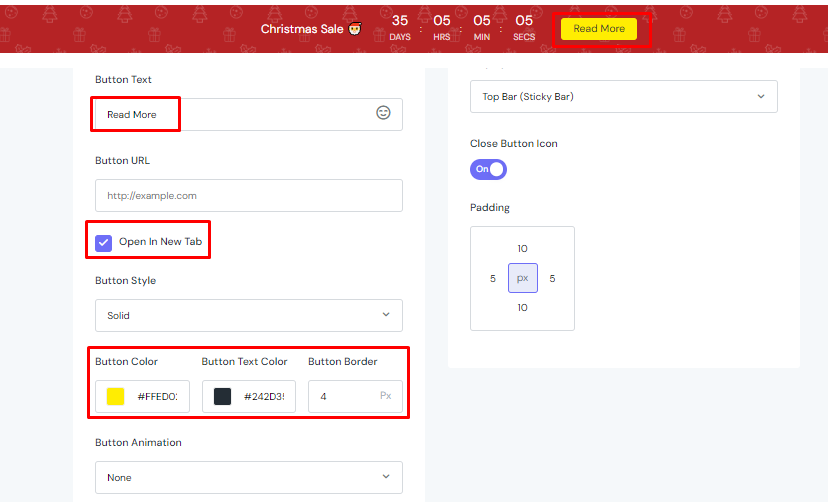
You can add a call to action button so it can link to another website. Customers can read more details about your product and make a decision to buy it.
Other similar configurations. You can install it like I have shown in the image below.
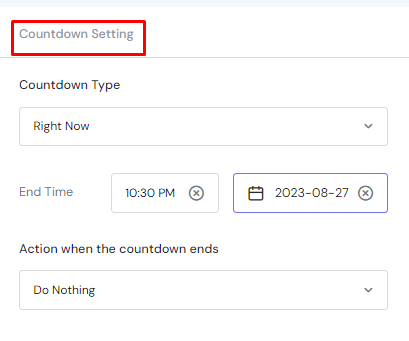
In this instance, we configure the Right Now option and enter the previously mentioned End Time. You can set it to 10:30PM to last the time for customers to think and buy the product. When the timer expires, proceed to configure Action. Instead of choosing Repeat It or Hide the bar, we decided to Do Nothing.
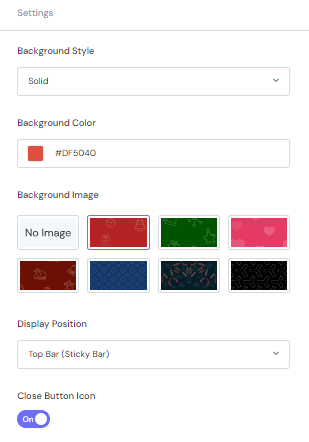
In the settings, you can also do the same with the picture below. Note that you should define your theme for discounts or special programs to choose the right colors for that theme. This will make customers feel outstanding and make their purchase decision.
TARGETING
Once all the settings are complete, define where to display your Countdown Timer.
To include the pages indicated in the dropdown list on the right, choose Include in the Show On Page field. If not, choose Exclude to hide the countdown on the chosen pages.
Finally, specify which device will display the countdown in the Show On Device section. Choose between desktop, mobile, or both.

Please remember to click Save before opening your store on website
Tadaaa, this is our result.

FINAL WORDS
I hope this passionate article of ours will provide you with a lot of useful information to help your store grow slightly. If you have any questions or concerns, you can contact us. We will answer your questions as soon as possible.

