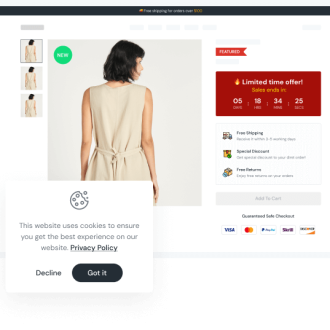
If you are looking for a helpful tool to increase conversions when sales season is coming, you should never miss Shopify Countdown Timer. Not only will it help your promotions run effectively but it will also make your online store look more lively as the clock is ticking. In this blog, you will know how to show Shopify Countdown Timer on multiple pages in your online store.
What is Shopify Countdown Timer?
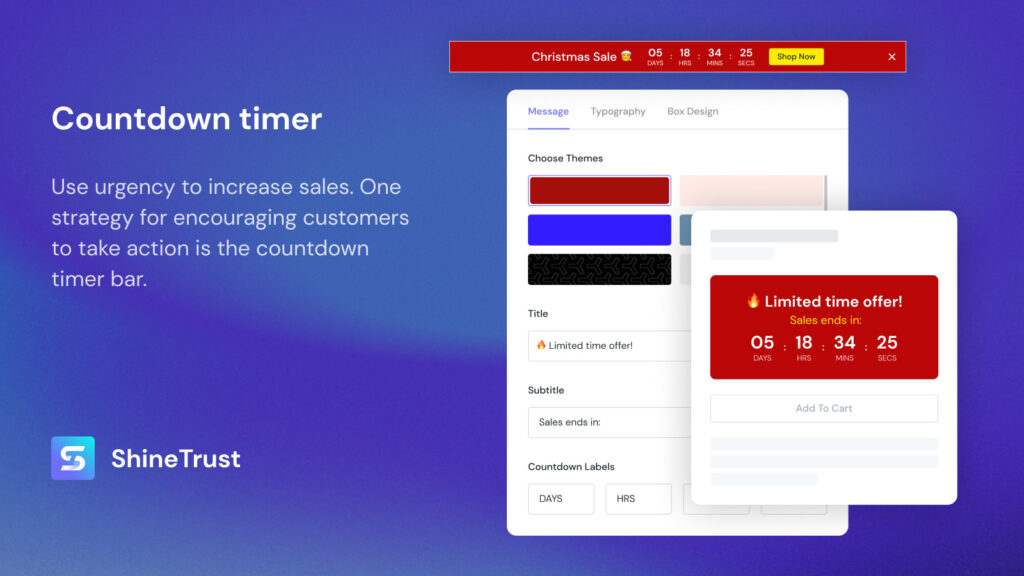
Shopify Countdown Timer is a virtual clock displaying the number of days, hours, minutes and seconds. It counts up or down from a certain time till the beginning or end of an offer, a promotion and a campaign. With Shopify Countdown Timer, visitors know how much time is left to get a special offer and they will have a decision at the right time.
When the sales season is coming around, you should use Shopify Countdown Timer for your campaign as it urges customers to buy quickly. Otherwise, they will miss the chance forever. Moreover, many people have demands to purchase but just add to cart for consideration. If they see the time they can get a discount showing clearly on your site, they have the motivation to make a decision immediately. At this time, Shopify Countdown Timer helps reduce cart abandonment. Shopify Countdown Timer can be used in various sales campaigns, including new product launching, give-away games, occasional discounts.
How to show a countdown timer on multiple pages?
To catch customers’ attention, store owners should show the deal on any page in the online store. There are two ways to show a countdown timer on multiple pages, which are using code and using ShineTrust app. The second way gives you the advantages of saving time and cost. Please check the guide below to apply for your store.
Using Code
Here is a recommended code you can use to add Shopify Countdown Timer to multiple pages in your store.
/* check if element exists */
if (document.getElementById("countdown")) {
/* countdown timer for quizzes, starts when page loads */
var timeRemaining = 10;
var downloadTimer = setInterval(function () {
document.getElementById("countdown").innerHTML = `${timeRemaining}<br> secs left`;
timeRemaining -= 1;
if (timeRemaining <= 0) {
clearInterval(downloadTimer);
document.getElementById("countdown").innerHTML = "<strong>Time's up!</strong> <br> Quiz'<br> will reset in 7 secs.";
setTimeout(function () {
window.location.reload();
}, 51000);
}
}, 1000);
} else {
console.log('countdown element missing');
}
However, you need to customize the code as it may not be suitable for every website. Please make sure that you are an expert in coding or hiding an experienced developer to support you.
Using ShineTrust app
Among many supported apps, ShineTrust is a good choice with a friendly interface, easy configuration and having no effect on your site speed. ShineTrust app can also work with any Shopify themes. To set up ShineTrust app, please follow this link.
Now, take step by step to see how to show a countdown timer on multiple pages with ShineTrust app.
Step 1 - Find and install the app Product Labels & Badges Shine in your online store
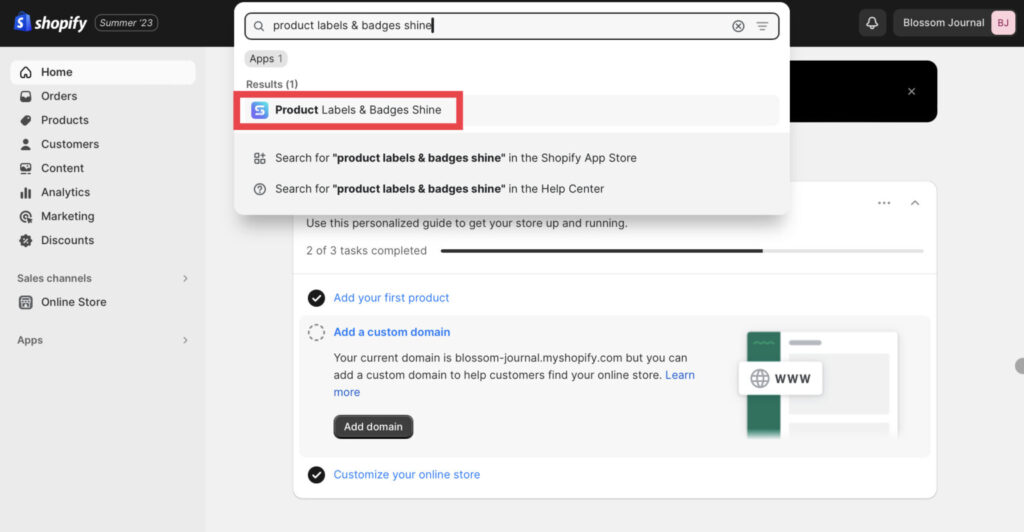
In the Dashboard menu, go to Apps, then click on Product Labels & Badges Shine.
Step 2 - Enter your store name or URL link for your store

Step 3 - After logging in, turn on the Countdown Timer feature
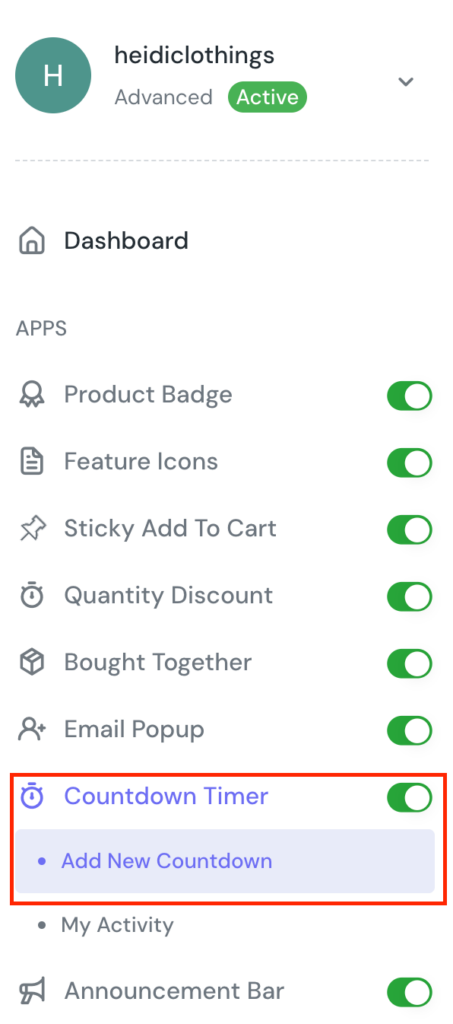
Click on Add New Countdown to configure a countdown timer for your promotion. By using ShineTrust app, you can flexibly design your countdown as you want.
Step 4 - Choose Display Position to show countdown timer on Product Image
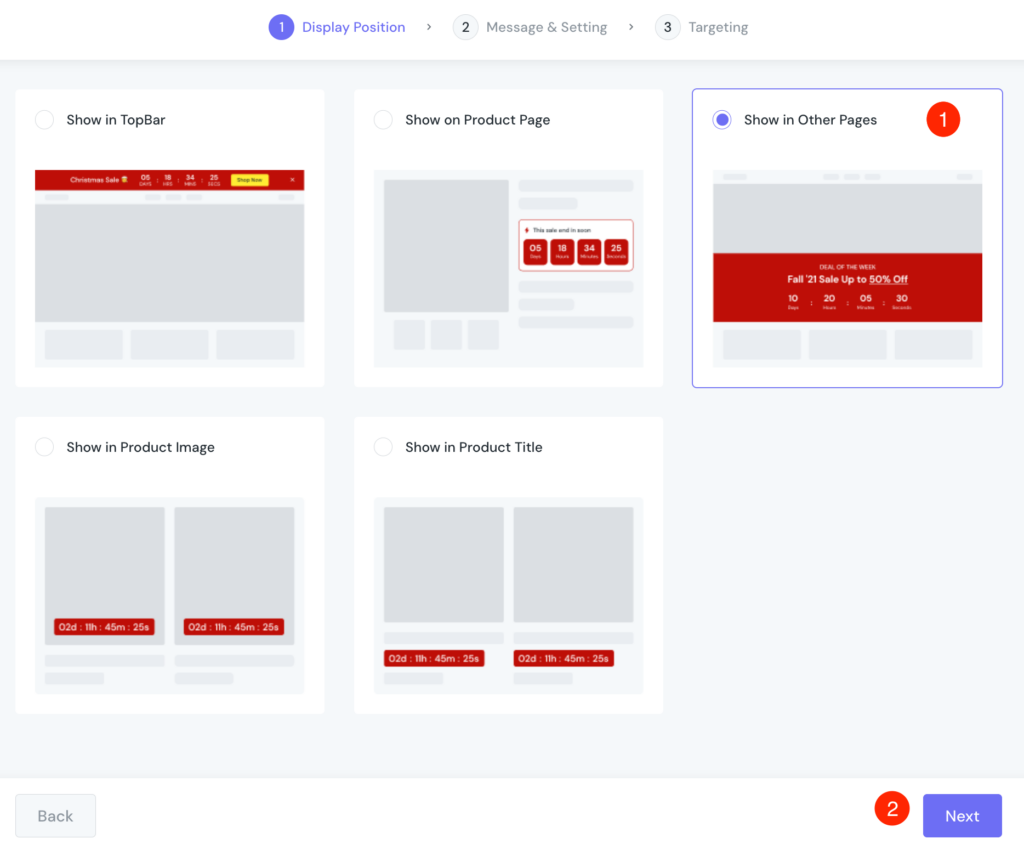
In the Display Position section, choose Show in Other then click Next button at the end of the page to go to the next step.
Step 5 - Configure Message & Settings
You will see the following page to customize Message & Setting.
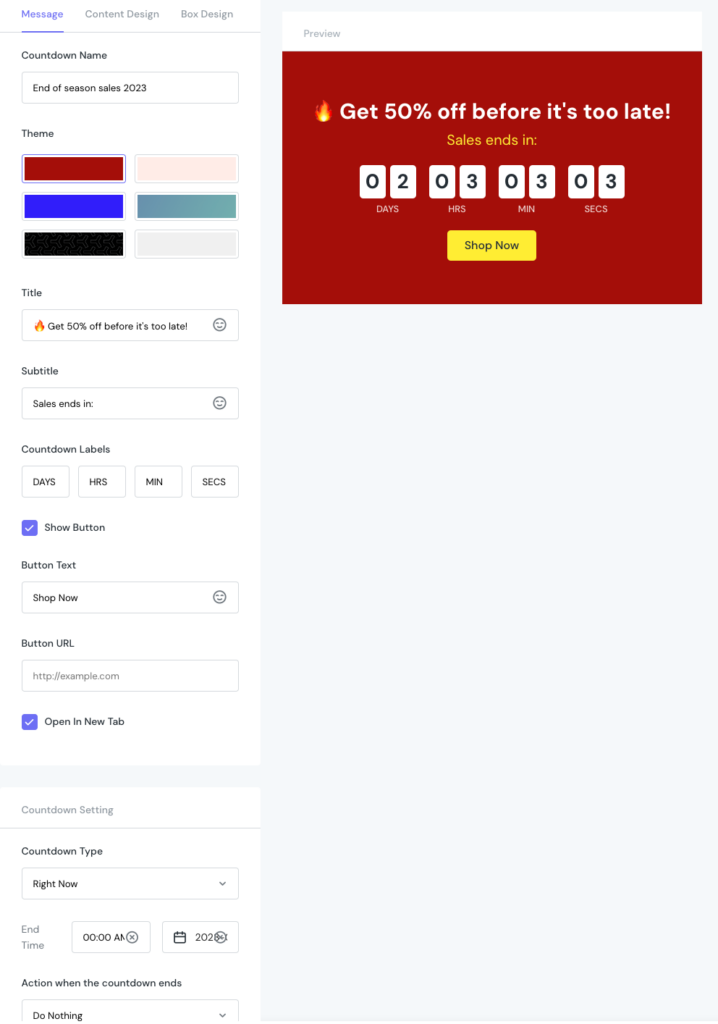
In the Message section, you will configure basic elements of your Shopify Countdown Timer.
- Countdown Name: Choose a countdown name that reminds you about your campaign. For example: End of season sales 2023. If you won’t change, the default name is based on time and date you create a countdown timer.
- Theme: Choose the theme matching with your promotion campaign. In this countdown, the red is chosen because in a big hot campaign, the red color attracts customers’ attention.
Tilte, Subtitle and Countdown Label are set as default. You can see in the picture above. The countdown timer shown in pages, you can also choose to add a button or not. If yes, don’t forget to insert Button Text, Button URL as preferred.
One more thing you should edit is End Time. Please choose the running time according to your promotion plan, for example, 00:00 AM 21-08-2023.
Then, go to the Content Design section.
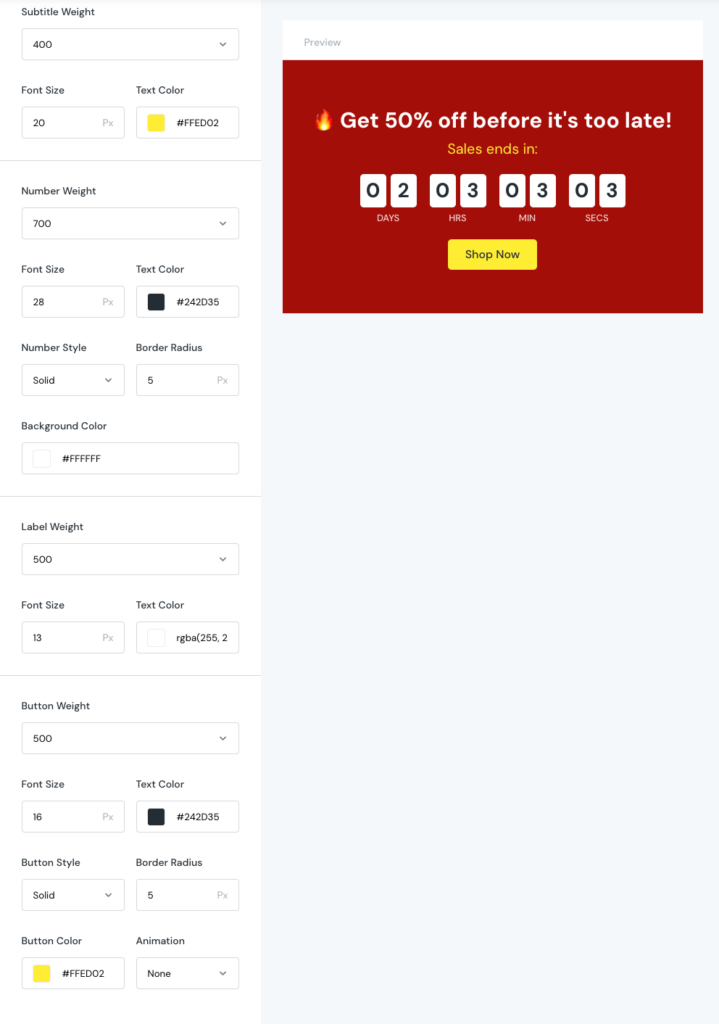
To make your Shopify Countdown Timer look perfect, you can flexibly design it just by configuring Title, Subtitle, Number, Label, Button without coding required. You can see the elements are set in the picture.
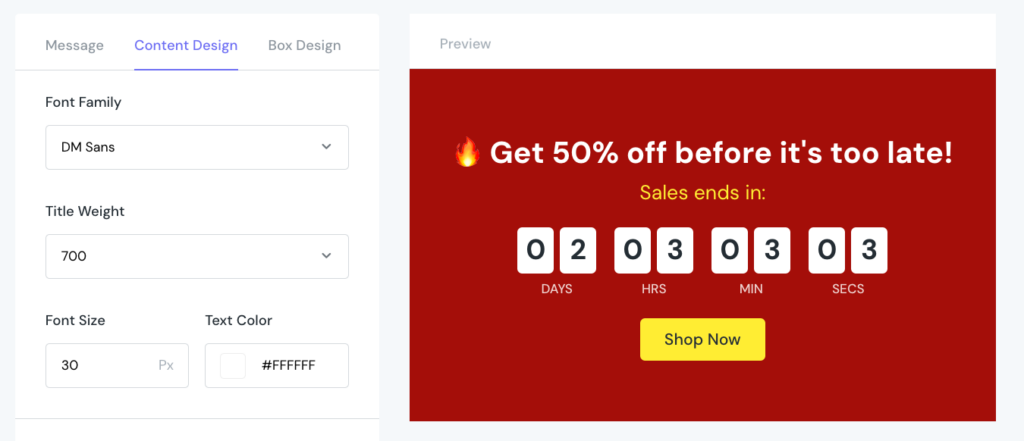
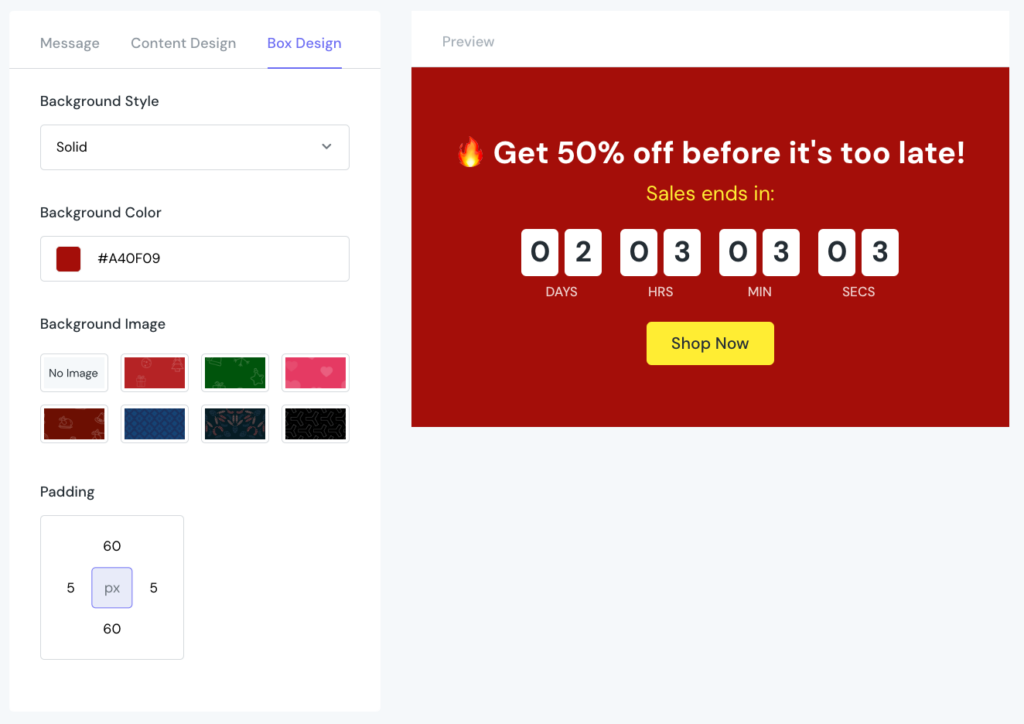
Your Shopify Countdown Timer is nearly done now! Please move to Box Design and finish its appearance.
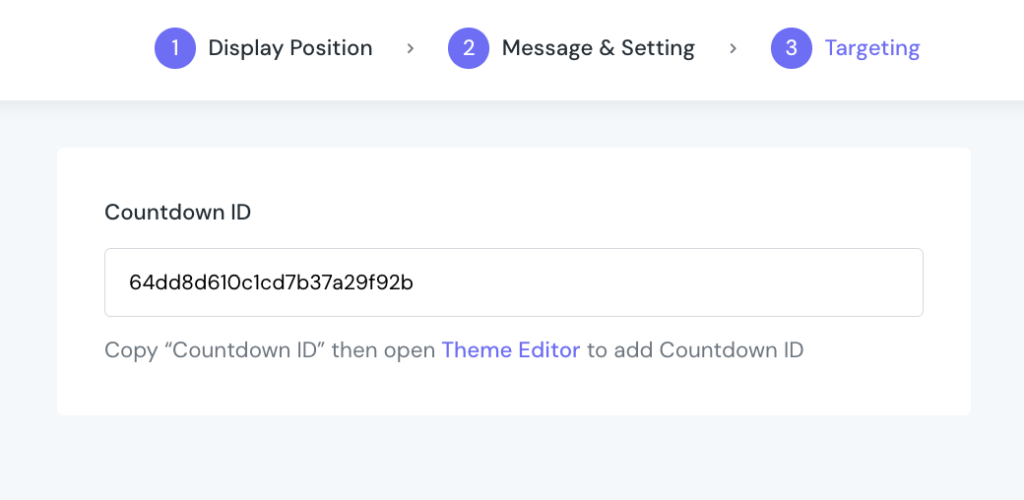
After finishing the design, go to the Targeting tab. At this step, you will be asked to click on Save & Publish button at the end of the page to get a Countdown ID. A box will appear with your ID. Just copy it to Theme Editor to add the countdown timer to the preferred page.
Step 6 - Choose Targeting
You are almost done now! In the Targeting section, please choose one or multiple products that you want to show the Countdown Timer. You can select all products as in the picture below.
After that, click on Save & Publish or Save button at the end of the page to finish.
Step 7 - Check countdown timer in the store
Once you finish your configuration in the dashboard, go to your online store to check the countdown timer again.

Shopify Countdown Timer is shown in homepage

Shopify Countdown Timer shown in catalog page

Shopify Countdown Timer shown in product page
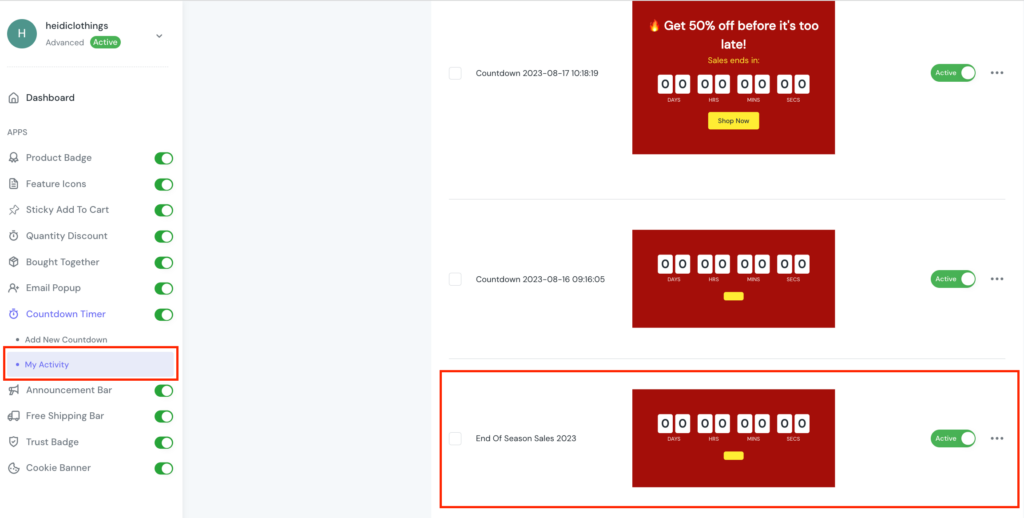
Note: Check My Activity to see all the countdown timers you have added and activate/deactivate or edit/delete the one you want.
In Conclusion
Are you ready to hit the sales target with Shopify Countdown Timer? Utilize it for your online store and you will see its effectiveness in boosting sales. By using ShineTrust app, configuration becomes much easier. Let’s follow the guide step by step to set up Shopify Countdown Timer to your website!


