

If you want to start an online business but are intimidated by the thought of building a website from scratch, Shopify could be the solution. For those of you who may not be aware of the word, Shopify is one of the leading eCommerce systems in the world at the moment.
But what can Shopify offer for your online business, and how can you build a website on its platform? This article will show you the simplest and quickest approach for a complete beginner to set up your own Shopify store. So take a seat, have a cup of coffee, and get rolling on your eCommerce journey.
What exactly is Shopify?
Shopify is an eCommerce SaaS (Software-as-a-Service) platform that allows anybody to launch an online store and start selling their goods, even those with little to no coding or technological experience. It is a fully-hosted solution, so customers don’t need to worry about finding a hosting provider. Shopify will also handle any technical difficulties like web server maintenance, allowing you to focus on selling and marketing your online business.
Shopify empowers users to customize their stores, allowing them to express their brand image. It offers a comprehensive range of tools and solutions to assist you in running and managing your business, from products and inventory to shipping and payments. What’s more, the platform can support integrations with other channels so that your products could be sold on social media, other online marketplaces, pop-up shops, or brick-and-mortar businesses.
In short, when it comes to the ease to start an online store for beginners, Shopify could be a worth-to-consider option on the top list of your choice.
You can find more information with What is Shopify and How Does it work?
How Shopify can help with your business
On Shopify, you can sell multiple things, which include:
- Physical products (e.g. apparel and clothing, healthcare and beauty, home and garden equipment, home office products, sports and fitness, etc.)
- Service (both online and in-person) (e.g. training courses, consultancy, appointment bookings, home service, etc.)
- Digital products (e.g. digital arts, e-books, non-fungible tokens – NFTs, etc.)
You can benefit from the advantages of upscaling your business, selling to a wider audience, expanding your market, and even going international by launching a store on Shopify. Plus, as mentioned above, Shopify supports your business with several marketing solutions to operate and grow your online store.
It is an ecosystem with a connection to its customers and partners (e.g. developers, marketing, or service agencies); therefore, once you start up a store on Shopify, you can receive helps from its massive community, Shopify support team or consult Shopify Experts. However, with Shopify Experts, you need to consider the cost if you want a higher standard of support and advanced customization.
What you need to prepare to launch your business with Shopify
As long as you have a computer with a stable Internet connection, you’re all set to go. It is feasible to create your Shopify store on a tablet or a smartphone, but a computer is recommended for the best results.
If you don’t have any coding experience, no need to worry because Shopify is designed for everyone. Also, this article will take you through the necessary procedures to create a Shopify store, so just follow the guide and you’ll be all set.
For those who already have a physical business and plan to go online with Shopify, you should create a brand strategy before setting up your online store. This will maintain your brand consistency in the long run. If you own items and want to establish an online business using Shopify, you must first create a clear business plan and branding strategy. Lastly, for individuals who are unsure of what to offer on Shopify, the platform may help you identify products via dropshipping applications and begin selling the items.
Create your Shopify store: a detailed step-by-step guide
Now you know what Shopify is. It’s time to get down to business and set up your own Shopify store. Below are the 10 following steps to set up an online shop on Shopify for any beginners.
Step 1: Create a Shopify account
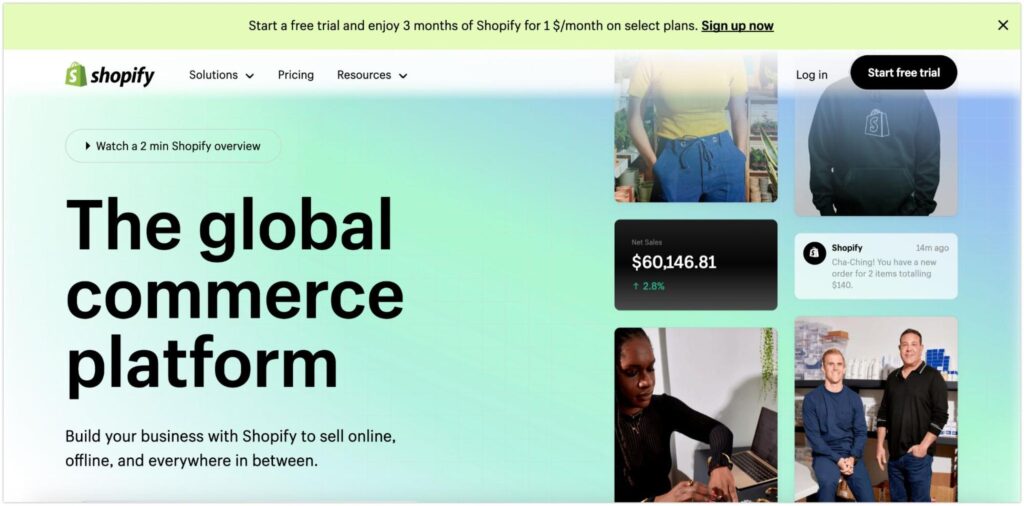
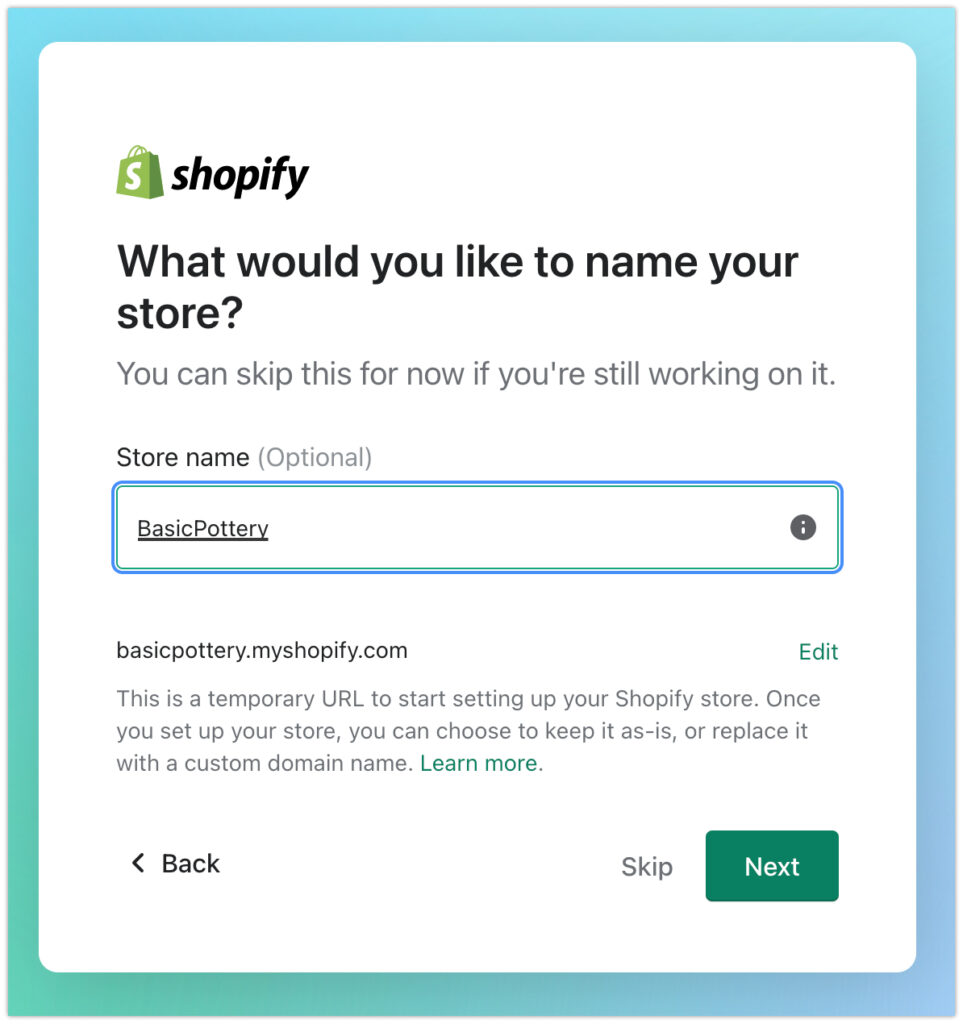
To build an online store, you first need to sign up for an account on Shopify. When browsing Shopify.com, click on the “Start free trial” button, it then directs you to enter your store name as well as some basic information such as your email and password to set up your store.
Enter your basic information
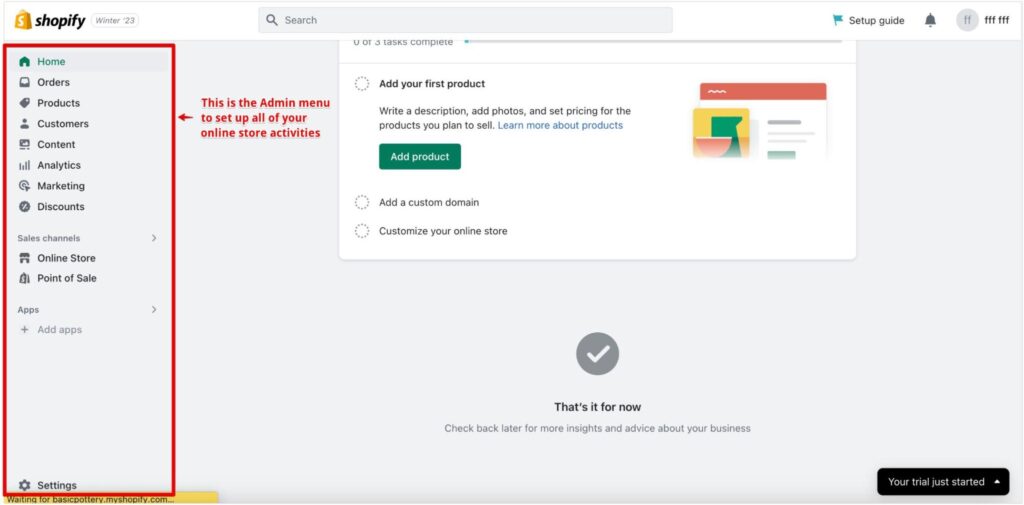
Once you finish, a Shopify admin dashboard will show up on your computer screen. This is called the back-end settings for all activities of your online store. You can manage your products, orders, customers, marketing campaigns, and most importantly, customize your store’s appearance to attract customers.
Remember that Shopify offers a 3-day free trial with no credit card required, you may experiment and learn about the platform without the fear of being charged. After the trial period, it’s your choice to continue with Shopify or say goodbye.
Step 2: Pick a theme
To build your online Shop, a theme must be chosen, which provides a suitable design for your Shopify store appearance. In the Shopify Admin dashboard, choose “Online store” >> “Themes” >> “Add” the theme you want to choose.
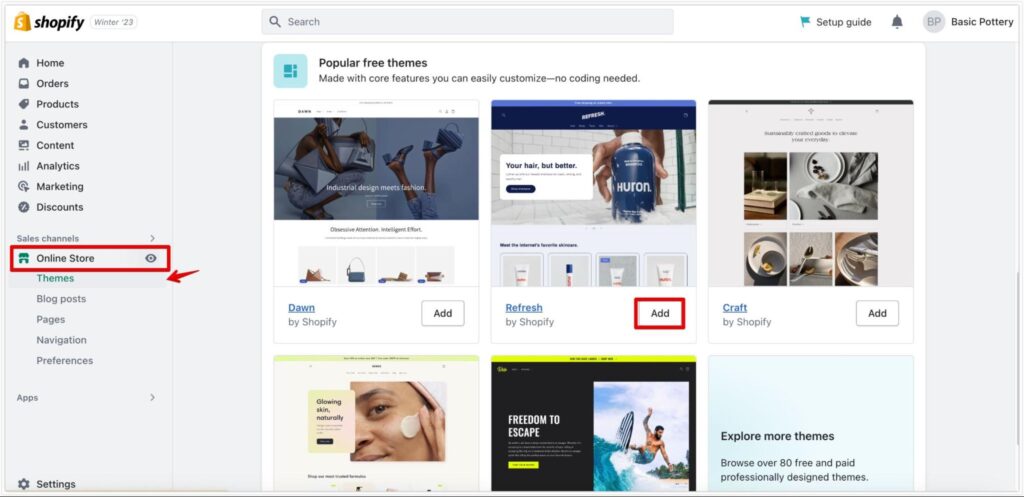
Shopify offers 11 free themes and more than 100 paid themes on the Shopify Theme Store. Based on your products and brand strategy, you can pick a suitable theme for your business. Although all of the Shopify free themes offer modern and responsive designs, some of the best recommended free themes are Dawn, Origin, Craft, and Refresh.
Because the price for a premium Shopify theme ranges between $180 and $350, it is preferable to run a trial and test a theme before purchasing. There are also Shopify themes available from prominent marketplaces like ThemeForest, Envato, or MOJO if you want to locate more affordable solutions. However, you must be aware of the theme creators’ evaluations and support services on these sites to avoid complications when technical issues arise. Meanwhile, with the themes designed by Shopify, you will receive 24/7 support from the staff for any technical glitches.
Step 3: Add your products and organize collections
This is an important step because products are what you sell. So, adding your products is a must-do in the process.
Add products
To add a product, click on “Products” >> “Add your products”. If you have no idea of what to sell yet, you can choose “Find products to sell”, Shopify will present multiple suggestions for your store.

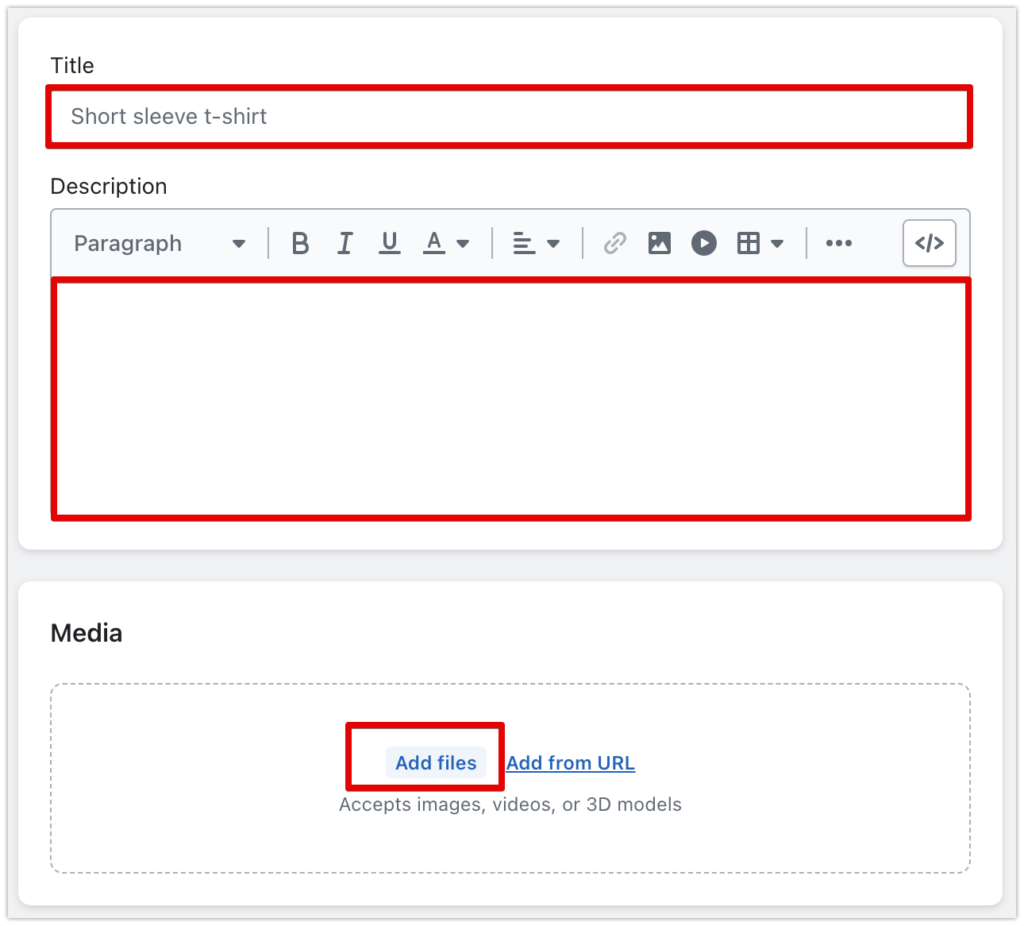
After that, there are several important product information that needs to be filled in:
- Product title: Give a name to your items. Remember to pay attention to how customers will search for your products so that you can put the right keywords that will easily show up on search engines results pages like Google or Bing.
- Product description: Write a detailed and helpful product description for your customers. Give them clear information about the materials, sizes, incentives, shipping, and so forth. Your description should be easy to scan. For example, you can organize the text in numbering or bullet points.
- Media: Add your product images, videos, GIFs, or 3D photos to let your customers visualize the items. Remember to upload high-resolution photos with consistent ratios for all product images. You can use some free or paid image editor tools to customize your media for better quality.
- Price: Put your product price in this field. If you offer a discount, enter the lower price in the “Compare at price”. It will show the discount price to your customers on the website. If you put the cost for each product, the system will automatically calculate your margin and profit.
- Inventory: Put a current quality number of the product you have in stock. If your products have SKU (Stock keep units, e.g. GHR-HH) or barcode to keep track of your items, you can tick the boxes and put in the information.
- Shipping: Select the shipping location, and put in the weight of the item.
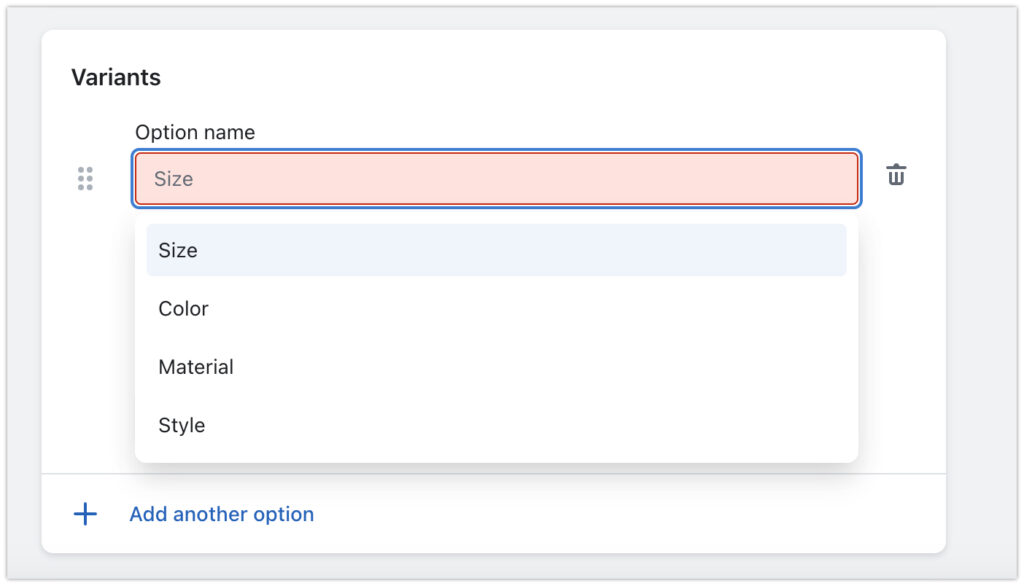
- Variants: If a product has many alternatives such as colors, sizes, or styles, you can add multiple variants for it. Images or media for the variants could also be added if you prepare photos of products in different options.
- Search engine listings: This is for SEO optimization to help your product appear on Google or other search engines. You should put the relevant keywords in the page title and URL as well as a detailed meta-description.
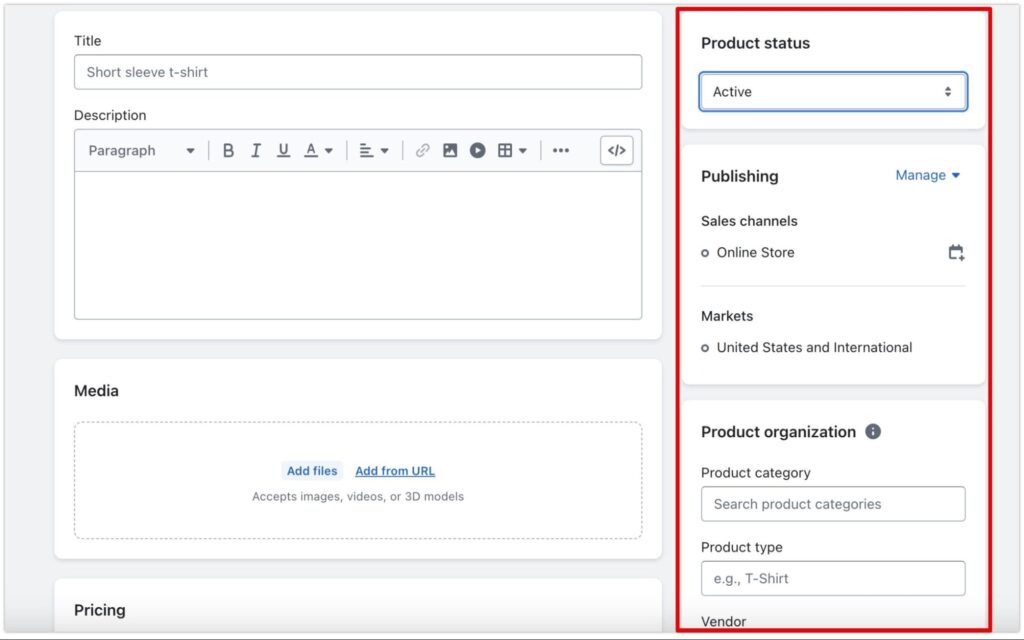
Next, on the right-hand side, you will notice the product availability and organization. You can set it to ‘active’ or ‘draft’ status. Put in product category types, vendors, and product tags (again, for better SEO). Also, you can manage the channels (online store, social media, etc.) and the market region.
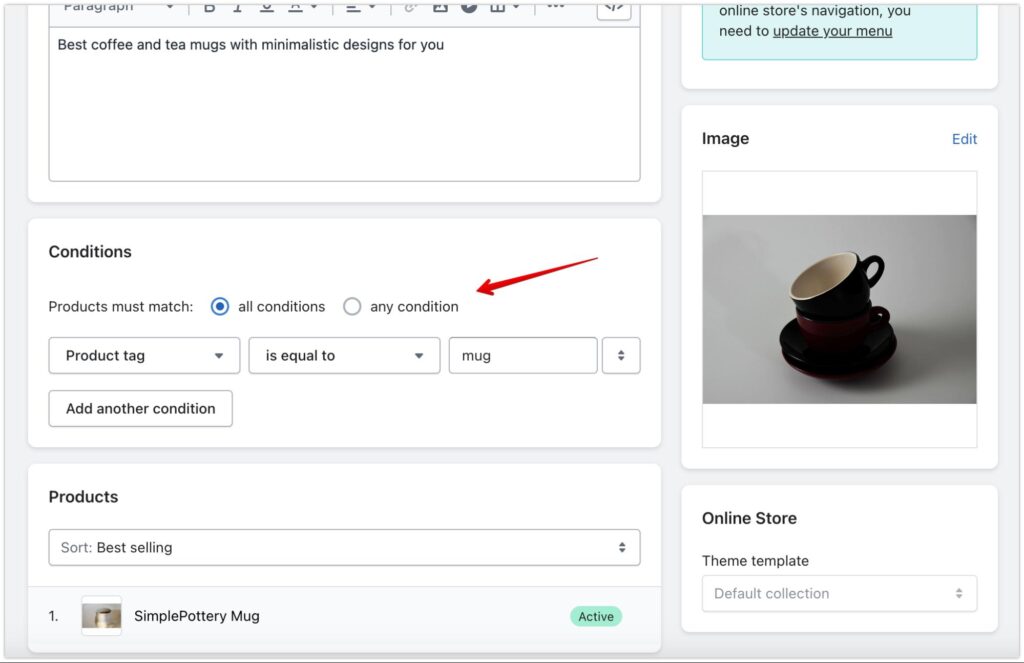
Sort out collections
You can automatically or manually organize your products into collections by price, type, title, tag, and many more. Just go to “Products” >> “Collections” >> “Add collections”. Then, type in a title and description for the collection, add an image, and set up the collection based on your products.
Step 4: Have crucial pages for your online store
Several vital pages to your store represent a strong profile for your business and provide necessary information that customers might look for. They are the About Us, Contact Us, and Policies pages.
For the About Us, and Contact Us, go to “Online store” >> “Pages” >> “Add page”, then put the content of your About Us and Contact Us pages and create them in just 1 minute.

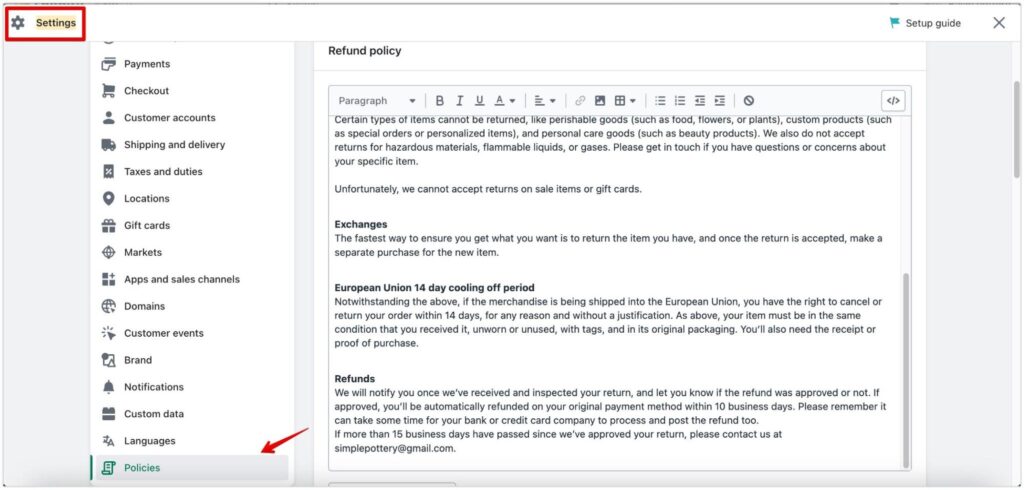
For Policies, go to Settings >> Policies. You will see all the fundamental policies needed for your online store, including the ‘Return Policy’, ‘Privacy Policy’, ‘Shipping Policy’, ‘Terms of Service’, and ‘Contact information’. You can create your own policies or utilize the templates that Shopify has already provided, just do some tweaks to your documents and everything is all set.
Step 5: Add a Shopify app
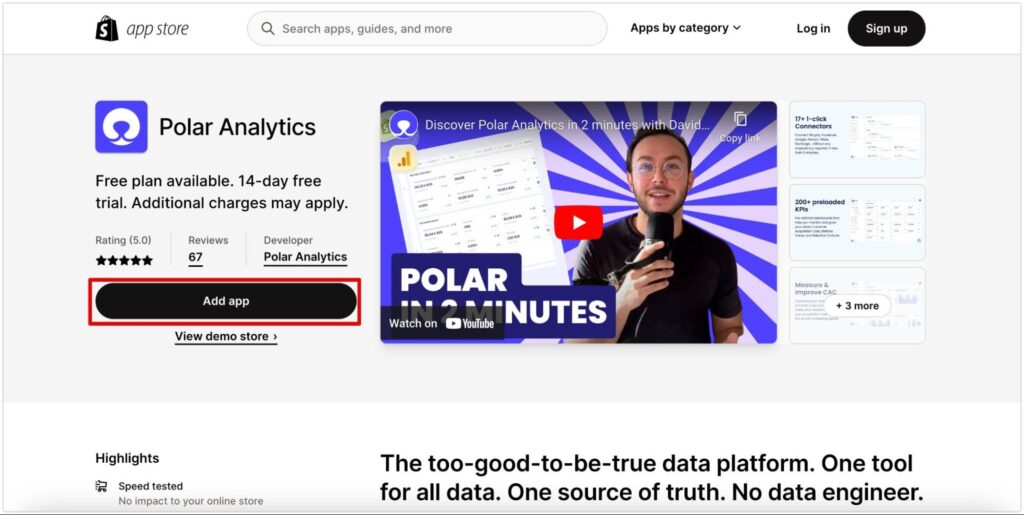
One interesting fact about Shopify is that it provides Shopify Apps to provide users with solutions and services that are not available in Shopify. These applications can assist you with your store decoration, business operations, finding dropshipping products, marketing, and conversion optimization.
You can look for more suitable apps for your store in the Shopify Apps Store. There is detailed information about the pricing, functions, developers, and customer reviews to help you choose the best plug-ins for your business. Once, you’ve found the useful apps, just click on “Add app”, the app will be linked to your Shopify store and installed.
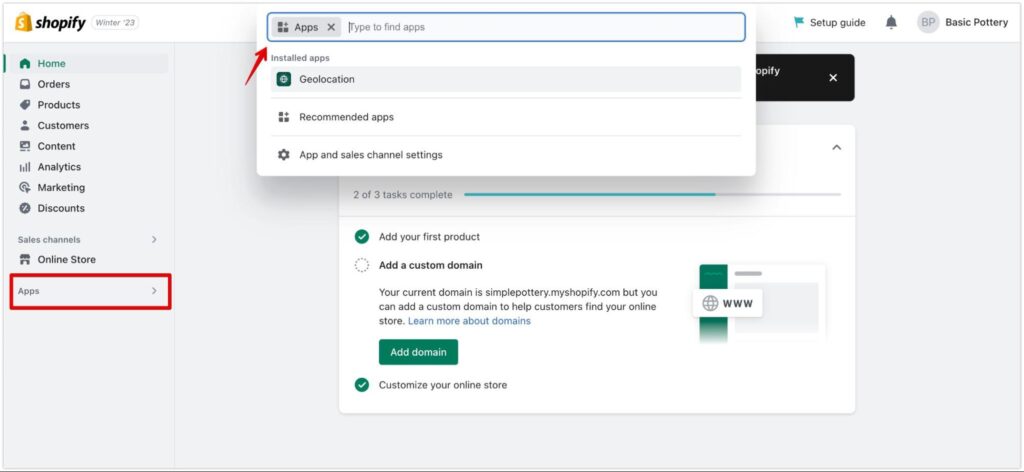
In the Shopify Admin dashboard, choose “Apps”, then search for the plug-ins you have installed and work with them. You can also remove an app in this section if you no longer need it.
Below are some essential apps suggested for your Shopify store:
Store design
Support advanced customization for your store design, and page building to match your brand image and marketing plan.
Email marketing
Enhance your email marketing campaign
- Affordable with free plan: MailChimp, Omnisend, Klaviyo
- Ease of use: MailChimp, Klaviyo, Shopify Email
SEO
Support SEO optimization for your content and digital marketing
- Affordable with free plan: SEO, Image optimizer & Speed, BOOSTER SEO & IMAGE OPTIMIZER, Hextom: Bulk Image Edit & SEO
- Ease of use: SEO, Image optimizer & Speed, Plug-in SEO
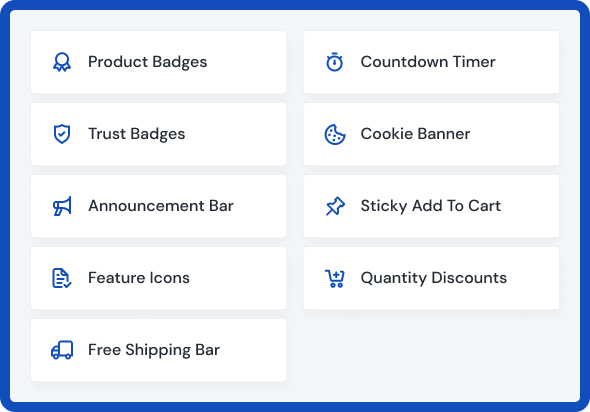
Sales & conversions booster
Improve sales and conversion with added features such as trust badges, labels, countdown timers, secured checkout, etc.
- Affordable with free plan: Hextom: Ultimate Sales Boost, Trust Badges Bear
- Ease of use: Product Labels & Badges Shine
Product reviews
Boost brand image, increase customer trust and improve sales with testimonials and reviews
- Affordable with free plan: Product Reviews, Yotpo, Judge.me
- Ease of use: Product Reviews, Loox, Judge.me
Up-selling & cross-selling
Marketing app that helps boost sales
- Affordable with free plan: ReConvert, Bundler ‑ Product Bundles
- Ease of use: Frequently Bought Together, ReConvert
Step 6: Customize your store
Once you have your crucial products, pages, and theme installed, it’s time to design your online shop presence. This step may sound complicated since you must build a complete online store to launch. However, once you get into the theme editor, Shopify got you covered.
To start customizing your shop, click on “Online store” >> “Theme” >> “Customize” the theme you chose.
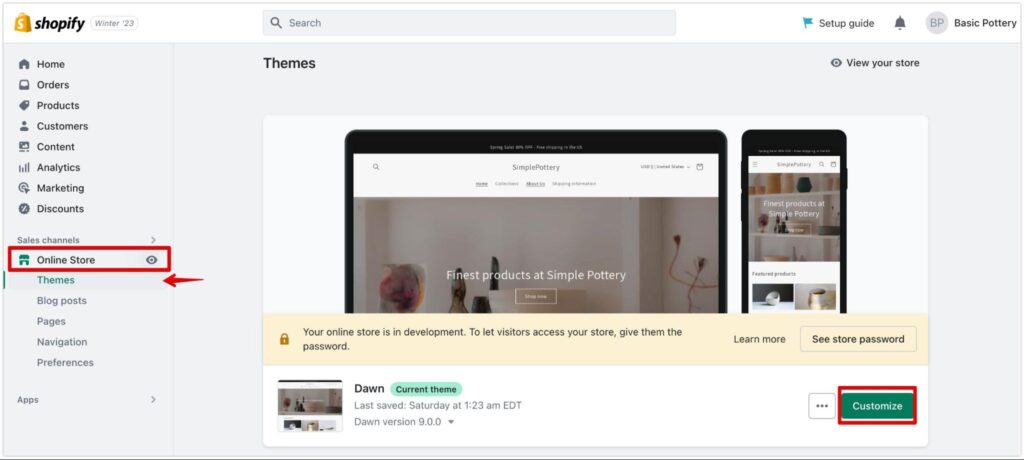
After that, you will be directed to the theme editor board where the playground is yours.
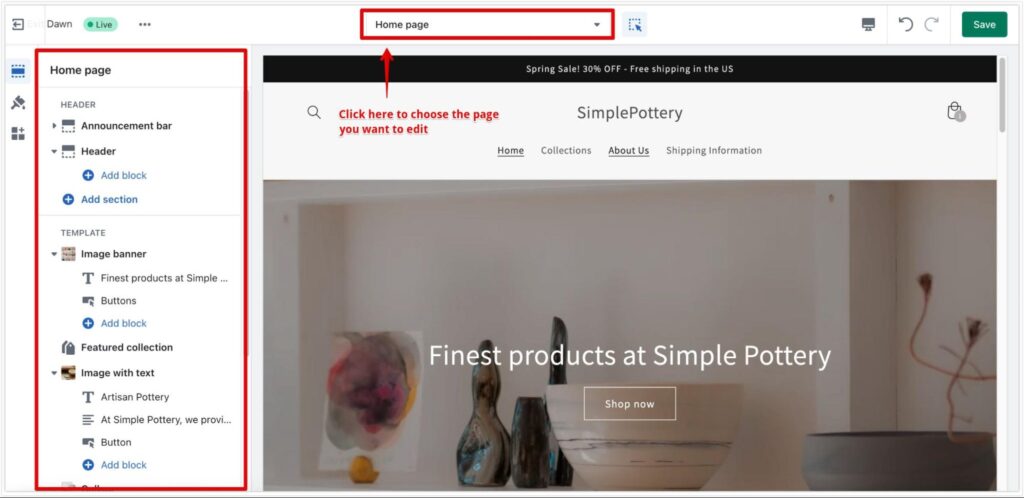
You can edit the homepage, collection page, product page, and many other pages in the editor. The Header and Footer are two important parts of a website that will show up on any page. For “Header”, you can edit the “Navigation” menu, and add an “Announcement bar” such as free shipping or big sales. For the “Footer”, you can add an “email signup” section as well as a “Navigation” menu.

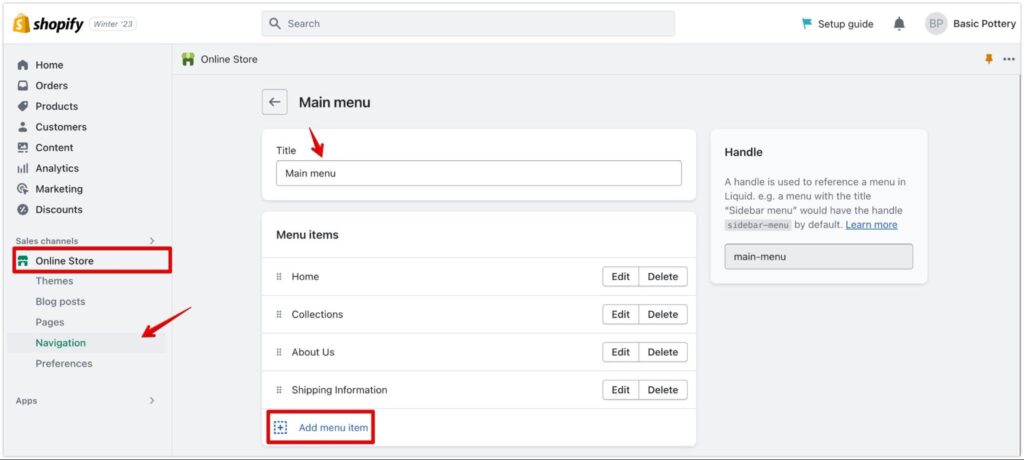
Click on the “Header” or “Footer”, then “Main menu”, which will take you to the Navigation section in the Shopify Admin dashboard, then you can “Add menu item”.
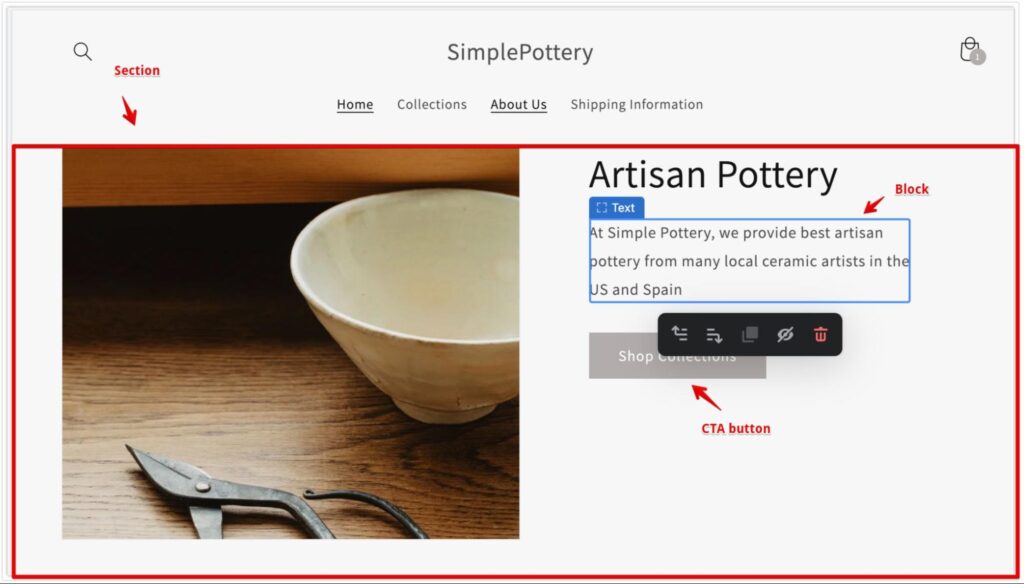
For the Home page, you can add ‘Sections’ such as photo banners in your stores, featured collections, images with text, videos or maps, or anything else that make your homepage an attractive place to visitors. In each ‘Section’, you can also customize by adding more ‘blocks’ which include smaller elements to design your page. To increase the customer experience and conversion rate, we propose that you place CTA (call-to-action) buttons in the main portions of your home page to lead people to your products or sales pages.
Remember to ‘Save’ your store once in a while when editing.
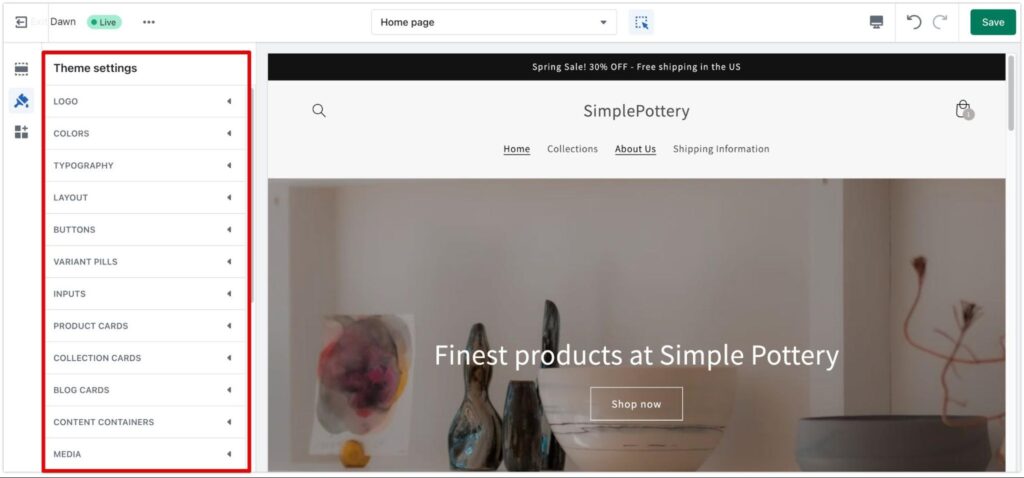
Another pivotal step you need to take care of is the Theme settings. This is where you change the general appearance and function of your store, such as logo, brand color, typography, checkout, or social media. Depending on your brand strategy and design plan, you could configure the theme accordingly to match your brand image.
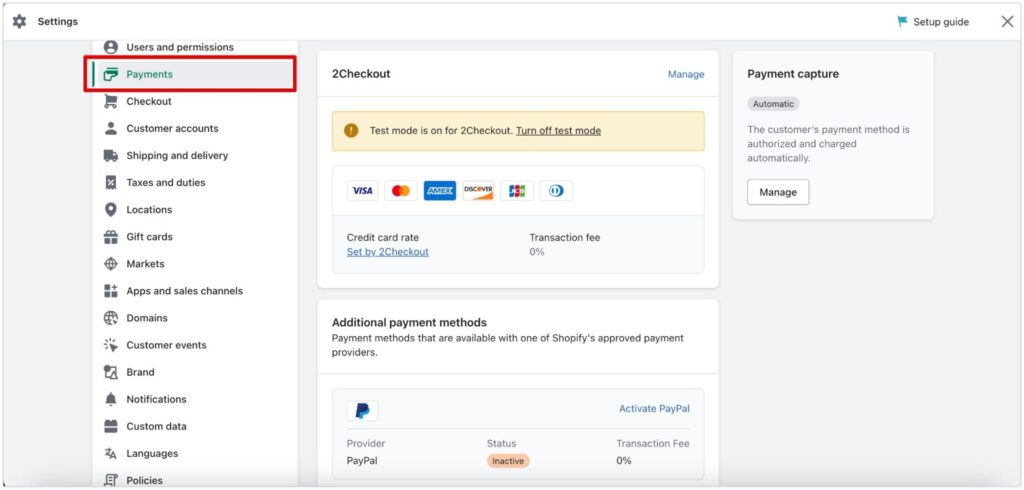
Step 7: Set up Payments
After designing the store, setting up the payments is necessary. You should let people know what types of payment are available at your store to make their buying experience more convenient.
To set up payment, go to “Settings” >> “Payments” >> “Add new payments”. With certain regions or countries, there will be “Shopify Payments” available for your store, while “Paypal” is the default option.
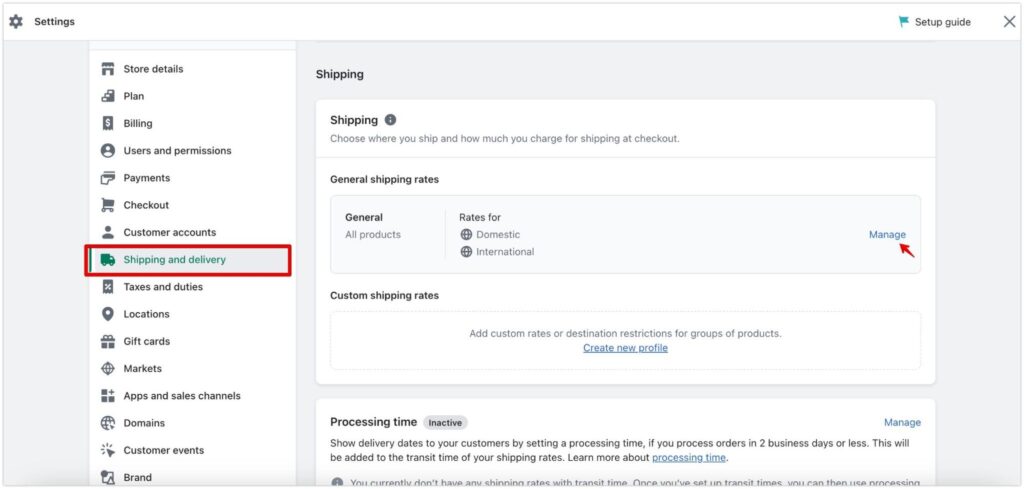
Step 8: Set up Shipping
Shopify allows you to define various shipping prices in the main market against other markets. Also, you can offer a Standard shipping rate and a Free shipping rate based on pricing or weight.
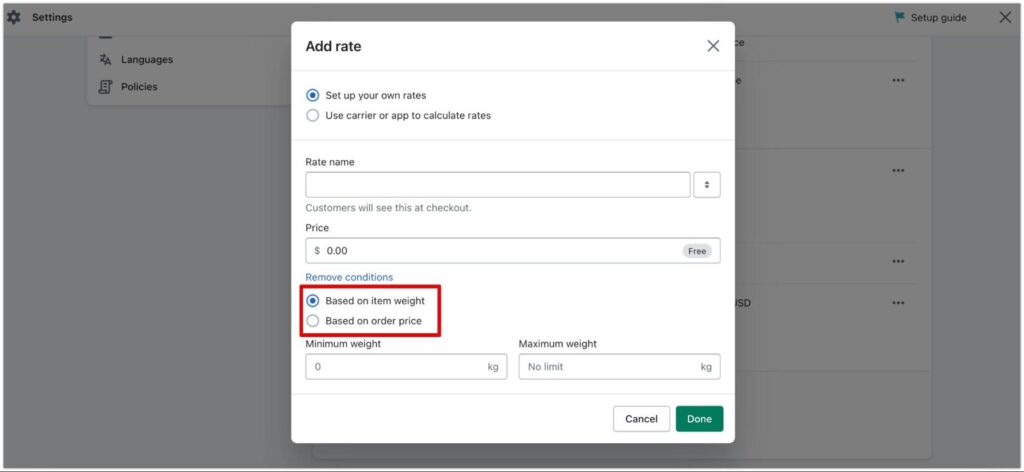
Go to “Settings” >> “Shipping and delivery” >> “Manage” >> “Add rate”
When you set your own rate for different markets, you can add conditions for the rate based on ‘item weight’ or ‘order price’.
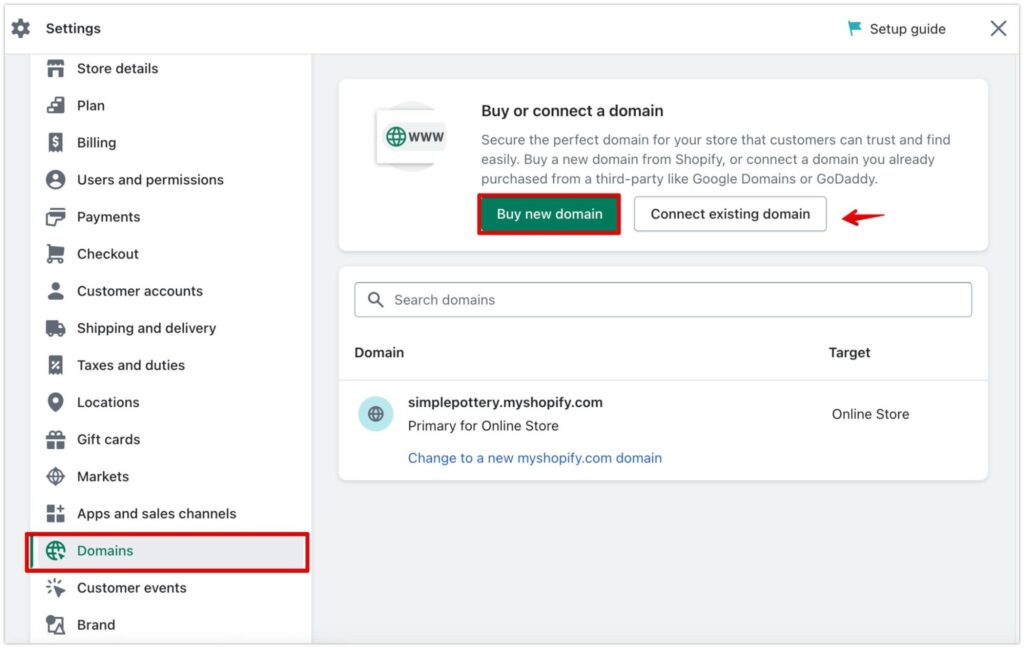
Step 9: Get a customized domain
You’re almost done setting up your Shopify store. Even though Shopify provides you a free domain with “yourstore.myshopify.com”, it is better to own a personalized domain name for your business.
You can buy a new domain on Shopify or connect to your existing domain if you have one.
Go to “Settings” >> “Domains” >> “Buy new domains” or “Connect existing domain”
Step 10: Launch your store
After the setting up, it’s time to launch your store. Just go to “Online store” >> “Theme” >> “Customize” >> “Publish”.
If your store is still protected with a password. Go to “Online store” >> “Preferences” and then disable the password. However, it is suggested that you should test your store before actually going live to your customers if you want to ensure your website is working properly. Pay attention to the ordering flow, checkout and payment process, and email notifications as such to make sure the user experience goes smoothly.
Marketing tips
Okay, you did it! Now you have accomplished your own online store. The journey, however, is not over. To get people to reach your website and buy products, marketing activities are critically essential to boost sales and earn revenue.
So, here are some of our suggestions for your Marketing plans.
First of all, don’t miss out on the data. You should pay attention to analytic reports in the Shopify Admin dashboard (“Analytics” >> “Reports”) to manage the traffic, sales, conversion rate, and a host of other data regarding your business activities. The information can help you learn and gain insight into your visitors and customers so that you can adjust, plan, and implement your marketing campaigns accordingly. Apart from the reports generated by Shopify, you can set up Google Analytics for more diverse and flexible business analysis and tag on your Shopify store.
Next, SEO (search engine optimization) is what you should keep in mind. Many people will search for your store or products on Google, Bing, or many other search engines. It is best to have your customers come to your website through organic search and traffic. That’s why having good SEO plans and tactics can help push your website to the first results page where people find you the most. Shopify does support your store with a variety of SEO apps, so you can utilize the plug-ins to boost traffic and improve conversion rate.
Finally, connect your store to social media networks to boost the chance of connecting with your target audience. People may connect with your brand directly through Facebook or Instagram Ads and then visit your Shopify store to purchase things. So you don’t want to miss out on such possibilities.
You can set up this function by going to “Online Store” >> “Preferences” >> “Facebook Pixel” >> “Set up Facebook”.
Conclusion
Getting an online business has never been an easy process, especially for people with no coding or technological understanding. However, several eCommerce services like Shopify can make the journey less painful. That’s why this article was written not only to provide you with a broad overview of the platform but also to walk you through a painless path to building a complete Shopify store with ease.

