Labor Day is a good three-day weekend chance to boost sales and traffic to your online store. Besides some tips from the post-Labor Day Marketing: Amazing Promotion And Sale Idea For 2023, here are some support tips to increase the conversion rate and attract customers to visit your website.
After using social media and email marketing campaigns to drive traffic to your online store, we now need to move on to optimizing websites.
Why Should I Combine Product Badges and a Countdown Timer for Labor Day?
Product Badges
Product badges, which are textual or graphic labels, attract attention to new products in your store, best-selling items, discounts or ongoing promotions, customer-friendly policies (including free shipping, buyer guarantees, returns, refunds, etc.), and much more.
When it comes to sales and conversions, a good badge may truly make a difference. Badges are a powerful and customizable marketing tool from which any business can profit.
Online shoppers may immediately recognize this pattern because it appears in every major e-commerce business: discount items are worth checking out if they have a tag that says “discount.”
The symbol that shows “New Arrivals,” or the new products you’ve added to your catalog, is another that attracts the customer’s attention with simplicity. Pointing out new products is a clever approach to give a dynamic touch to your shop and to maintain the interest of your shop visitors at all times, especially if you have particular customers that frequent your store regularly.
Countdown Timer
One of the popular strategies used by businesses to encourage customers purchasing decisions and boost sales is the use of countdown timers. It’s necessary to add countdown timers frequently when you run an online store. Three goals can be achieved using this:
- Sell the items in your inventory to clear it.
- Increase your customers’ level of engagement.
- Accelerate customer purchase decisions.
Countdown timers can be used for a wide range of marketing actions. The timer should, however, be pertinent to the offer or event and shouldn’t be taken advantage of since buyers can grow attached to the sense of urgency it creates. The following marketing efforts fit some of the categories in which countdown timers work well:
Short-Term Specials
Countdown timers can be used for limited-time discounts, flash sales, or seasonal promotions, such as those that happen around Black Friday or New Year’s Eve. You may increase the number of purchases made during limited-time promotions by employing countdown timers.
Product Launches
You can make a countdown timer for the launch of a product or even a website. You can create attention and interest by beginning the countdown a few days or weeks before the launch date. This will encourage customers to subscribe to email notifications or follow your social media pages for updates.
Registration for events
A timer counter can be useful for promoting events and boosting registration. You can create a sense of urgency and encourage customers to register before it’s too late by highlighting the number of days or hours until the event.
Why Should Combination for Labor Day?
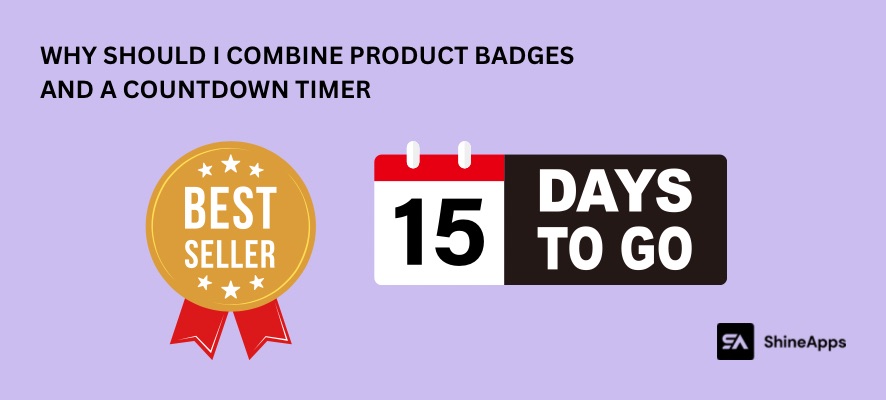
The combination of Product Badges and Countdown Timer is a way to boost sales of the product you want to push for a limited time. For example, you can choose some product badges like “Best Seller” or “Most Picked” and then set up a promotion countdown timer from one to three days to encourage the limited time for sale.
Use Product Badges In Your Store on Labor Day
It’s important to choose the right third-party app for your marketing campaign among the many options available on Shopify. In this blog, we suggest using Product Labels – ShineTrust.
Step 1 – Find and install the app Product Labels – ShineTrust in your online store.
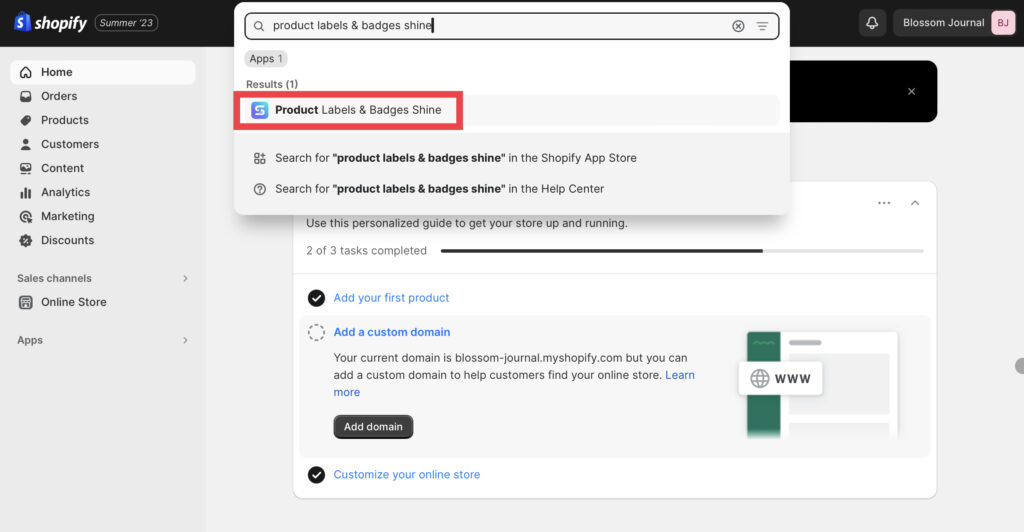
Step 2 – Enter your store name or URL link for your store.
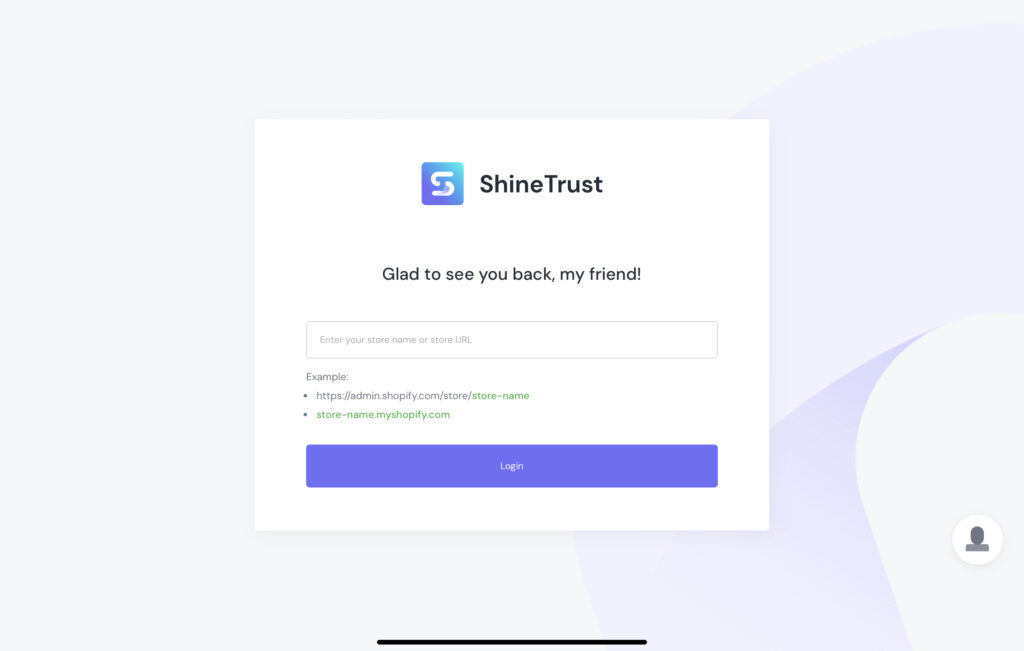
Step 3 – After going to the Dashboard, turn on the Product Badge
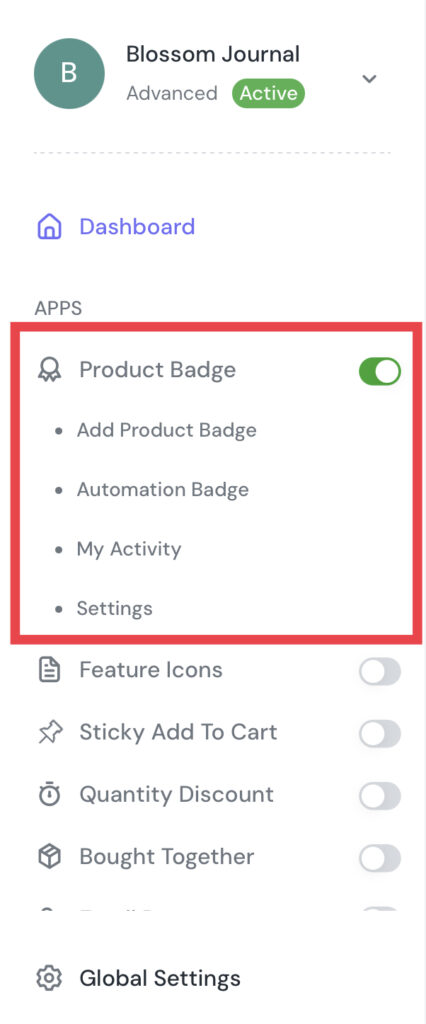
Step 4 – Then, click on the Product Badge, after that, choose Add Product Badge to start.
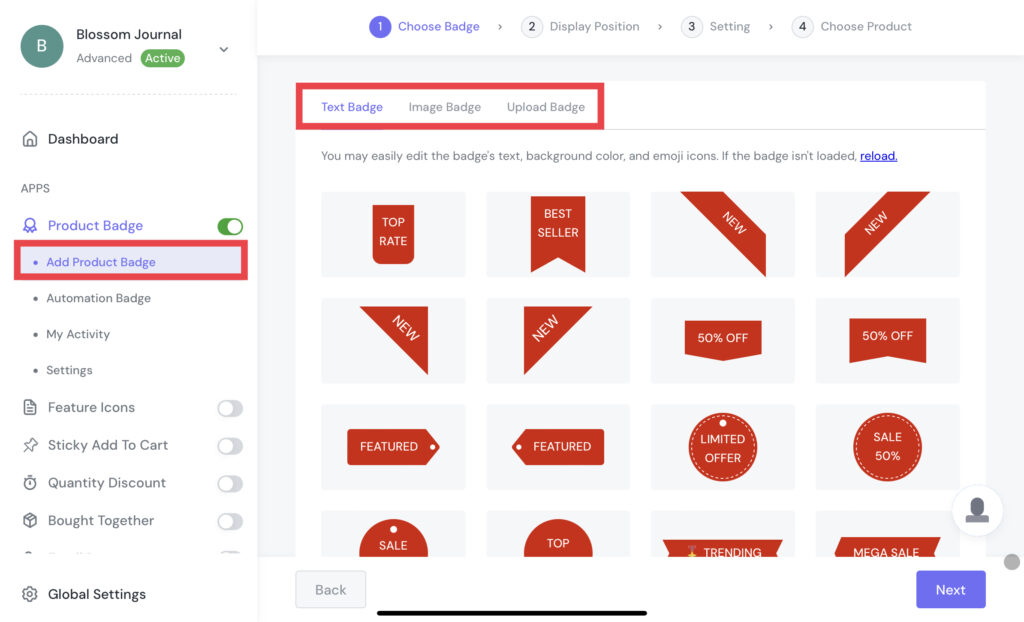
There are three types of badges: Text Badge, Image Badge, and Upload Badge.
Text Badge – Find and choose the pre-designed “Sold Out”.
Image Badge – Among multiple image choices, you can search “Sold Out” or “Out of Stock” on the search bar to find your favorite one.
Upload Badge – You can drag files from your folder into this section. In addition, click Browse to submit your badges. The supported file types are jpg, jpeg, png, SVG, and gif.
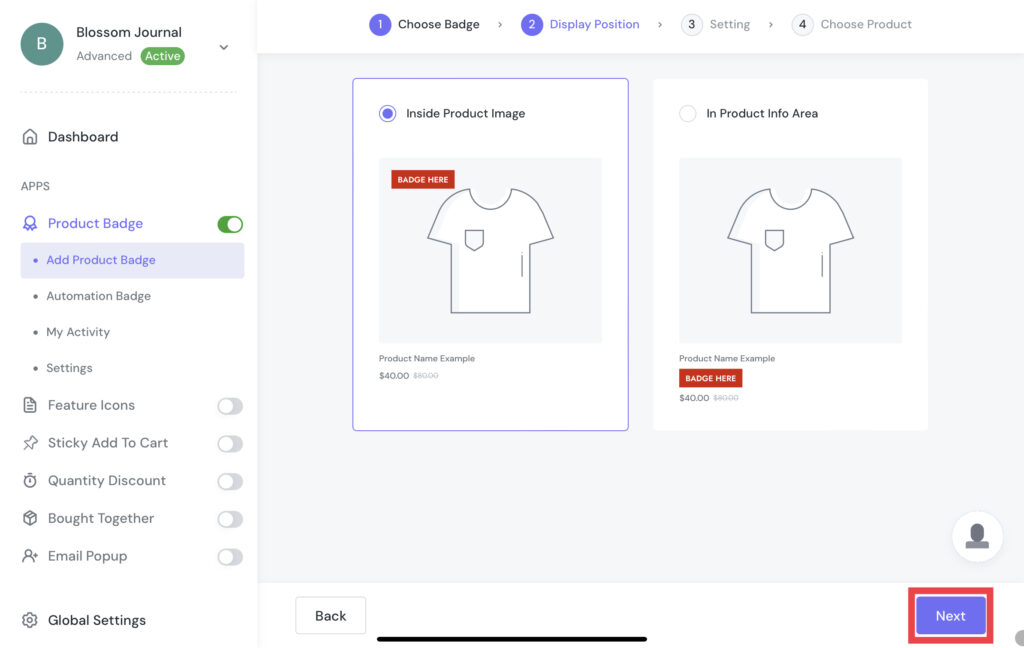
Step 5 – After choosing your favorite one, click Save to go to the Display Position choosing step. There are two positions you can choose from: Inside Product Image and In Product Info Area.
Step 6 – Now we are coming to the Setting step. In this step, you can customize your product badges based on your favorite style. This custom step can be quite different between Text Badge, Image Badge, and Upload Badge.
Note: Text Badge will have General and Advanced Setting, while Image Badge and Upload Badge don’t.
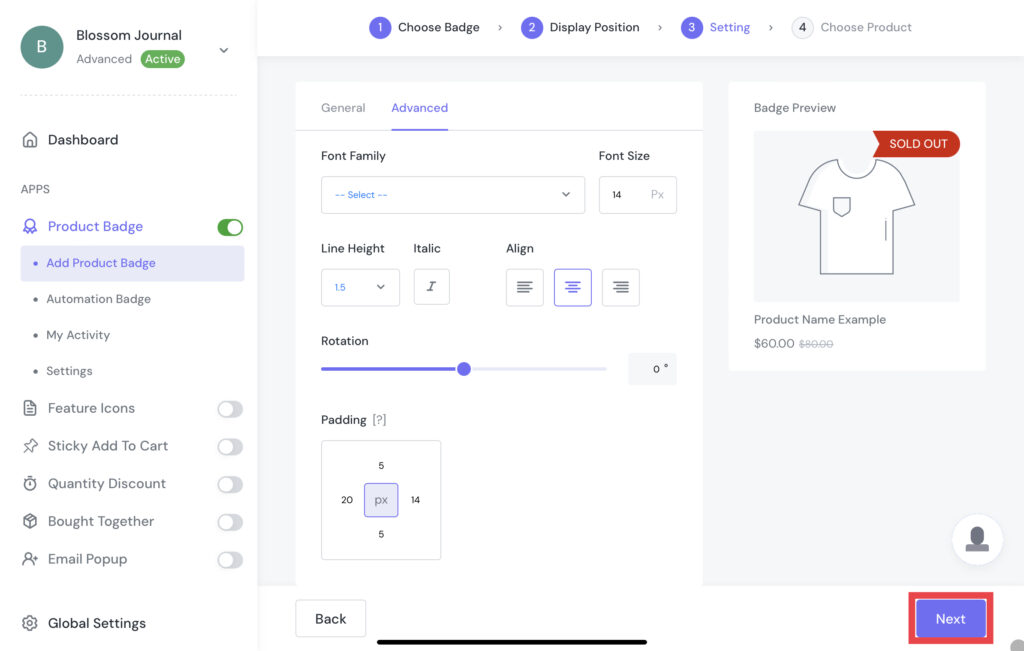
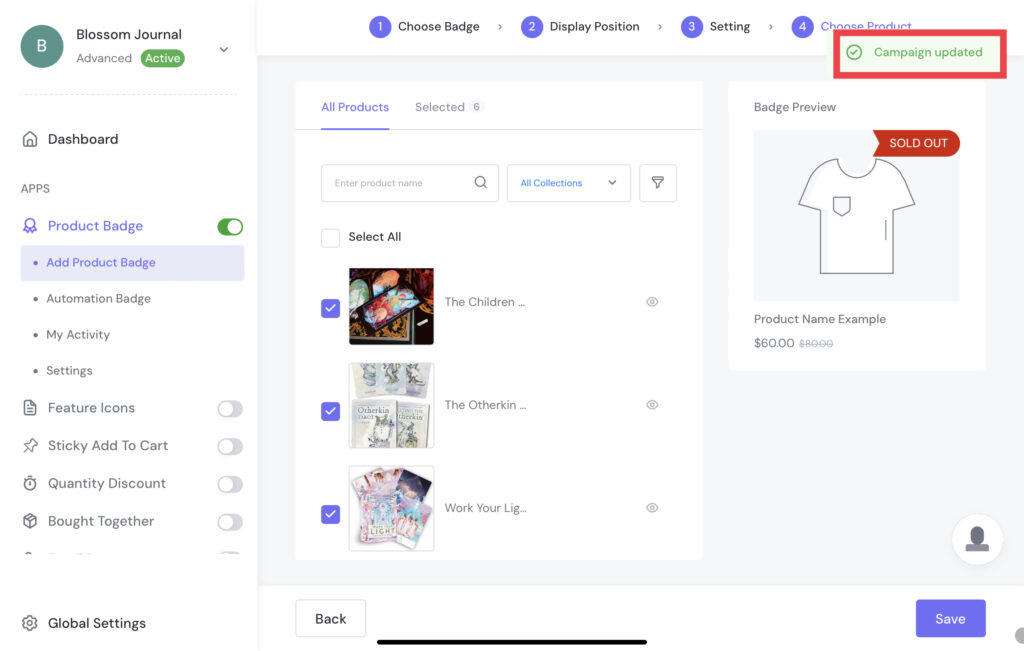
Step 7 – Click Save to go to the Choose Product step. Now, you can choose the product you want to mark with a product badge. Then, click Save to finish.
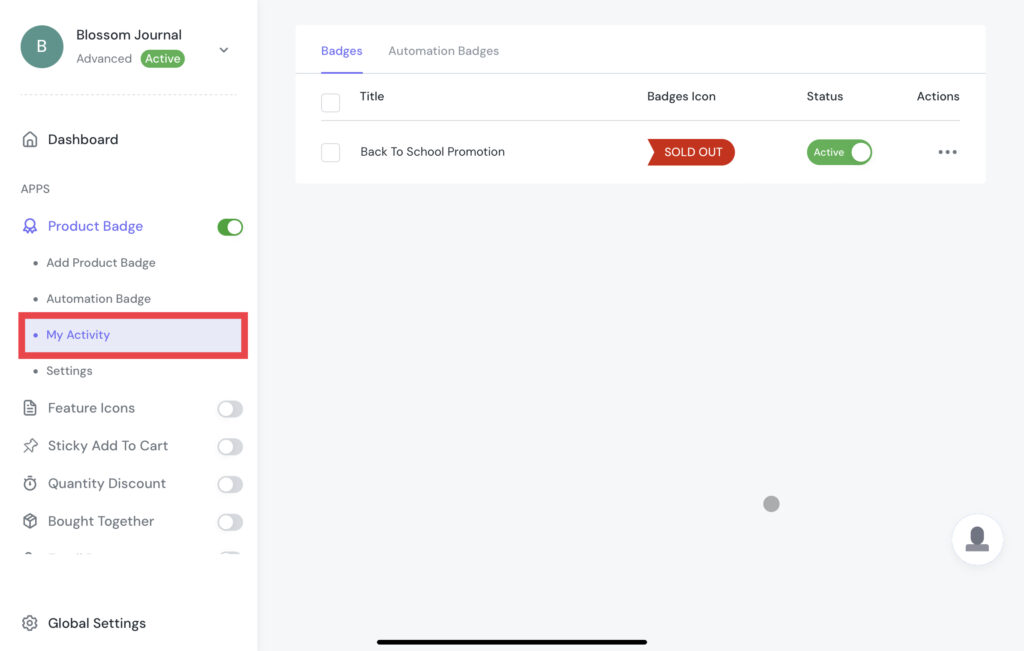
Note: You can check and edit the product badge in My Activity
Use Countdown Timer In Your Store
Step 1 – Login to the Dashboard manager, then turn on the Countdown Timer.
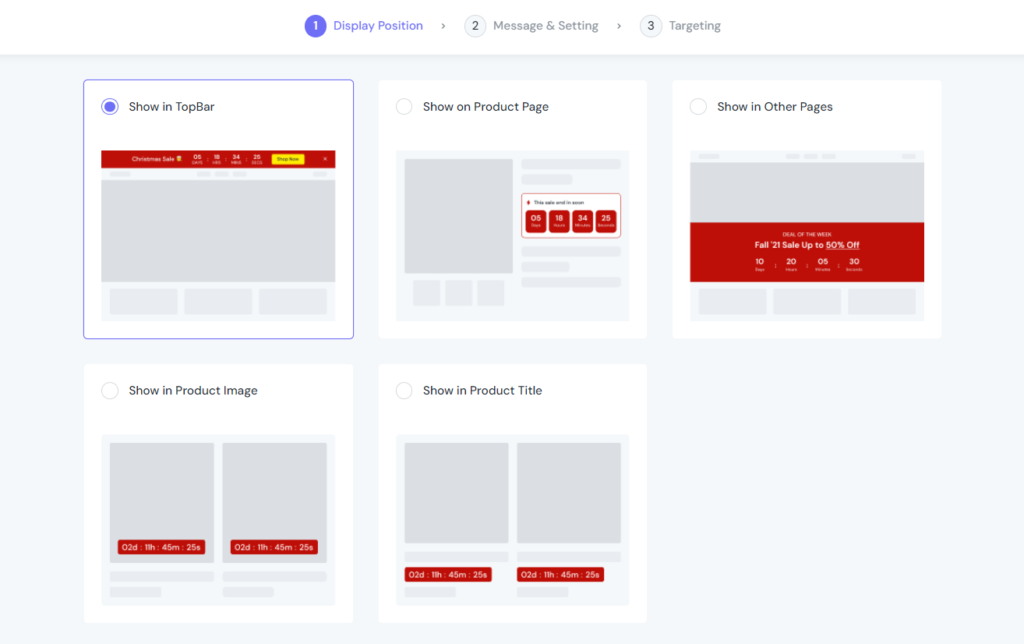
Step 2 – Select the Display Position for the Countdown Timer from the list:
- Show in Top Bar
- Show on the Product Page
- Show in Other Pages
- Show in Product Image
- Show in Product Title
In this case, we decided to show it on the top bar.
Step 3 – Edit the Message and Typography.
Configure the Message & Typography tab like this (In this case, we are creating a countdown banner for the Christmas sale campaign. So we select the red theme as the default).
You can Add a Call To Action button and choose how it will display:
- No Call To Action
- Call To Action Button
- Simple Link
- Make Entire Bar Clickable
Whatever you select, you then have to configure the look and feel individually.
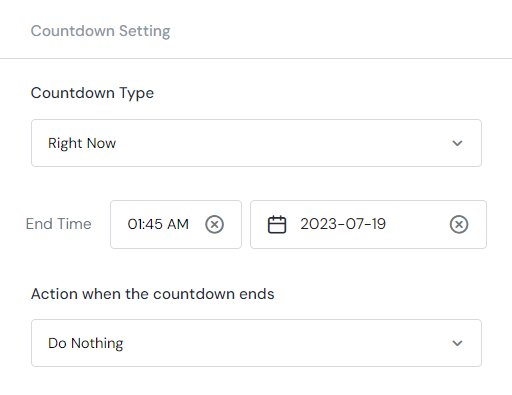
Then, move to the Countdown Setting section
You can choose from 3 Countdown types, including:
- Right Now
- Definite Time
- Fixed Time Per Visitor
In this case, we select the Right Now option and set the End Time as above. Then, go set up Action when the countdown ends. We selected Do Nothing instead of Repeat It or Hide the Bar.
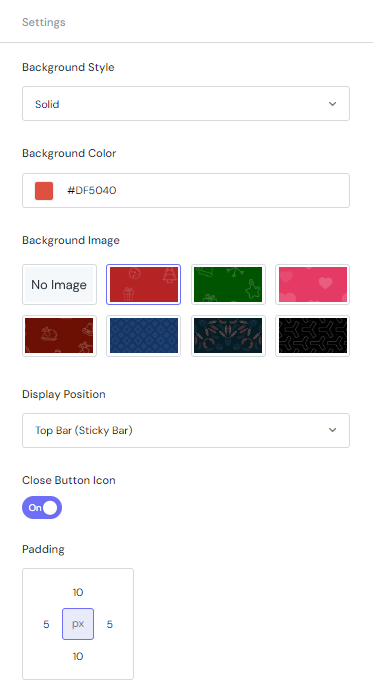
Next, define the look of the countdown bar with the settings of Background Style, Background Style, Background Color, Background Image, Display Position, Close Button Icon, Padding, etc.
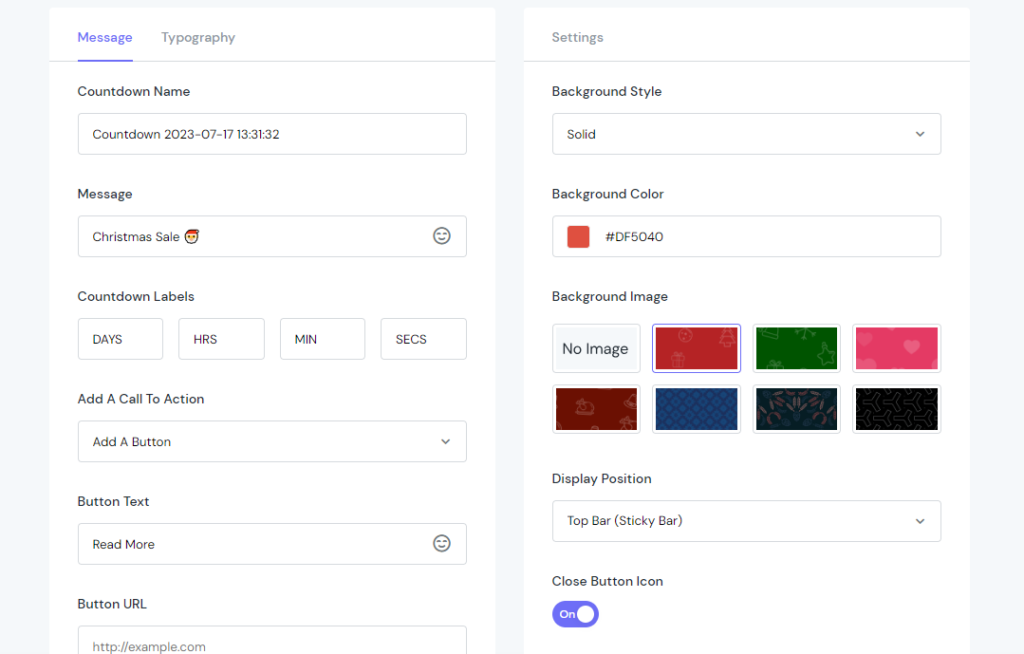
Step 4 – Choose the page target.
After finishing all the settings, decide where to put your countdown.
In the Show On Page field, select Include to include the pages listed inside the dropdown list on the right. Otherwise, select Exclude to not show the countdown on the selected pages.
Finally, in the Show On Device section, define which device the countdown will be displayed on. You can choose from Desktop, Mobile or both.
Okay, time to see how the countdown looks in the front
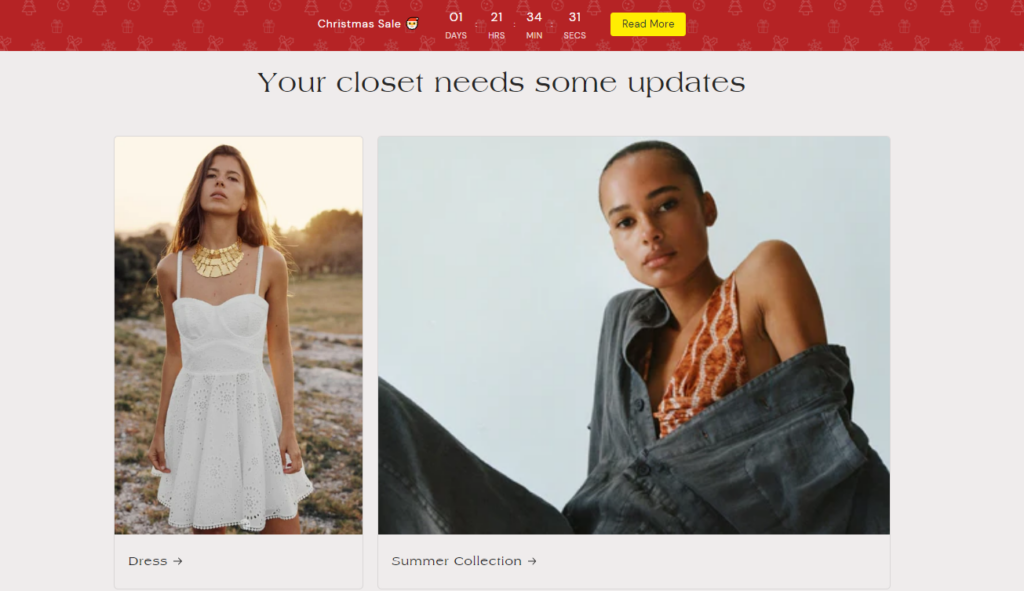
Step 5 – Check and review again.
Note: You can check and edit the product badge in My Activity. On the other hand, in case you can’t imagine these steps, check out the video guide.
In Conclusion
There are many strategies to boost sales. This is one of our suggestions for you to optimize your online website during the Labor Day three-day weekend to increase sales and traffic during the holiday time!


