

1. What is Shopify Email Popup?
A Shopify Email Popup in Shopify is a tiny window that shows on a website for an online store to request email addresses from visitors. Stores can do this to get prospective consumers’ contact information.
Shopify Email popups can significantly affect marketing tactics like cross-selling and up-selling. Stores can give customers personalized offers for relevant products when they exchange their email addresses. For instance, the retailer may contact a customer who purchases a shirt with suggestions for matching pants. Customers may purchase more goods as a result of this.
2. How to create a Shopify Email Popup?
2.1 Using Code
Step 1: To show the content inside the popup, we will extract it from the page you generate. The handle of the page will be used by the HTML code. The page handle for the Popup Content page that we established in the example below.
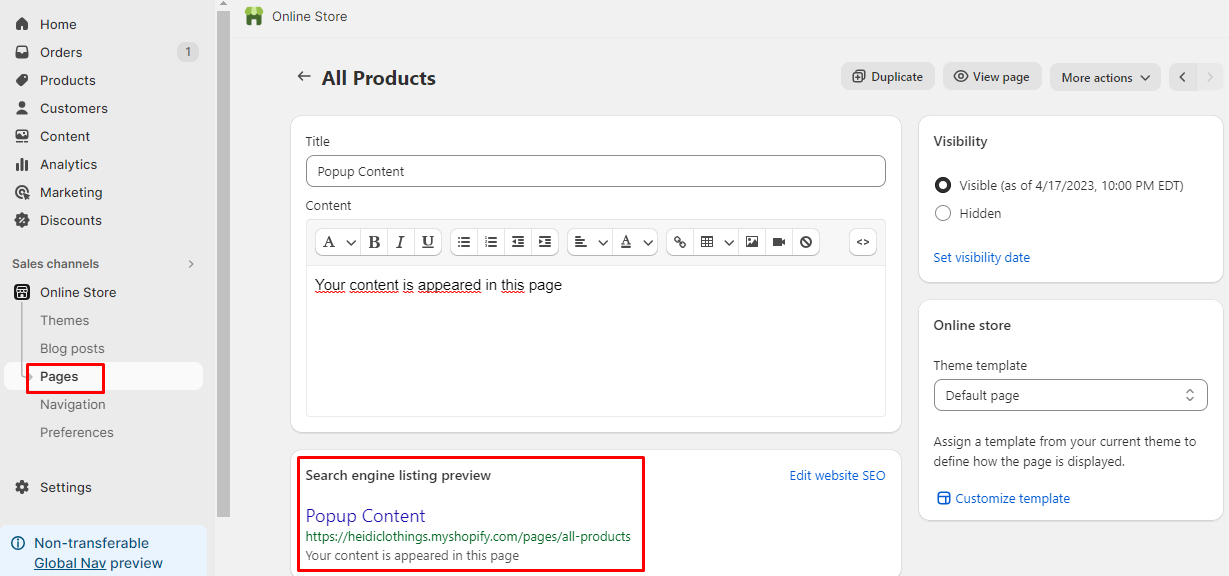
Step 2: Add the HTML code
At this point, you need to understand a little bit of coding and your theme layout. Since the popup only shows clickable text, it must be placed in the proper place.
In the code editor of your Shopify theme, locate the spot where the clickable text will go, and then paste the following code there. Remember to make any necessary adjustments to the text and handling.
<div class=”popup-wrapper”>
<div class=”popup-content”>
<!– Your popup content here –>
</div>
</div>
Step 3: Add JavaScript to your theme if your popup needs interactive features, such as the ability to close it. Include the following code in your “theme.liquid” or other suitable file.
<div class=”popup-wrapper”>
<div class=”popup-content”>
<!– Your popup content here –>
<button id=”popup-close-btn”>Close</button>
</div>
</div>
<script>
// JavaScript to close the popup
document.getElementById(“popup-close-btn”).addEventListener(“click”, function() {
document.querySelector(“.popup-wrapper”).style.display = “none”; });
</script>
Step 4: Add Code in Theme.css
You can apply CSS styles to the theme.css file to alter the popup’s look. Here is an illustration of how to style the popup’s content and wrapper:
/* Style for the popup wrapper */
.popup-wrapper {
display: none;
position: fixed;
top: 0;
left: 0;
width: 100%;
height: 100%;
background-color: rgba(0, 0, 0, 0.5);
z-index: 9999;}
/* Style for the popup content */
.popup-content {
background-color: #fff;
padding: 20px;
border-radius: 5px;
box-shadow: 0px 2px 5px rgba(0, 0, 0, 0.3);}
/* Style for the close button */
#popup-close-btn {background-color: #333;
color: #fff;
border: none;
padding: 8px 16px;
border-radius: 5px;
cursor: pointer;}
2.2. 3rd app
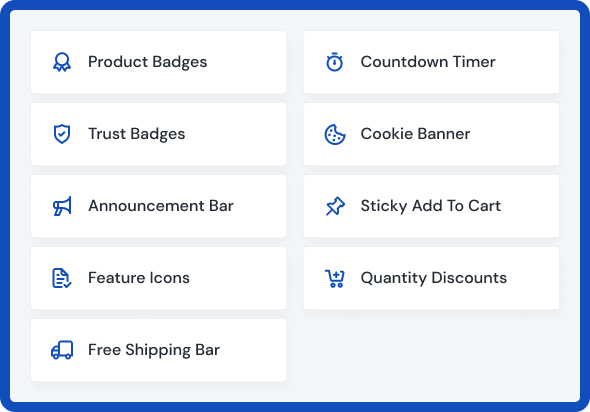
To do it in a simpler way without using complicated code, you can use a third application. This is one of the super convenient apps that combine a full set of marketing features, such as Shinetrust, is this Email Popup application. You can follow the steps below to install it.
Step 1: Install Email Popup in the Shopify
Step 2: Active Email Popup in the sidebar -> Add Email Popup
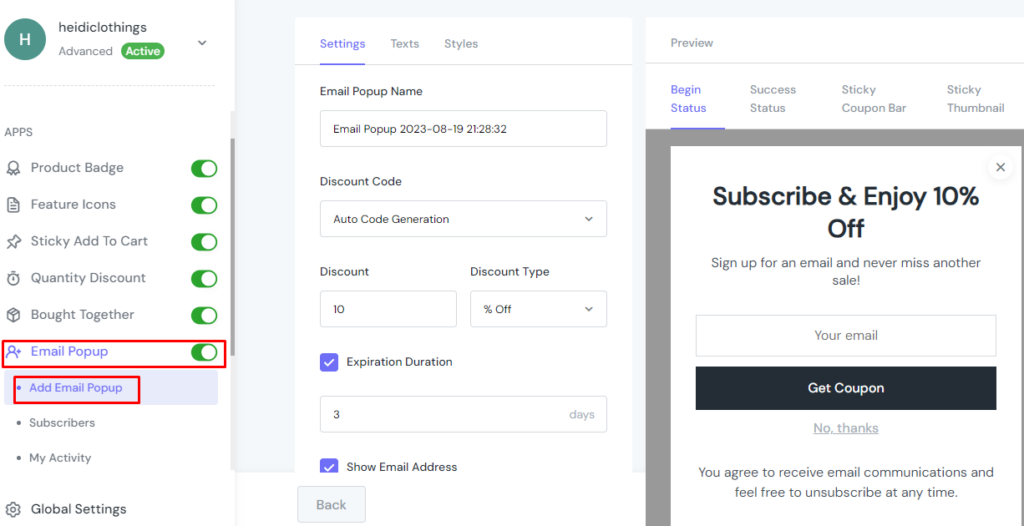
With its extensive set of parameters, Email Popup enables you to precisely control the display of the message for the highest conversion rate. To view an element’s parameters, select the element in the layout:
- Settings
- Texts tab
- Styles tab
- Behaviour Setting
SETTINGS
Step 1: In the Settings section, you can specify the Popup’s name.
In the Discount Code field, I decide to select the Auto Code Generation from the dropdown list..
In the Discount column, specify the amount by which you want to discount for your clients. In this field, we provide a 10% discount for each product
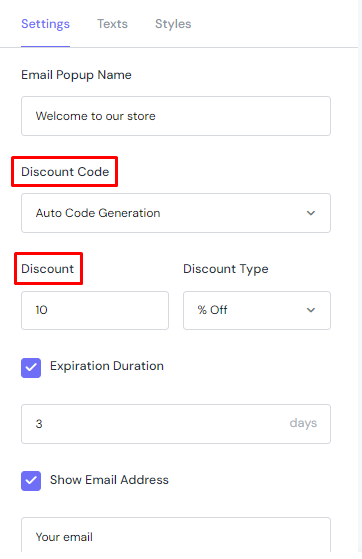
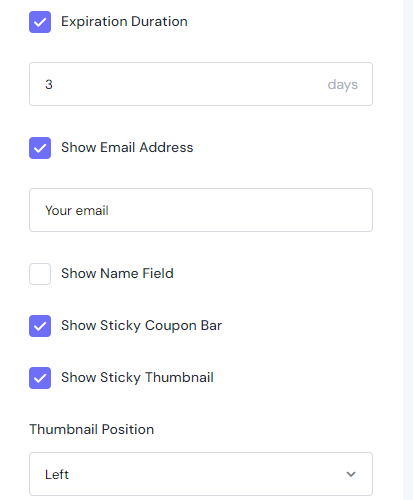
Step 2: In the Expiration Duration field, you can choose between 3-5 days, depending on the campaign for your product. You completely test in that period and evaluate its quality, you can fully adjust after evaluating the quality.
You can tick the checkboxes and keep the default configuration of other settings.
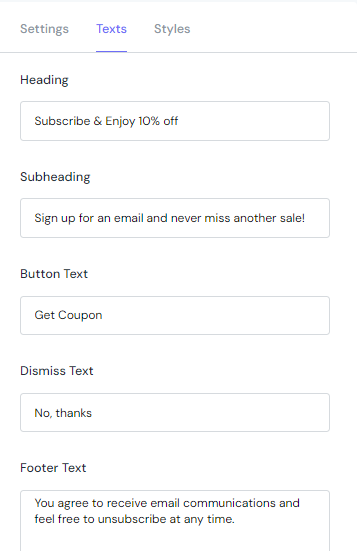
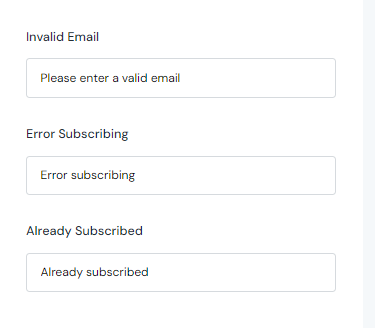
TEXT TAB
You may set up Headings, Subheadings, Button Text, Dismiss Text, Footer Text, and other options similar to the sample I’ve shown below.
Also, you have the option to customize the text and display every stage, including Begin Status, Success Status, Sticky Coupon Bar, and Sticky Thumbnail.
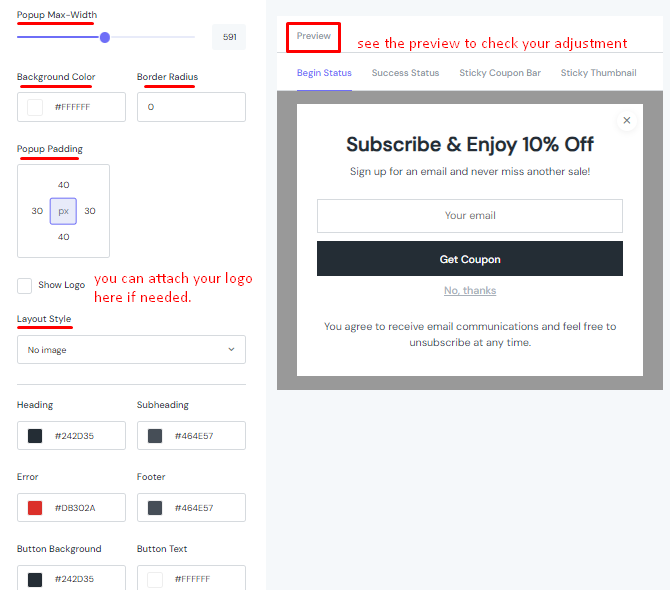
STYLES TAB
The maximum width of your popup is the size displayed in the storefront. You can adjust accordingly and review in the Preview section.
The Styles tab offers the same functionality, allowing you to individually customize each Status’ settings.
BEHAVIOR SETTINGS
In the behavior setting, show Popup after 3 seconds and reopen it after 3 minutes to make sure the popup floats anytime they navigate down the website by checking the Show the Sticky Thumbnail box.
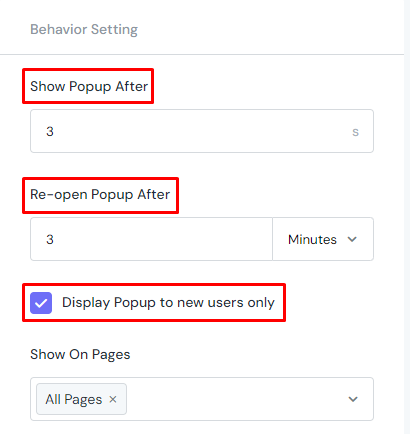
Select the Show Sticky Coupon Bar checkbox to alert customers to the code.
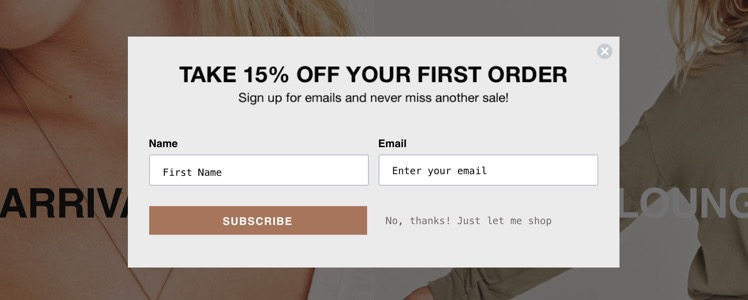
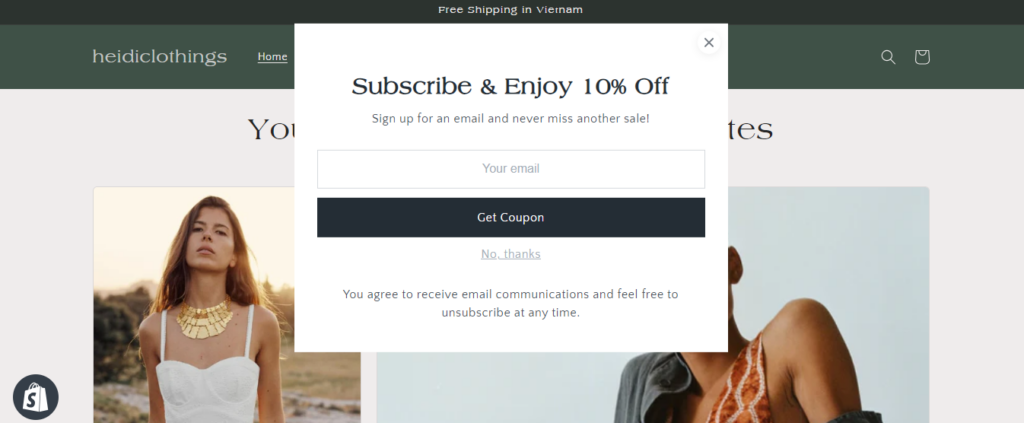
Then, click Save and Publish. The popup appears like this on the front.
FINAL WORDS
We trust that you now understand how to add an email popup to your Shopify store. Feel free to experiment with the recommended tools to create your own popup designs and increase conversions!

