

When customers visit your Shopify product page, one of the most important variables that impacts them is the product media. It boosts your clients’ trust in the value of your items by giving them a greater understanding of the use and size of an item.
How Many Types Of Product Media
There are three types of product media that you can use on your Shopify product page: images, 3D models, and videos. To display videos or 3D models on product pages, your online store needs to use a theme that supports the media that you want to add. While every theme allows you to add images to your products.
The media you include for your products needs to be of a high standard and follow the necessary standards for them to be displayed effectively. The standards for product media will be explained more clearly in the parts below.
Images
In every one of Shopify’s sales channels, including your online store and Shopify POS, product photos can be used to display products. The best file type for most product images is PNG, followed by JPEG. Other accepted file types are PSD, TIFF, BMP, GIF, SVG, HEIC, and WebP.
Shopify’s images automatically display an image in the optimum format after determining which image types are supported by the user’s web browser. All themes for online stores allow you to add photographs, although the exact images displayed on your site will differ depending on the theme.
Your product and collection images can be any size up to 4472 x 4472 pixels, or 20 megapixels. Product and collection images need to have a file size smaller than 20 MB to be added to Shopify. High-resolution photos look more polished and professional to your customers. For square product images, a size of 2048 x 2048 pixels usually looks best.
If you want to learn more about how to set up and take product photos by yourself, let’s see a suggestion from Shopify: Perfect Product Photography: Craft a Perfect Setup in 2023
Different sizes are automatically generated when you add an image for use in different places based on the theme of your online store.
When a customer wants to look at a product in-depth on the product detail page, for example, a large version of the product image can be used. On the collection templates, where a larger resolution is not required, a smaller version of the same image may be used.

Tips:
1 – On Shopify collection pages, product photos displayed alongside each other have different sizes. Use the same aspect ratio (height to width) for every image you add as your featured or main image to make them appear to be the same size.
2 – Ideally, here are some tips for an effective image collection for uploading on the Shopify product page:
- The main product should have a pure white background. not be blurry or a representation of the product being sold. The product should take up 85% or even more of the image area.
- Secondary images, props, backgrounds, text, graphics, logos, and close-ups are all permitted in your additional “other view” images, so this is your chance to get creative and build your branding.
- You should show your products from any angle where you think your customers will consider the design, material, or dimensions of items. If you have cool packaging, you should show it too.
- You should shoot 2-3 lifestyle images to show the product in action. It allows shoppers to visualise the product in their own lives and form more of an emotional connection to it.
- Remember to show your product in the best light, optimise your images for mobile, and make adjustments as needed, for example, change the lifestyle image to match the occasion.
3D Models
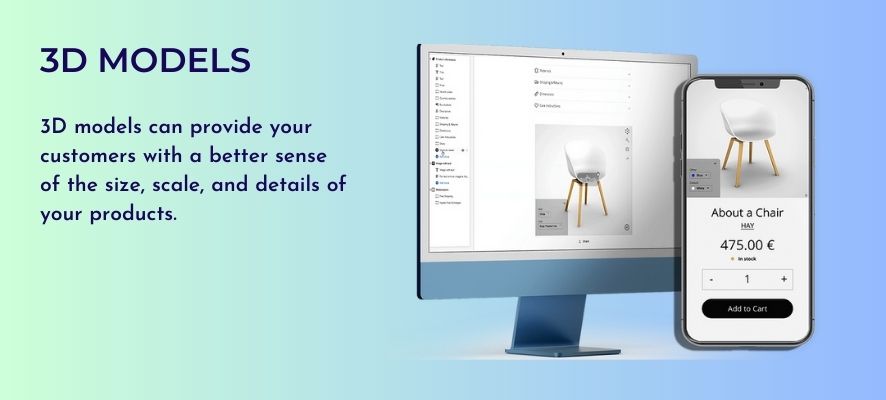
3D models are virtual representations of an object in three dimensions. 3D models can provide your customers with a better sense of the size, scale, and details of your products.
The most important benefit of using a 3D model is that it helps customers view the object from any angle. That’s the reason why you need to make sure that your 3D model files meet the following requirements before you add them to your Shopify online store: file size up to 500 MB and file type: GLB, USDZ.
Tips:
You can hire a Shopify expert to help you create quality 3D models to display your products.
Video
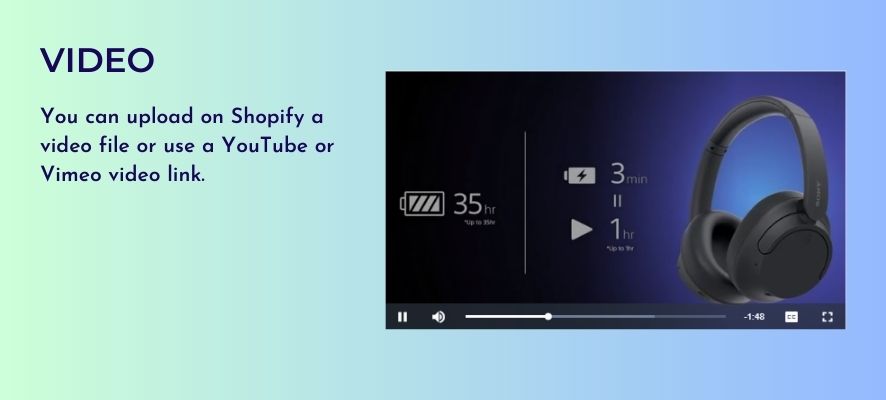
You have two options for uploading videos on your Shopify product page: either upload a video file or use a YouTube or Vimeo video link.
If you’re uploading video files, then make sure that they meet the following requirements:
- Video length: Up to 10 minutes
- Video size: Up to 1 GB
- Video resolution: Up to 4K (4096 x 2160 px)
- Video file type: .mp4 or .mov
On the other hand, if you choose to embed videos from Youtube or Vimeo, you do not need to meet the above requirements. However, the URL different from YouTube and Vimeo is not supported. And the quality of the video is dependent on the viewer’s connection speed.
Custom Product Media By Using Metafields
If you want to customise the way that product media are displayed in your online store, then you can use Metafields to create a file reference Metafield for your products.
File reference Metafields allow you to submit any form of file for your customers to download, including photographs to display your products. On your online store, Metafields can show JPEG, PNG, WEBP, SVG, HEIC, or GIF images. A Metafield can contain only one file at a time.
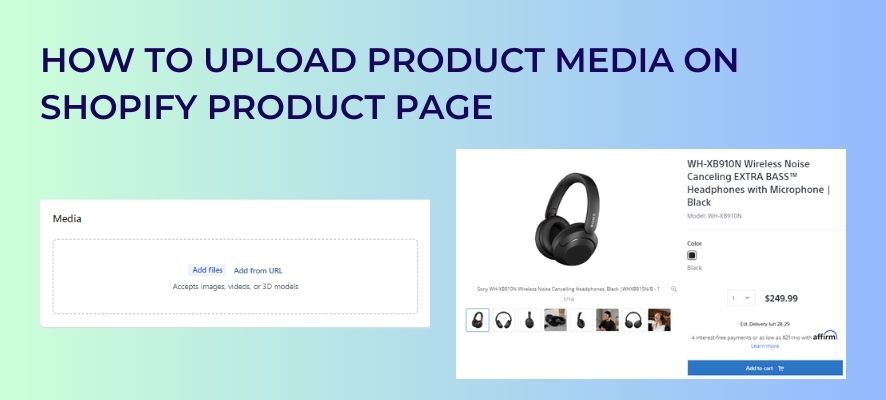
How To Upload Product Media On Shopify Product Page
A product can have up to 250 photos, 3D models, or videos. The highlight, or primary, media item is the main media item for each product. On Shopify collection pages, cart pages, checkout pages, and your homepage, the main media item is displayed.
Tips: You can’t prevent people from saving your on-screen images, but you can use an app from the Shopify App Store to add a watermark.
Add Media To Your Shopify Product Page
On Desktop:
Step 1 – From your Shopify admin, go to Products.
Step 2 – Click a product to see its details page.
Step 3 – Add an image, 3D model, or video in one of the following ways:
- Click Add, and then select the file that you want to upload.
- Drag and drop the file that you want to upload onto the Media section.
- Click Add media from the URL, and then enter the image URL, or video URL of the product hosted on YouTube or Vimeo.
On Mobile:
Step 1 – From the Shopify app, go to Products > All Products.
Step 2 – From the All Products screen, tap a product.
Step 3 – From the product details screen, under Media, tap +.
Step 4 – Select one of the following options:
- Camera: Take a photo or video of the product in the ideal aspect ratio.
- Embed video from the URL: Add a video of the product hosted on YouTube or Vimeo.
- Import from Files app: Add an existing product file from another source.
Step 5 – After you’ve selected the media, tap Done.
Step 6 – Go back to the product details page and tap Save.
Add An Image To A New Variant
Step 1 – From your Shopify admin, go to Products.
Step 2 – Click the name of the product that you want to edit.
Step 3 – In the Variants section, click Add Variant.
Step 4 – While creating the variant, click Add image on the variant details page.
Step 5 – Select a product image or click Add File to add a new image.
Step 6 – Click Done.
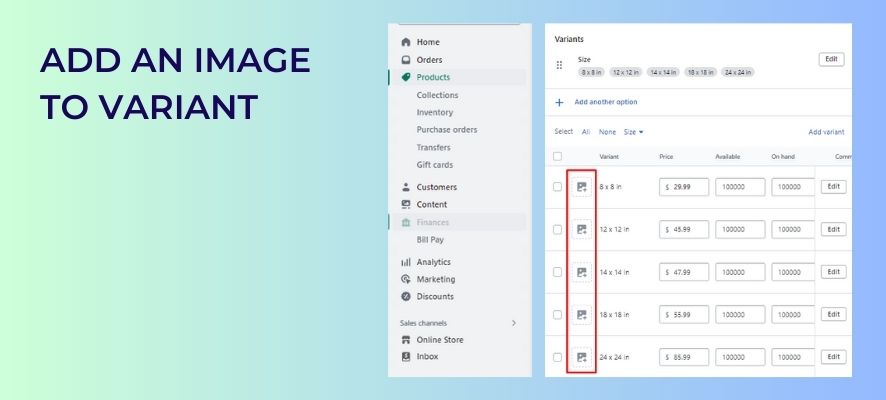
Add An Image To Existing Variant
On Desktop:
Step 1 – From your Shopify admin, go to Products.
Step 2 – Click the name of the product that you want to edit.
Step 3 – In the Variants section, click the image icon to assign an image to that variant.
Step 4 – Select a product image or click Add image to upload a new image.
Step 5 – Click You can also add variant images as a bulk action by selecting multiple variants on the product page.
Note: You can also add variant images as a bulk action by selecting multiple variants on the product page.
On Mobile:
Step 1 – From the Products tab, tap the name of the product that you want to edit.
Step 2 – In the Variants section, tap the variant that you want to edit.
Step 3 – In the Variant Media section, tap + to select an image.
Step 4 – Select a product image and then tap Done.
Note: You can only add one image per variant. To select an image for a variant, you need to add it to the product first.
Delete Media In Bulk
You can delete one or more media items from a product by using a bulk action.
Step 1 – From your Shopify admin, go to Products.
Step 2 – Click a product to see its details page.
Step 3 – Under Media, check the media items that you want to delete.
Step 4 – Click Delete media.
Step 5 – Click Save
Optimise Website’s SEO By Adding Alt Text To Media
Alt (alternative) text describes a media item and is an important part of a product description. Keep your alt text brief and descriptive. The maximum length is 512 characters, but 125 or less is recommended.

On Mobile:
Step 1 – From your Shopify admin, go to Products.
Step 2 – Click the name of the product that you want to edit.
Step 3 – From the product details page, click a product media item to see the Preview media page.
Step 4 – Click Add alt text.
Step 5 – Enter your alt text, and then click Save alt text.
Step 6 – Click the X to exit the preview page.
On iOS:
Step 1 – From the Shopify app, go to Products > All Products.
Step 2 – From the Products screen, tap a product.
Step 3 – From the product details screen, tap a product media item to see its Preview screen.
Step 4 – Tap the … button, and then tap Add alt text.
Step 5 – Enter your alt text, and then tap Save alt text.
Step 6 – Tap the X to return to the Preview screen.
On Android:
Step 1 – From the Shopify app, go to Products > All Products.
Step 2 – From the Products screen, tap a product.
Step 3 – From the product details screen, tap a product media item to see its Preview screen.
Step 4 – Tap the ⋮ button, and then tap Edit alt text.
Step 5 – Enter your alt text, and then tap Save.
Step 6 – Tap the back arrow to return to the product details screen.
Step 7 – Tap the checkmark to save your product.
In Conclusion
Product Media on your Shopify product page is one of the most important because it is the first thing your customer sees to determine whether they are interested in your products or not. In our opinion, if you can combine types of media, for example, image and video, it will bring more trust from your customers to your product quality and how it is imagined.

