To help customers understand what is available and save time while shopping, it must be clear and simple to find. A Shopify collection that satisfies these objectives can increase sales and improve customers’ online shopping experiences for a variety of reasons.
What Is Shopify Collection?
Shopify Collection is a product-specific organization tool. It allows you to group your products into categories and helps customers easily find what they are looking for in your online store.
You can group your collections in multiple ways, depending on the Shopify store you run. However, it will be better if you group your products into categories. Some examples of Shopify collections that you can refer to are:
- Gender, for example, gifts for her, gifts for mom, or gifts for dad
- Item type, for example, canvas and tumbler
- Colour, Style or Size
- Seasons and Holiday, for example, summer or Christmas collection
- Items that are on sale
- Favorite, for example, camping and horse racing

Put yourself in your customer’s position while creating a Shopify collection, and try to imagine how they might wish to look through your products. Collections perform the same purpose for your eCommerce business as the various sections do for an offline shop to organize products.
How To Add A Collection On Shopify
Add A Collection On Shopify
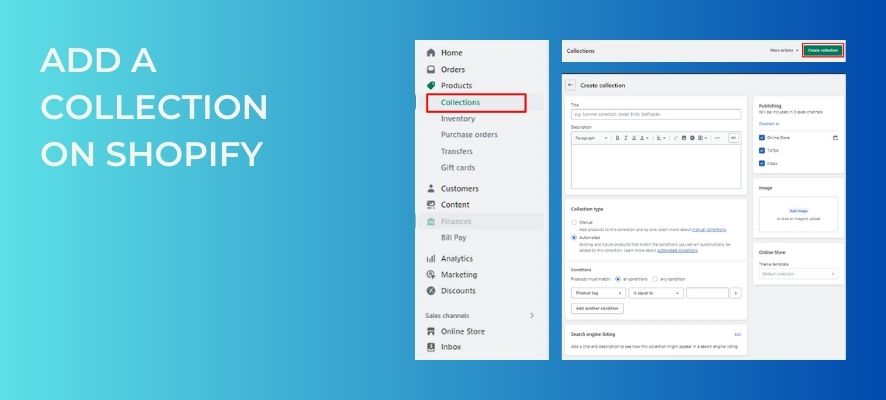
Step 1 – You can create or see all your collections by clicking Products > Collections
Step 2 – Choose Create Collection
Step 3 – Enter Title, Description
Step 4 – Choose Collection Type (Manual or Automated)
Step 5 – Pick Publishing
Step 6 – Add Image, Online store and Search Engine Listing (optional)
Step 7 – Click Save
Type Of Shopify Collection
The two types of collections in Shopify are manual collections and automated collections.
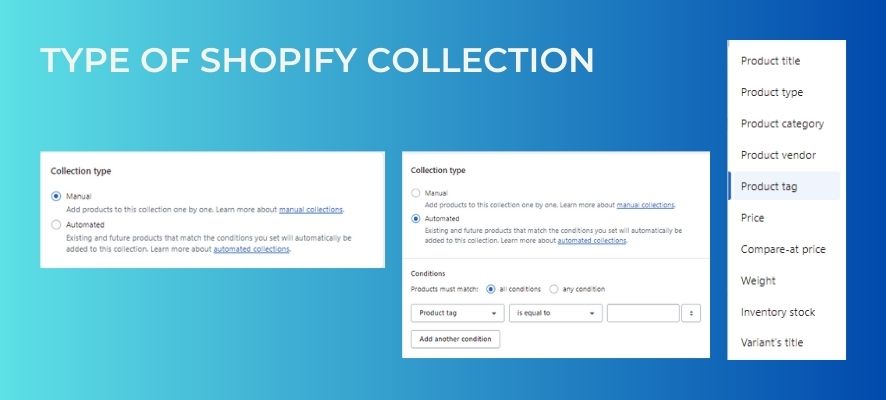
You must manually add each product to the collection when using the manual Shopify collection. In order to do this, you must go through all of your products, choose each one, and then add it to the collection. Additionally, as you can expect, this can take a lot of time, making it the least flexible option. If your store just sells a few items that don’t change frequently, it’s a good choice.
You can set collection requirements for automated Shopify collections that describe which products should be included in the collection. A product will be added automatically if it fits those requirements. As of writing this post, the Shopify collection conditions you can use are:
- Product title
- Product type
- Product vendor
- Product price
- Product tag
- Compare at price
- Weight Stock
- Variant title
Up to 60 Shopify collection conditions can be combined to create custom collections. If you have a lot of products that are constantly changing, an automated Shopify collection is going to work best for you.
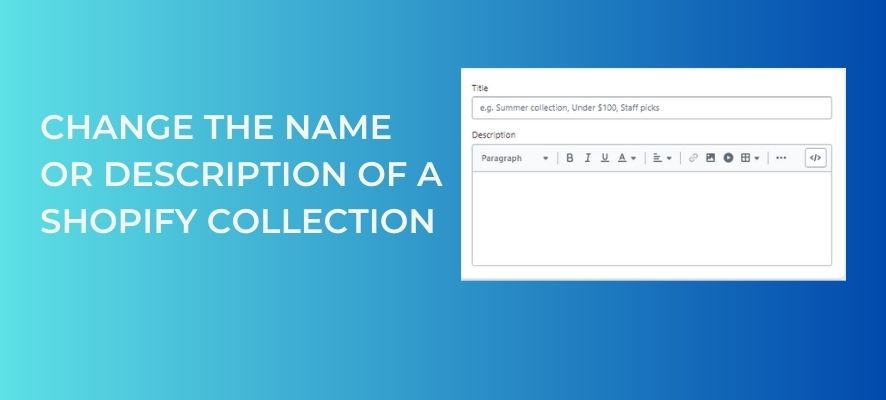
Change The Name Or Description Of A Shopify Collection
On Desktop:
Step 1 – From your Shopify admin, go to Products > Collections.
Step 2 – Click the name of the collection that you want to update.
Step 3 – On the collection details page, enter a new title or a new description.
Step 4 – Click Save.
On iOS:
Step 1 – From the Shopify app, go to Products > Collections.
Step 2 – Tap the collection that you want to edit.
Step 3 – Tap Edit.
Step 4 – Enter a new title or description.
Step 5 – Tap Save.
On Android:
Step 1 – From the Shopify app, go to Products > Collections.
Step 2 – Tap the collection that you want to edit.
Step 3 – Tap the pencil icon.
Step 4 – Enter a new title or description.
Step 5 – Tap the check mark to save your changes.
Add Or Change The Featured Image For A Collection

On Desktop:
Step 1 – From your Shopify admin, go to Products > Collections.
Step 2 – Click the name of the collection that you want to update.
Step 3 – Update the collection’s featured image:
- If the collection doesn’t have a featured image yet, then click Add Image to select an image.
- If you’re changing a collection’s featured image, then click Edit > Change image to select a new image.
Step 4 – Click Save.
On iOS:
Step 1 – From the Shopify app, go to Products > Collections.
Step 2 – Tap the collection that you want to edit.
Step 3 – Tap Edit.
Step 4 – If the collection already has an image, then tap it, tap the … button, and tap Delete.
Step 5 – On the collection details screen, tap the image icon to add a new image to the collection.
Step 6 – Tap Save.
On Android:
Step 1 – From the Shopify app, go to Products > Collections.
Step 2 – Tap the collection that you want to edit.
Step 3 – Tap the pencil icon to edit the collection.
Step 4 – If the collection already has an image, then tap it, tap the ⋮ button, and tap Delete.
Step 5 – On the collection details screen, tap the image icon to add a new image to the collection.
Step 6 – Tap the check mark to save your changes to the collection.
Change The Sort Order For The Products In A Collection
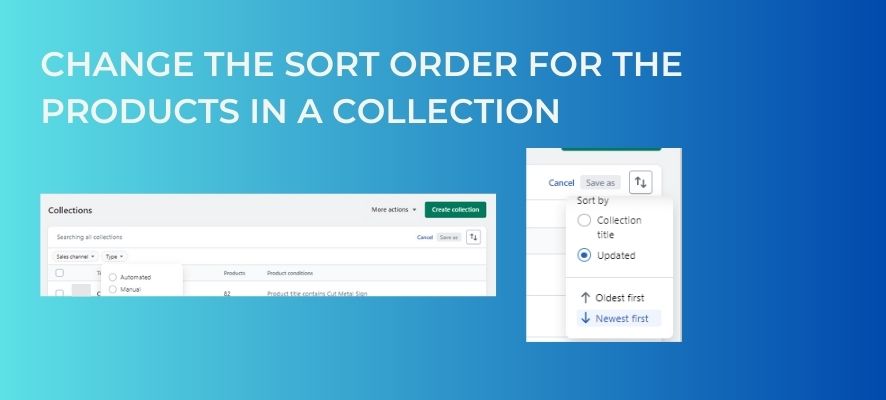
The items in a collection are displayed in the order you’ve chosen when the collection appears in an online store. By default, products are arranged alphabetically by product title.
You can select from a few sorting options:
- Best selling product, based on the all-time number of orders that include the product. If you haven’t sold any products yet, then this option sorts your products from newest to oldest.
- Product title, in alphabetical order or reverse alphabetical order.
- Highest or lowest product price.
- Newest or oldest product, based on the date that the product was created.
- Manual, based on your own preferences.
On Desktop:
Step 1 – From your Shopify admin, go to Products > Collections.
Step 2 – Click on a collection.
Step 3 – In the Products section, click the drop-down list beside Sort and then select a sort order.
Step 4 – If you select Manually, then you can click and drag the products in the list to reorder them. You can also click and select one or more products in the list. Click Move to reorder them to a specific position in the collection.
Step 5 – Click Save.
On iOS:
Step 1 – From the Shopify app, go to Products > Collections.
Step 2 – Tap the collection that you want to edit.
Step 3 – Tap Edit.
Step 4 – Tap Sorting.
Step 5 – Select the sort order that you want the collection to use.
Step 6 – If you select Manual, then you can tap and drag the handles beside the products to reorder them.
Step 7 – Tap Save.
On Android:
Step 1 – From the Shopify app, go to Products > Collections.
Step 2 – Tap the collection that you want to edit.
Step 3 – Tap the pencil icon to edit the collection.
Step 4 – Tap Sorting.
Step 5 – If you select Manually, then you can tap and drag the handles beside the products to reorder them.
Step 6 – Tap the checkmark to save your changes to the collection.
In Conclusions
In this blog post, we have given you some ways to create and organise your Shopify collection. Subscribe to us for more tips on how to use and show Shopify collections on the online Shopify theme website in the next blog posts.


