As a customer browses your Shopify store, a bar or button labelled “Add to Cart” sticks out at the top or bottom of the screen. As a result, it remains within easy reach of your customer, and they are no longer required to scroll back to the primary “Add to Cart” button, breaking their shopping focus. The user experience is improved by this function, which also supports other customer services.
Active Sticky Add To Cart

Before you can modify the details, you need to activate the toggle button in Sticky Add to Cart.
You will be redirected to the Shopify Editor page of your store. You can activate it by switching in the Shopify Editor or selecting where you want to display it on the Product Page by adding the section.
Add Sticky Add To Cart
Add Sticky Add to Cart comes with plenty of parameters, allowing you to fine-tune content’s appearance for the best possible conversion rate. Select the element in the layout to see its parameters:
- Preview
- General
- Design
- Typography
- Visibility Settings
Preview

You can preview your Sticky Add to Cart on both Desktop and Mobile, and then you can customise it with the parts that I will introduce in the next section.
General
General gives you general edits when displayed on the store:
- Sticky Add to Cart Name: Change your campaign’s name.
- Choose Themes: We give you 6 ready-to-use themes.
- Button Text: Change your button’s name.
- After Clicking Button: There are 3 options to suit your needs: Go to Checkout, Stay on Page, and Go to Cart Page.
- Button Animation: Choose how to make the button move.
- Bar Text: Change your bar’s text.
- Show Countdown Timer: Select whether to display the countdown timer or not.
- Countdown Type:
- Right Now: When customers visit your store page, they can see your Sticky Add to Cart directly.
- Definite Time: When customers visit your store page, they can see your Sticky Add to Cart for as long as they want.
- Fixed Time Per Vision: When customers visit your store page, they can see your Sticky Add to Cart according to the number of minutes you placed the order in advance.
- Action when the countdown ends: When the countdown is over, you can “Hide the bar” or “Do nothing”.
Design

You are completely free to change the display design of Sticky Add To Cart with:
- Product Padding: Edit the spacing between the product content and the bounding border.
- Bar Padding: Edit the distance between the border and the top margin of the screen.
- Product Background: Modify the background colour of the product.
- Bar Background: Modify the background colour of the bar.
- Button Border Radius: Rounds the corners of the outer border edge.
- Button Style: Choose between 2 styles ‘Solid’ and ‘Gradient’.
- Button Color: Modify the colour of the button.
- Variant Style: Choose the style of the variant.
- Variant Color: Modify the colour of the variant.
- Box Shadow: Choose to edit the following elements: Color, Horizontal, Vertical, Blur, and Spread
Typography
Typography helps you change the text display in Sticky Add to Cart:
Font Family | Choose a typeface for the core design. |
Bar | Bar Weight: Determine how bold or light your bar will appear. |
Font Size: Make your font size smaller or larger. | |
Text Color: Choose the colour for the displayed text. | |
Name | Name Weight: Determine how bold or light your name will appear. |
Font Size: Make your font size smaller or larger. | |
Text Color: Choose the colour for the displayed text. | |
Price | Price Weight: Determine how bold or light your price will appear. |
Font Size: Make your font size smaller or larger. | |
Text Color: Choose the colour for the displayed text. | |
Variant | Variant Weight: Determine how bold or light your variant will appear. |
Font Size: Make your font size smaller or larger. | |
Text Color: Choose the colour for the displayed text. | |
Button | Button Weight: Determine how bold or light your button will appear. |
Font Size: Make your font size smaller or larger. | |
Text Color: Choose the colour for the displayed text. |
Visibility Settings
Visibility Settings allows you to edit how Sticky Add To Cart is displayed across devices with:
- Display Device: Select the device you want to display.
- Desktop Content Alignment: Sets the distribution of space between and around content items.
- Desktop Position: Select the position on the desktop.
- Mobile Position: Select the mobile position.
- Desktop Settings: Select to show information about your product in Sticky Add to Cart on the desktop.
- Show Bar
- Show Product Image
- Show Price
- Show Variants
- Mobile Settings: Select to show information about your product in Sticky Add to Cart on the mobile.
- Show Bar
- Show Product Name: With mobile displays, the display space is smaller, so you can think about the problem of displaying the product name.
- Show Product Image
- Show Price
- Show Variants
Check again

After all, you should check your Feature Icons display in the store and modify them again (if need be).
Analytics
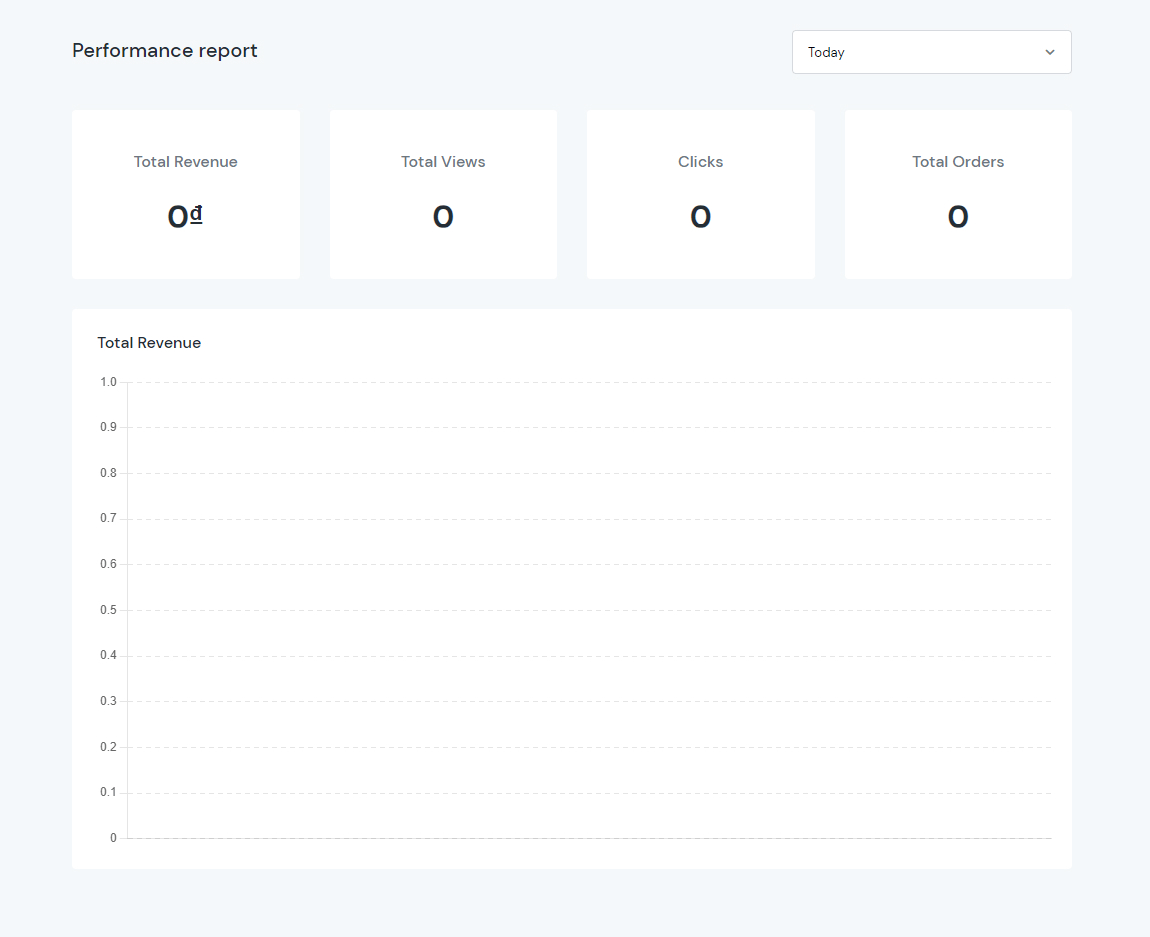
When it comes to A/B testing of any type, data is your friend. There may already be a Sticky Add to Cart on your website, but if many visitors click it without buying anything, you know there is another point of friction later in the checkout process that is driving up cart abandonment.
My Activity
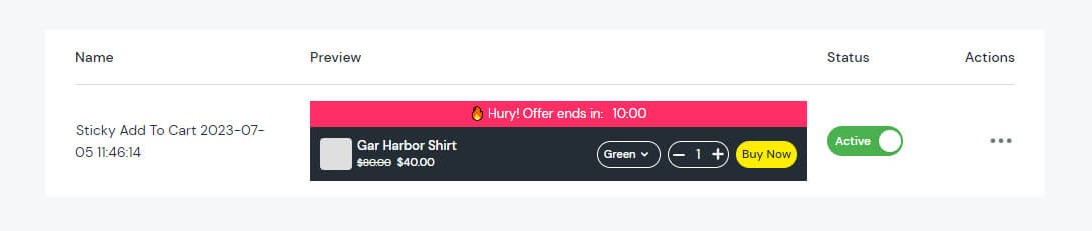
You can easily check the campaigns created at My Activity:
- Name
- Preview
- Status
- Actions
