Customizing Your Shopify Checkout Page (2023 Update)
By
Laelia
Build Store
Customizing Your Shopify Checkout Page (2023 Update)
By
Laelia
It’s recommended to keep the design simple, even though you might want to add a lot of color and interest to your Shopify checkout page. You don’t want to distract or make the content difficult to understand for your customers, who use these sites to enter shipping and payment information for their orders. Choose visuals that distract readers from the words on the page and colors with strong variety.
Note: The Customize Checkout area in the checkout settings section of the admin is hidden until after you’ve chosen a plan and created your first product.
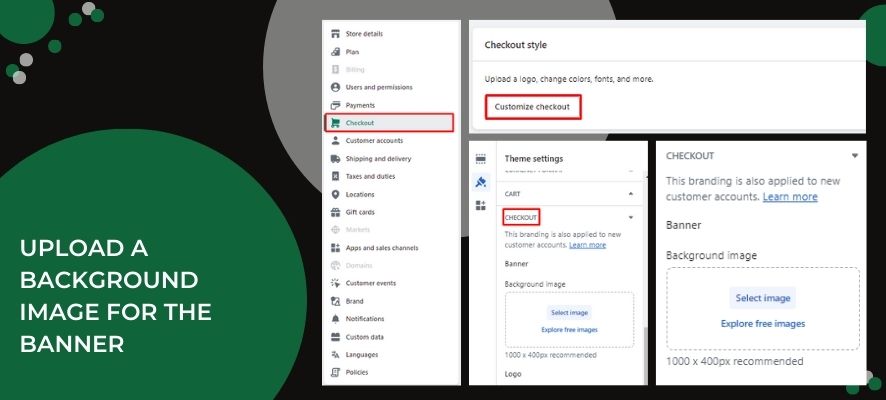
Upload A Background Image For The Banner
Your store name is displayed in a banner at the top of each checkout page. The banner’s background image can be changed. Pick an image that represents your brand.
On Desktop
Step 1 – From your Shopify admin, go to Settings > Checkout
Step 2 – In the Checkout style section, click Customize checkout to open the theme editor
Step 3 – In the theme editor, click the wet paintbrush icon to access the Theme settings
Step 4 – Click Checkout
Step 5 – In the Banner section, click Upload image, or select an image that you have already uploaded to your library
Step 6 – Click Save
On Mobile
Step 1 – From the Shopify app, go to Store > Settings
Step 2 – Under Store settings, tap Checkout
Step 3 – In the Checkout style section, click Customize checkout to open the theme editor
Step 4 – In the theme editor, click the wet paintbrush icon to access the Theme settings
Step 5 – Click Checkout
Step 6 – In the Banner section, click Upload image, or select an image that you have already uploaded to your library
Step 7 – Click Save
Add A Logo To The Shopify Checkout Page
The checkout pages allow you to include your store’s logo. The logo is placed on top of any banner images you use. On the checkout pages, you have the option to put your logo to the left, right, or centre of the banner area.
On Desktop
Step 1 – From the Shopify app, go to Store > Settings
Step 2 – In the Checkout style section, click Customize checkout to open the theme editor
Step 3 – In the theme editor, click the wet paintbrush icon to access the Theme settings
Step 4 – Click Checkout
Step 5 – In the Logo section, click Upload image, or select an image that you have already uploaded to your library
Step 6 – Select a position for the logo
Step 7 – Select a size for the logo
Step 8 – Click Save
On Mobile
Step 1 – From the Shopify app, go to Store > Settings
Step 2 – Under Store settings, tap Checkout
Step 3 – In the Checkout style section, click Customize checkout to open the theme editor
Step 4 – In the theme editor, click the wet paintbrush icon to access the Theme settings
Step 5 – Click Checkout
Step 6 – In the Logo section, click Upload image, or select an image that you have already uploaded to your library
Step 7 – Select a position for the logo
Step 8 – Select a size for the logo
Step 9 – Click Save
Add A Background Image Or Color To The Main Content Area
In the main content area of the checkout pages, you can add a background color or image. Ensure that you can still read the fields in the background, which are where your customers will enter their shipping and payment details. Both a background image and a color cannot be added.
On Desktop
Step 1 – From the Shopify app, go to Store > Settings
Step 2 – In the Checkout style section, click Customize checkout to open the theme editor
Step 3 – In the theme editor, click the wet paintbrush icon to access the Theme settings
Step 4 – Click Checkout
Step 5 – In the Main content area section, add a background color or image
If you’re adding color, then click the box beside Background color to open a color picker, then choose a color or enter a hexadecimal code
If you’re adding an image, then click Upload image, or select an image that you have already uploaded to your library. Smaller images repeat vertically and horizontally on the background, like tiles
Step 6 – Click Save
On Mobile
Step 1 – From the Shopify app, go to Store > Settings
Step 2 – Under Store settings, tap Checkout
Step 3 – In the Checkout style section, click Customize checkout to open the theme editor
Step 4 – In the theme editor, click the wet paintbrush icon to access the Theme settings
Step 5 – Click Checkout
Step 6 – In the Main content area section, add a background color or image
If you’re adding a color, then click the box beside Background color to open a color picker, then choose a color or enter a hexadecimal code
If you’re adding an image, then click Upload image, or select an image that you have already uploaded to your library. Smaller images repeat vertically and horizontally on the background, like tiles
Step 7 – Click Save
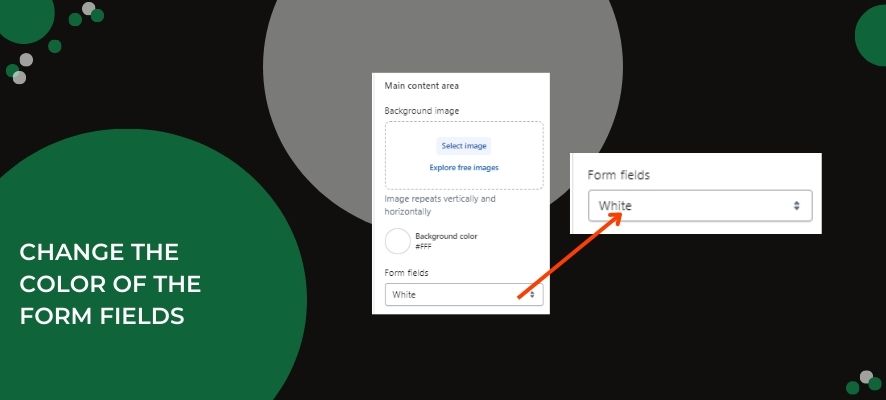
Change The Color Of The Form Fields
You may change the fields’ color to make them transparent or white. Making the fields transparent will allow images with backgrounds to show through. Ensure that you can read the content in the fields.
On Desktop
Step 1 – From the Shopify app, go to Store > Settings
Step 2 – In the Checkout style section, click Customize checkout to open the theme editor
Step 3 – In the theme editor, click the wet paintbrush icon to access the Theme settings
Step 4 – Click Checkout
Step 5 – In the Main content area section, click the Form fields drop-down to select the color you want
Step 6 – Click Save
On Mobile
Step 1 – From the Shopify app, go to Store > Settings
Step 2 – Under Store settings, tap Checkout
Step 3 – In the Checkout style section, click Customize checkout to open the theme editor
Step 4 – In the theme editor, click the wet paintbrush icon to access the Theme settings
Step 5 – Click Checkout
Step 6 – In the Main content area section, click the Form fields drop-down to select the color you want
Step 7 – Click Save
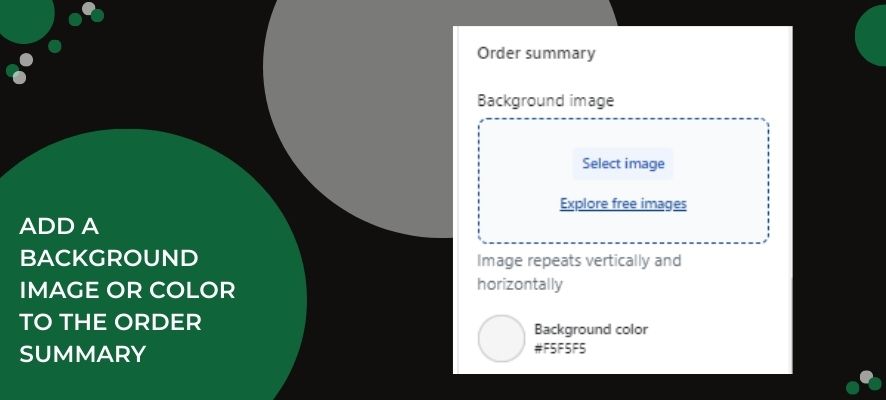
Add A Background Image Or Color To The Order Summary
A list of the items being purchased is displayed when a customer hits Show order summary on the Shopify checkout page. The order summary can have a background image or color added. Be sure to preview your selections to ensure that you are satisfied with how the order summary appears. In the theme editor, you can click Show order summary on the preview.
On Desktop
Step 1 – From the Shopify app, go to Store > Settings
Step 2 – In the Checkout style section, click Customize checkout to open the theme editor
Step 3 – In the theme editor, click the wet paintbrush icon to access the Theme settings
Step 4 – Click Checkout
Step 5 – In the Order Summary section, add a background color or image.
If you’re adding a color, then click the box beside Background color to open a color picker, then choose a color or enter a hexadecimal code.
If you’re adding an image, then click Upload image, or select an image that you have already uploaded to your library. Smaller images repeat vertically and horizontally on the background, like tiles
Step 6 – Click Save
On Mobile
Step 1 – From the Shopify app, go to Store > Settings
Step 2 – Under Store settings, tap Checkout
Step 3 – In the Checkout style section, click Customize checkout to open the theme editor
Step 4 – In the theme editor, click the wet paintbrush icon to access the Theme settings
Step 5 – Click Checkout
Step 6 – In the Order summary section, add a background color or image.
If you’re adding a color, then click the box beside Background color to open a color picker, then choose a color or enter a hexadecimal code.
If you’re adding an image, then click Upload image, or select an image that you have already uploaded to your library. Smaller images repeat vertically and horizontally on the background, like tiles
Step 7 – Click Save
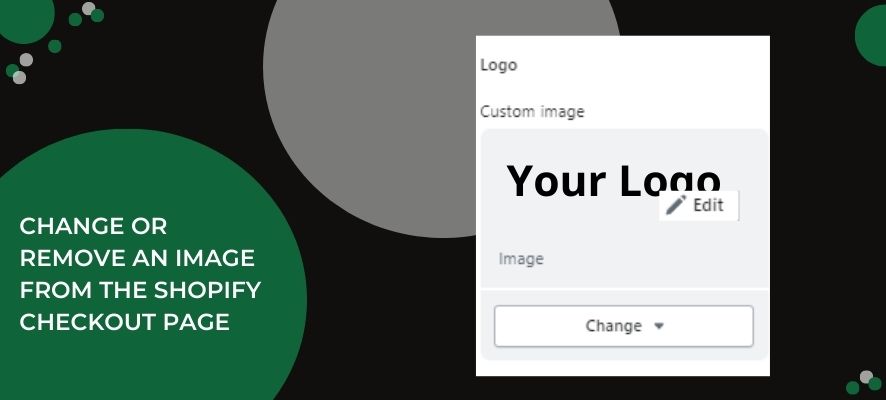
Change Or Remove An Image From The Shopify Checkout Page
On the Shopify checkout page, you can easily change or remove any images that you have added before.
Note: Click Remove next to an image to remove it. The image stays on Shopify after this.
On Desktop
Step 1 – From the Shopify app, go to Store > Settings
Step 2 – In the Checkout style section, click Customize checkout to open the theme editor
Step 3 – In the theme editor, click the wet paintbrush icon to access the Theme settings
Step 4 – Click Checkout
Step 5 – Under the image that you want to replace, click Change and upload an image or select one from your library
Step 6 – Click Save
On Mobile
Step 1 – From the Shopify app, go to Store > Settings
Step 2 – Under Store settings, tap Checkout
Step 3 – In the Checkout style section, click Customize checkout to open the theme editor
Step 4 – In the theme editor, click the wet paintbrush icon to access the Theme settings
Step 5 – Click Checkout
Step 6 – Under the image that you want to replace, click Change and upload an image or select one from your library
Step 7 – Click Save
Add Image Alt Text
After changing and choosing your new image on the Shopify checkout page, remember to add image alt text to optimize accessibility and SEO.
Step 1 – Under an image, click Update, then select Edit image
Step 2 – Enter alt text for the image. Write a short, descriptive title for the image.
Step 3 – Click Save
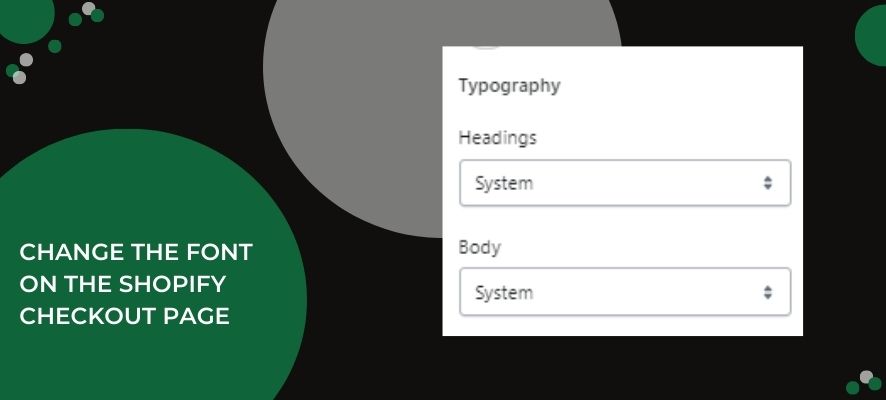
Change The Font On The Shopify Checkout Page
Your checkout pages can be personalized by choosing a font style from a selection, however, you can’t change the color of the text.
On Desktop
Step 1 – From the Shopify app, go to Store > Settings
Step 2 – In the Checkout style section, click Customize checkout to open the theme editor
Step 3 – In the theme editor, click the wet paintbrush icon to access the Theme settings
Step 4 – Click Checkout
Step 5 – In the Typography section, click the Headings drop-down or the Body drop-down, and then select a font
Step 6 – Click Save
On Mobile
Step 1 – From the Shopify app, go to Store > Settings
Step 2 – Under Store settings, tap Checkout
Step 3 – In the Checkout style section, click Customize checkout to open the theme editor
Step 4 – In the theme editor, click the wet paintbrush icon to access the Theme settings
Step 5 – Click Checkout
Step 6 – In the Typography section, click the Headings drop-down or the Body drop-down, and then select a font
Step 7 – Click Save
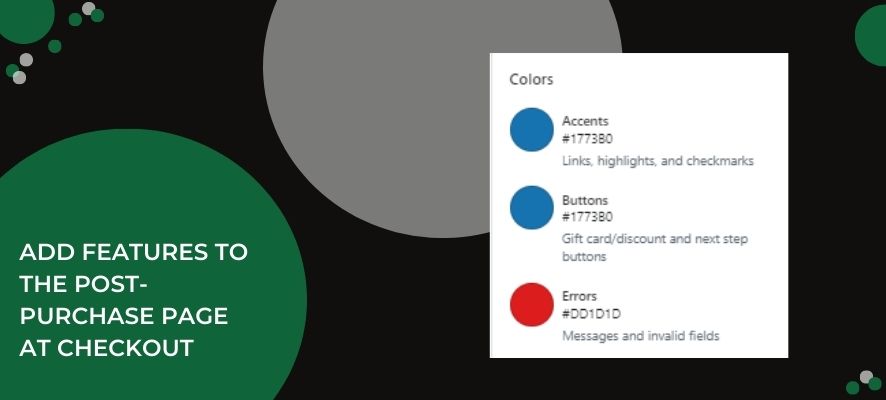
Change Button & Accent Colors On The Shopify Checkout Page
Your checkout pages can customize the color of the button, error messages, and accent-like links. When you change the color, remember to ensure that you can read the text in the background.
On Desktop
Step 1 – From the Shopify app, go to Store > Settings
Step 2 – In the Checkout style section, click Customize checkout to open the theme editor
Step 3 – In the theme editor, click the wet paintbrush icon to access the Theme settings
Step 4 – Click Checkout
Step 5 – In the Colors section, click the color box beside Accents, Buttons, or Errors to open a color picker, then choose a color or enter a hexadecimal code
Step 6 – Click Save
On Mobile
Step 1 – From the Shopify app, go to Store > Settings
Step 2 – Under Store settings, tap Checkout
Step 3 – In the Checkout style section, click Customize checkout to open the theme editor
Step 4 – In the theme editor, click the wet paintbrush icon to access the Theme settings
Step 5 – Click Checkout
Step 6 – In the Colors section, click the color box beside Accents, Buttons, or Errors to open a color picker, then choose a color or enter a hexadecimal code
Step 7 – Click Save
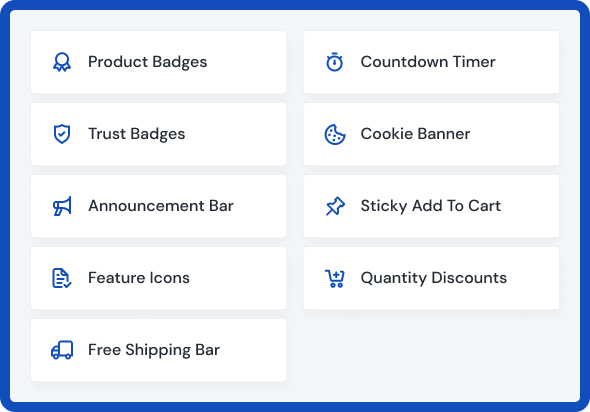
Add Features To The Post-purchase Page At Checkout
Using post-purchase apps, you can improve the consumer checkout experience with features like customer surveys or upsell offers. After your customer completes their purchase but before they see their order confirmation page, these apps send content.
Setting up and installing a checkout app and then choosing that app to be used on the post-purchase page in your Shopify checkout settings are required to add features to your post-purchase page.
To add post-purchase features, you can only use one checkout app at a time. If you have more than one app downloaded with post-purchase functionality, you can choose which one to use at checkout.
Install A Checkout App To Add Post-purchase Features
You have to use a third-party app that supports post-purchase features at checkout to add features to your post-purchase page.
Step 1 – Go to the Shopify App Store and search for the post-purchase app that’s right for your business
Step 2 – Click Add App. If you aren’t logged in to your Shopify account, then you’re prompted to log in
Step 3 – Click Install App.
Step 4 – Go to the Apps section of your Shopify admin, and then click the name of your checkout app
Step 5 – Enter any configuration settings required
Select An App To Use On Your Post-purchase Page
You must choose the checkout app to use on the post-purchase page in your checkout settings after installing and configuring it. Additionally, you may change the app you want to use in your checkout settings.
Step 1 – From your Shopify admin, click Settings
Step 2 – Click Checkout
Step 3 – In the Post-purchase page section, select the checkout app that you want to use
Note: A post-purchase page only displays in your store’s checkout if you’ve completed the configuration in the app settings.
In Conclusion
If you want to customize and edit your Shopify checkout page with your brand identity set, you need to upgrade to the Shopify Plus plan.
With the checkout editor, you can add checkout apps to your checkout experience and customize checkout. This will help a lot with your brand sync on your Shopify online store.